Secure Token Service
Secure Token Service, like Instance Assume Role, uses an authentication mechanism that leverages temporary API credentials that are rotated every 60 minutes or less. The steps below describe how to configure Secure Token Service for your AWS accounts to be harvested.
Note well, these instructions assume you have added the STS policy as described here.
Steps for TRiA Instance(s)
Steps
1.) Identity & Access Management Console
Login as an Admin to the AWS console in the account where TRiA is deployed. Access the Identity & Access Management service.
2.) Create User.
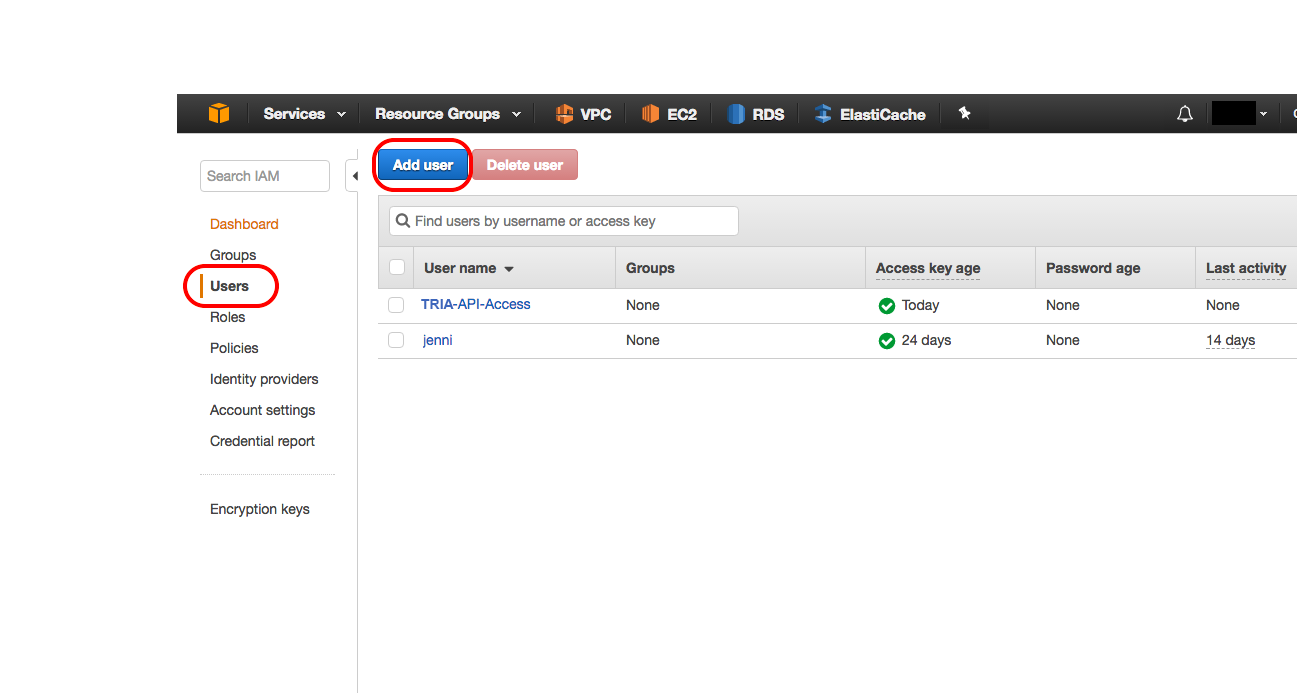
Users. Click on Users on the left navigation window.
Add User. Click on the Add User button.
3.) Set User Details
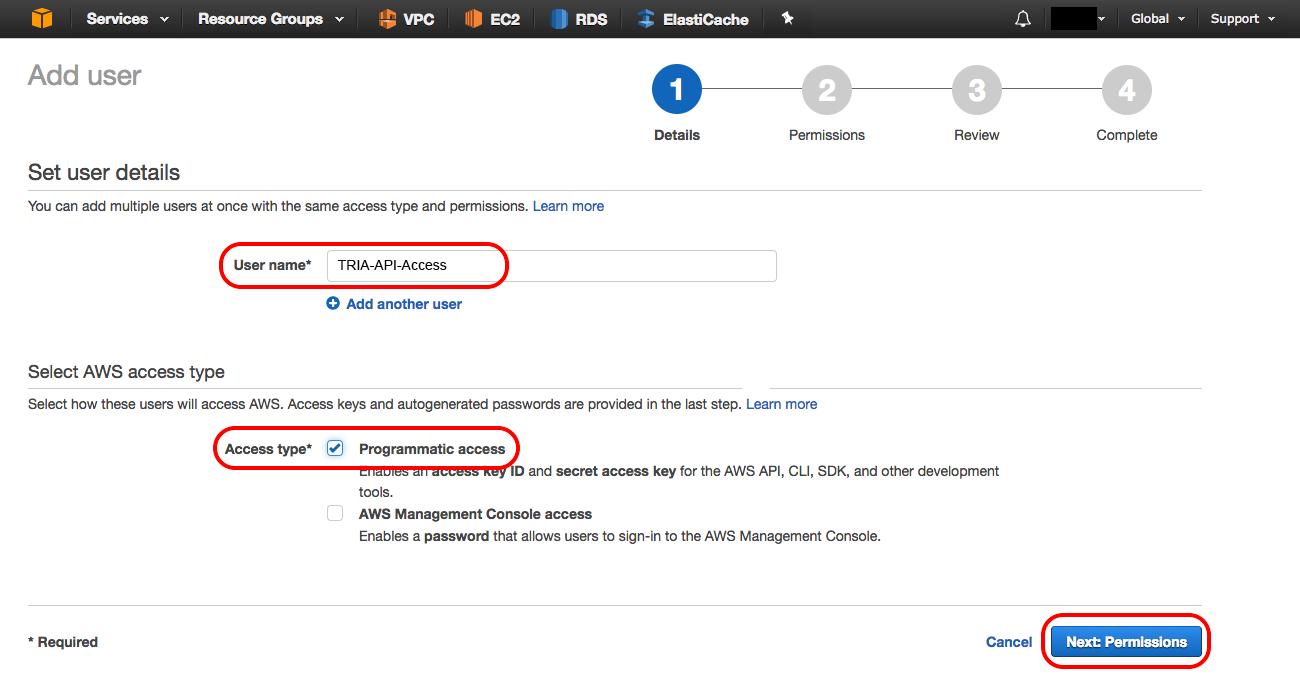
a. User name. Enter a user name to denote that this account is used for TRiA. As an example you could set the user to TRiA-STS-Access. By creating a specific TRiA user, you are then able to monitor in CloudTrail all actions taken by that user, which helps you understand what TRiA is doing versus what other users are doing and facilitates troubleshooting.
b. Programmatic Access. Check Programmatic access as an Access type. That allows TRiA to call APIs programmatically.
Permissions. Click on Next: Permissions.
4.) Set Permissions
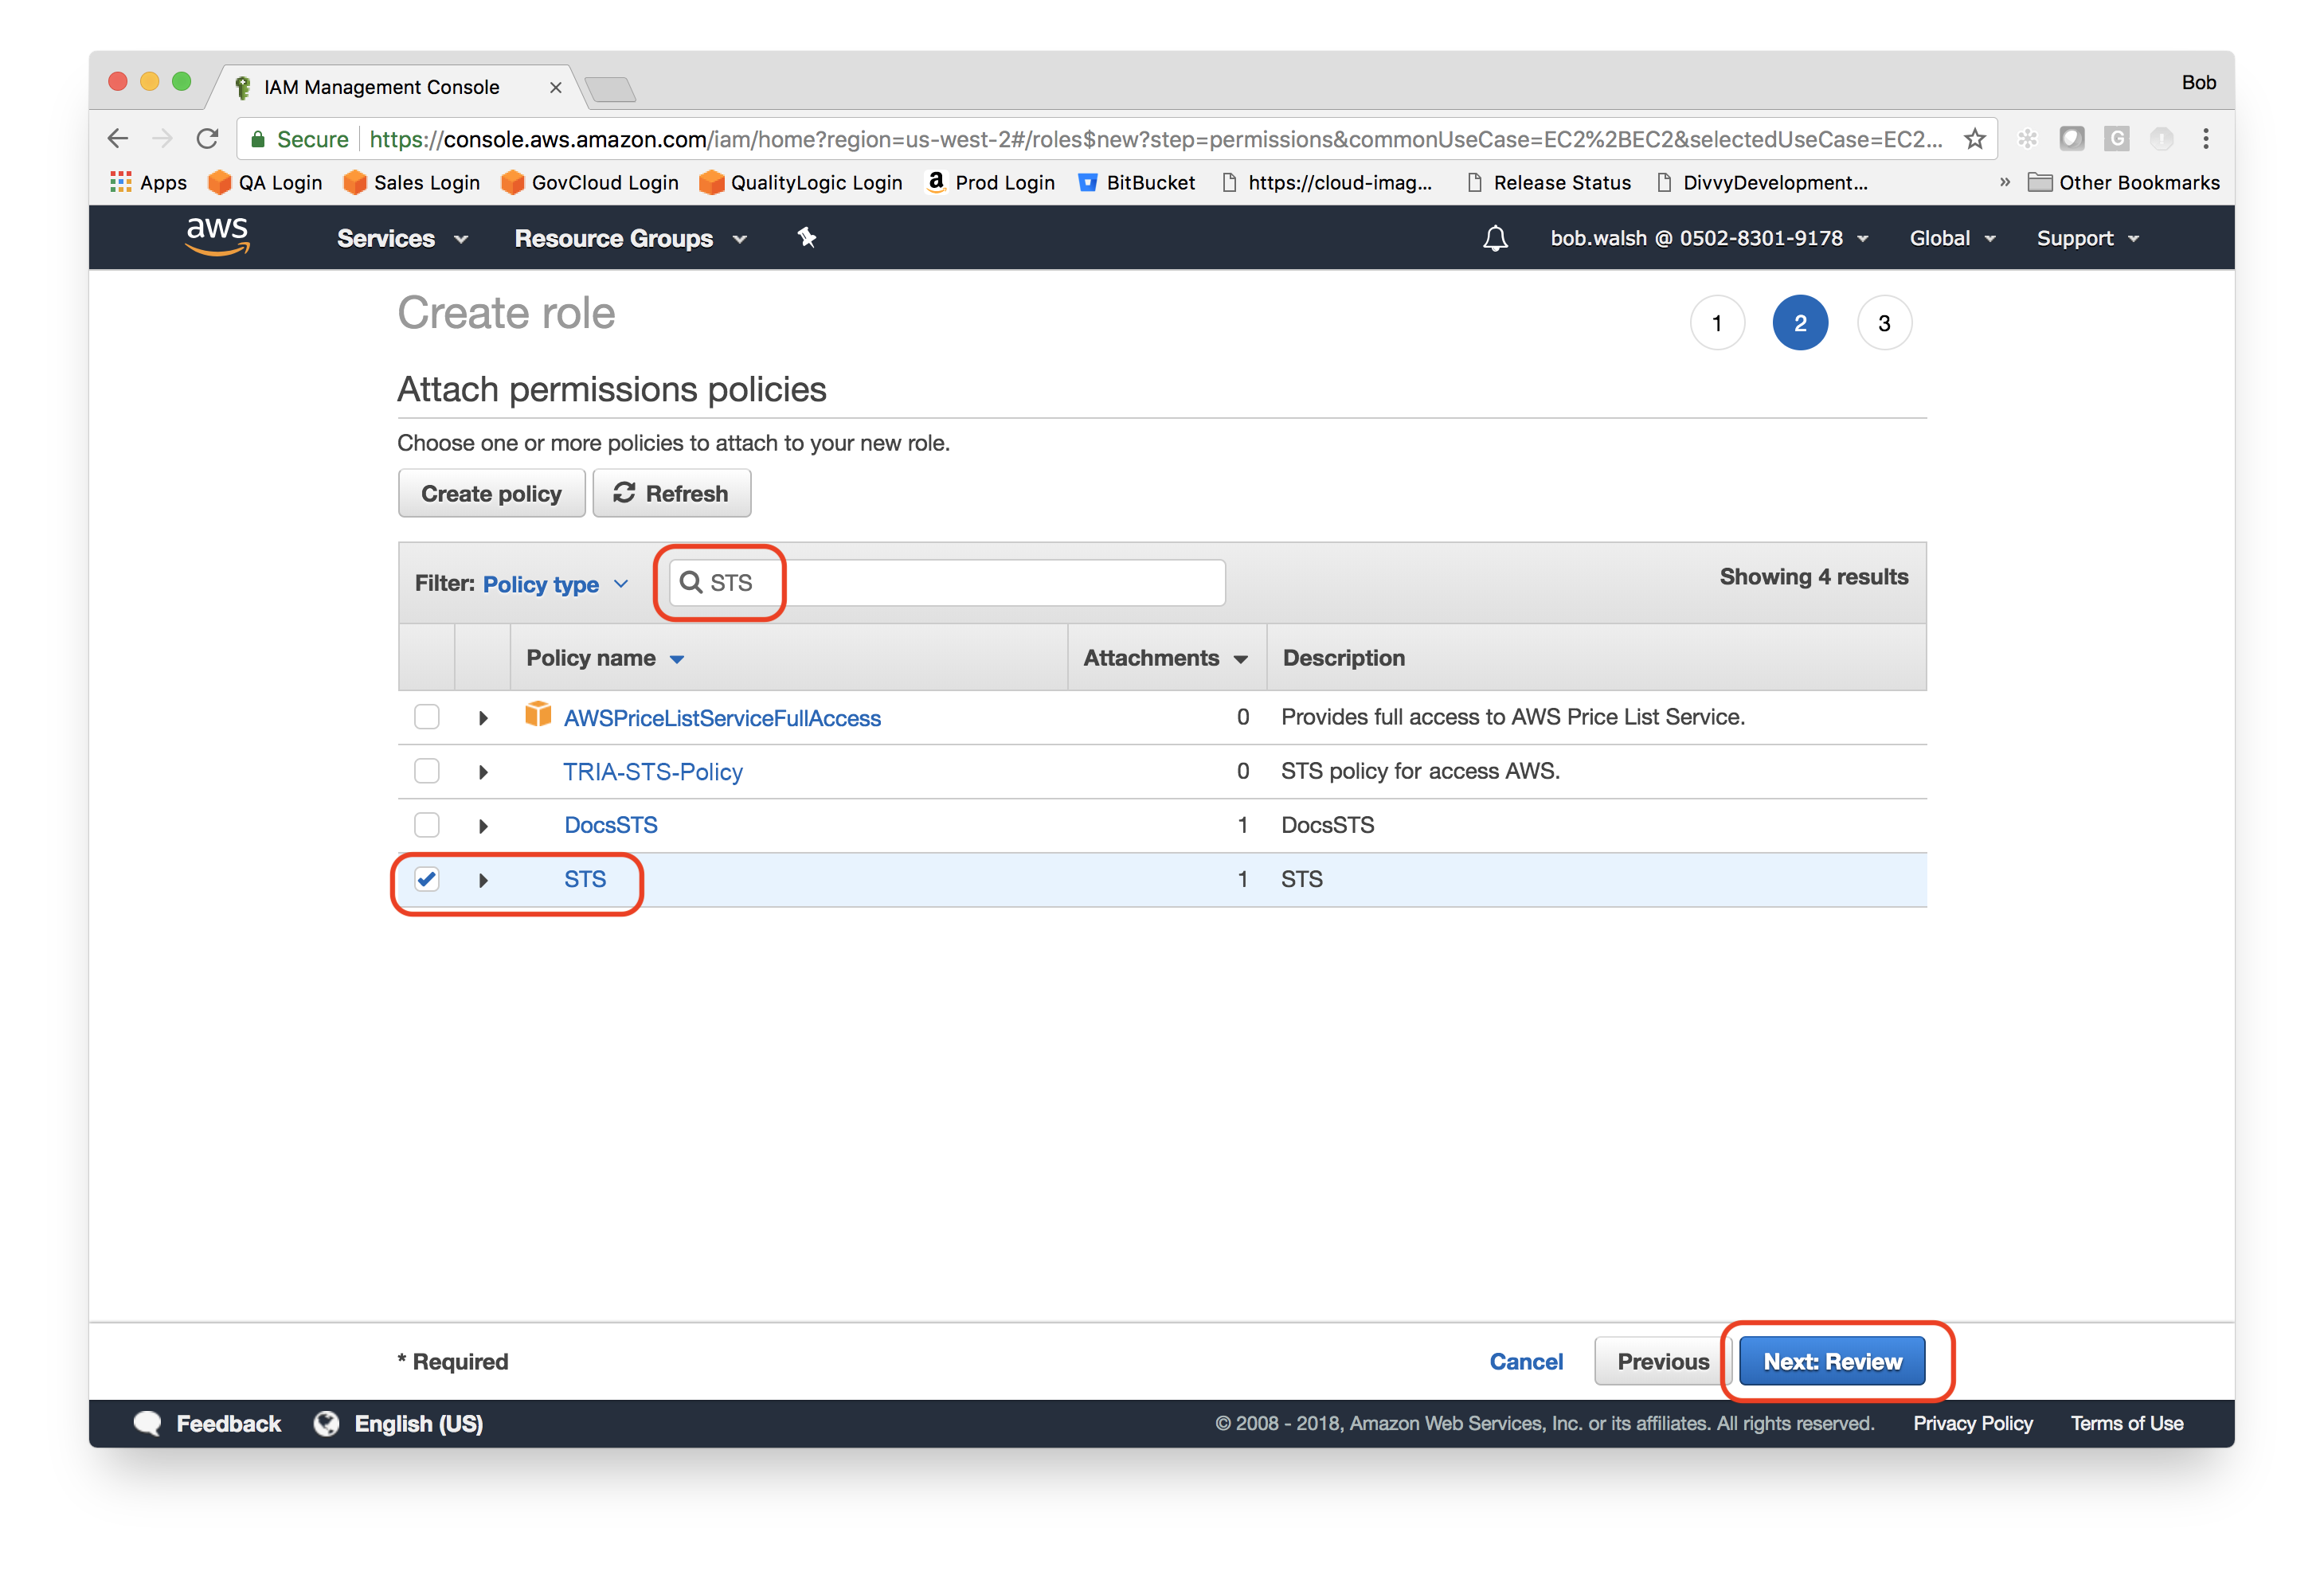
a. Attach Existing Policies Directly. Choose Attach existing policies directly.
b. Select. Select your newly created policy, e.g., TRiA-STS-Policy. You can find it by filtering your results by name.
Review. Click on Next: Review.
5.) Create User
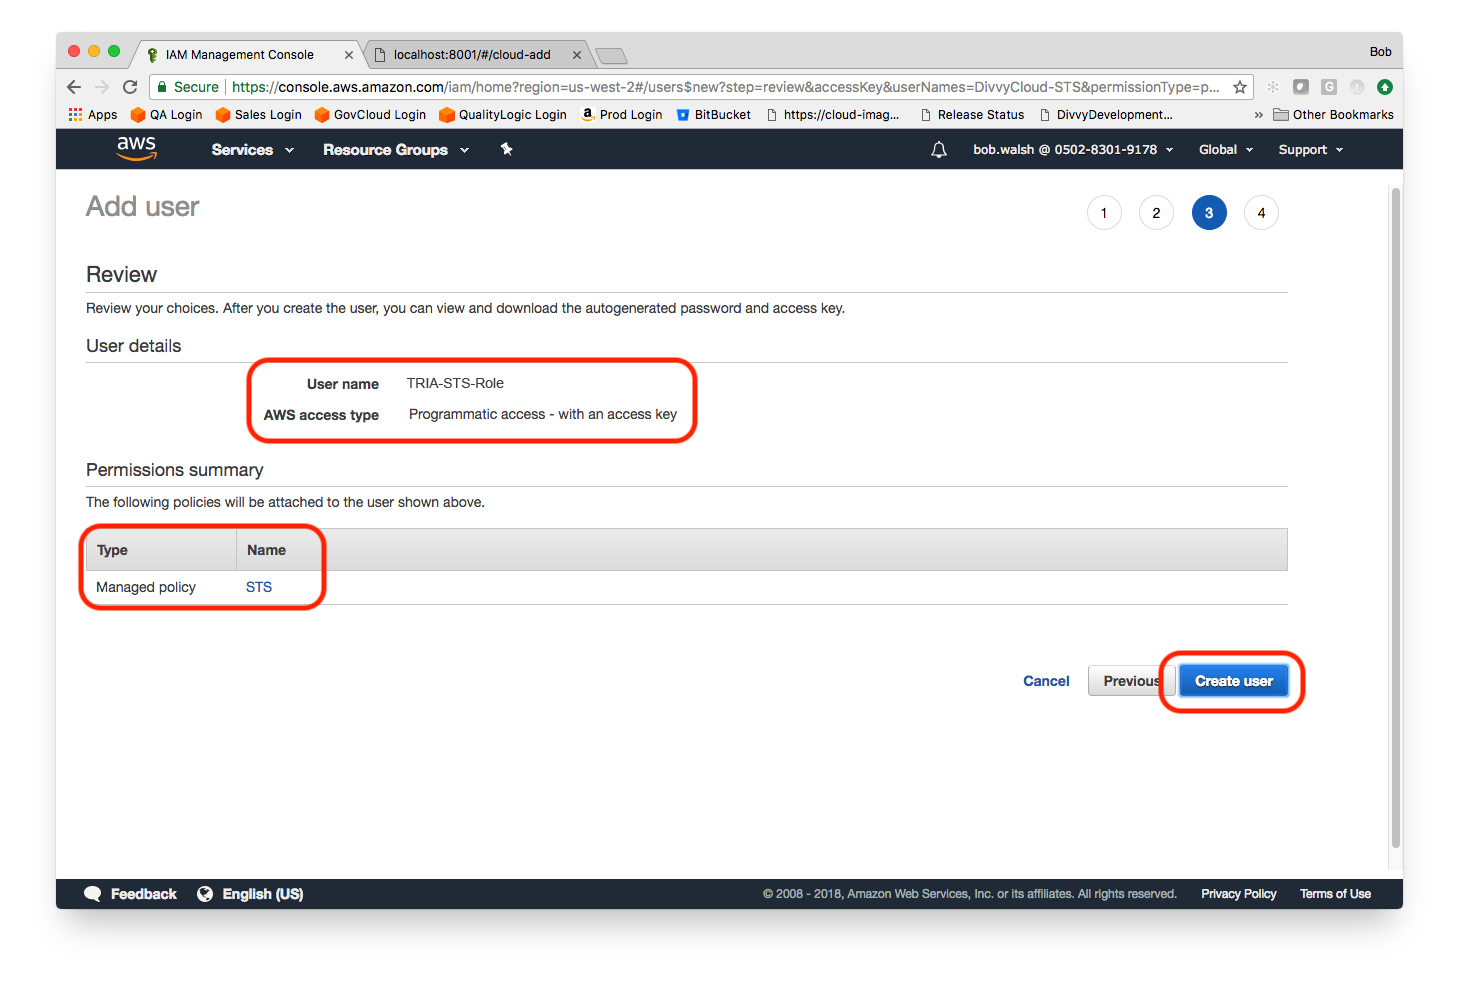
Click on Create user after confirming that your User name and AWS access type are correct and that your Permissions summary displays the policy that you just created.
6.) Confirm
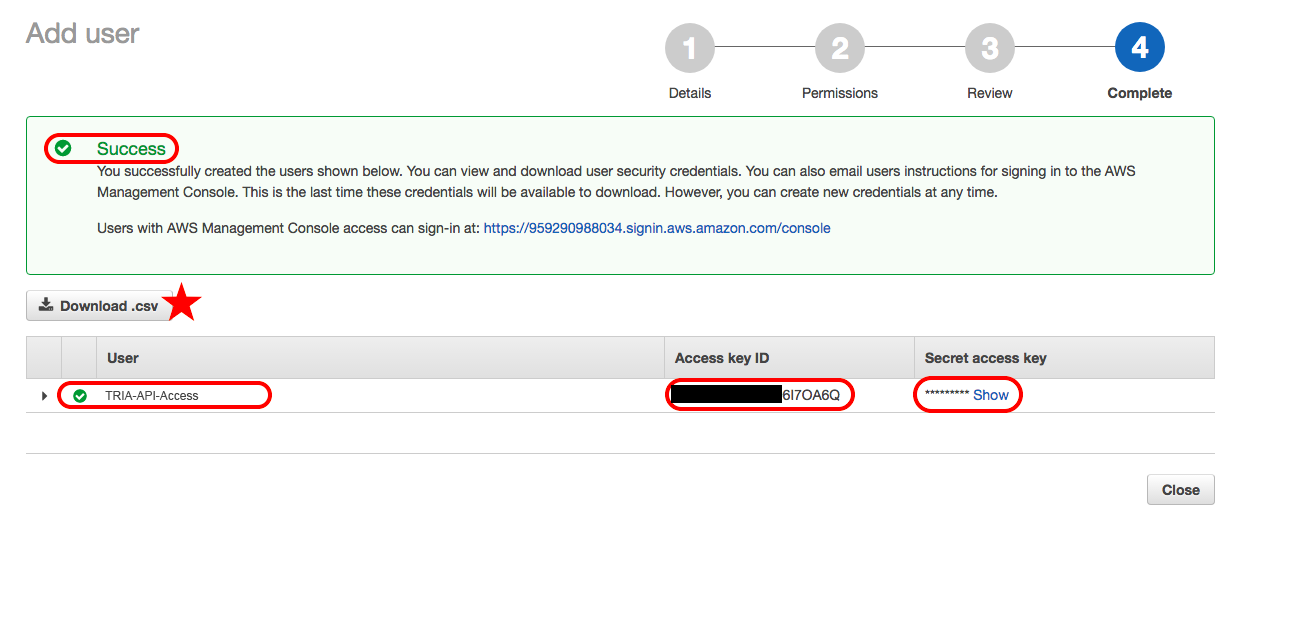
You should receive a Success message from the console at this point. Assuming that you have, you will see your user listed along with an Access key ID and Secret access key. Do not close out this screen until you have saved your Access key ID and Secret access key. You will not get another chance to do so (start over again if you did by accident). You can save your keys by clicking on Download .csv, copying & pasting the values, or, as documented here, entering the values in TRiA directly. However you choose, you will need your Access key ID, and Secret access key.
Steps for Additional AWS Accounts
1.) Identity & Access Management Console
Login as an Admin to the AWS console in the account that you would like to harvest. Access the Identity & Access Management service. Add the appropriate IAM policy, e.g., ReadOnlyAccess or Power User, as documented elsewhere.
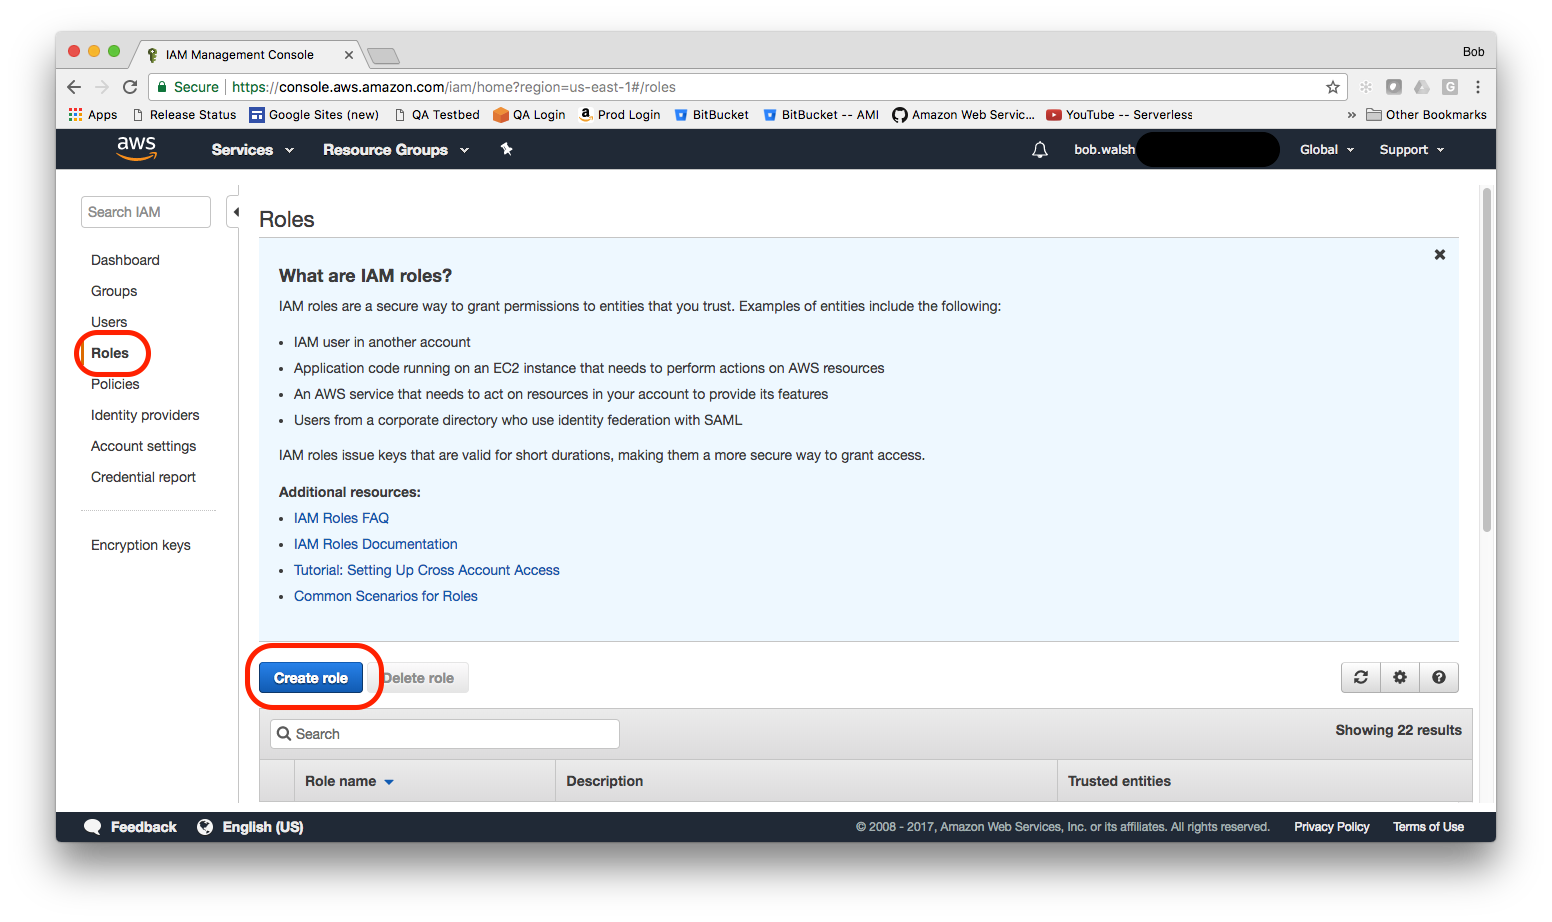
2.) Create Role. Select Roles and Create role.
3.) AWS Service
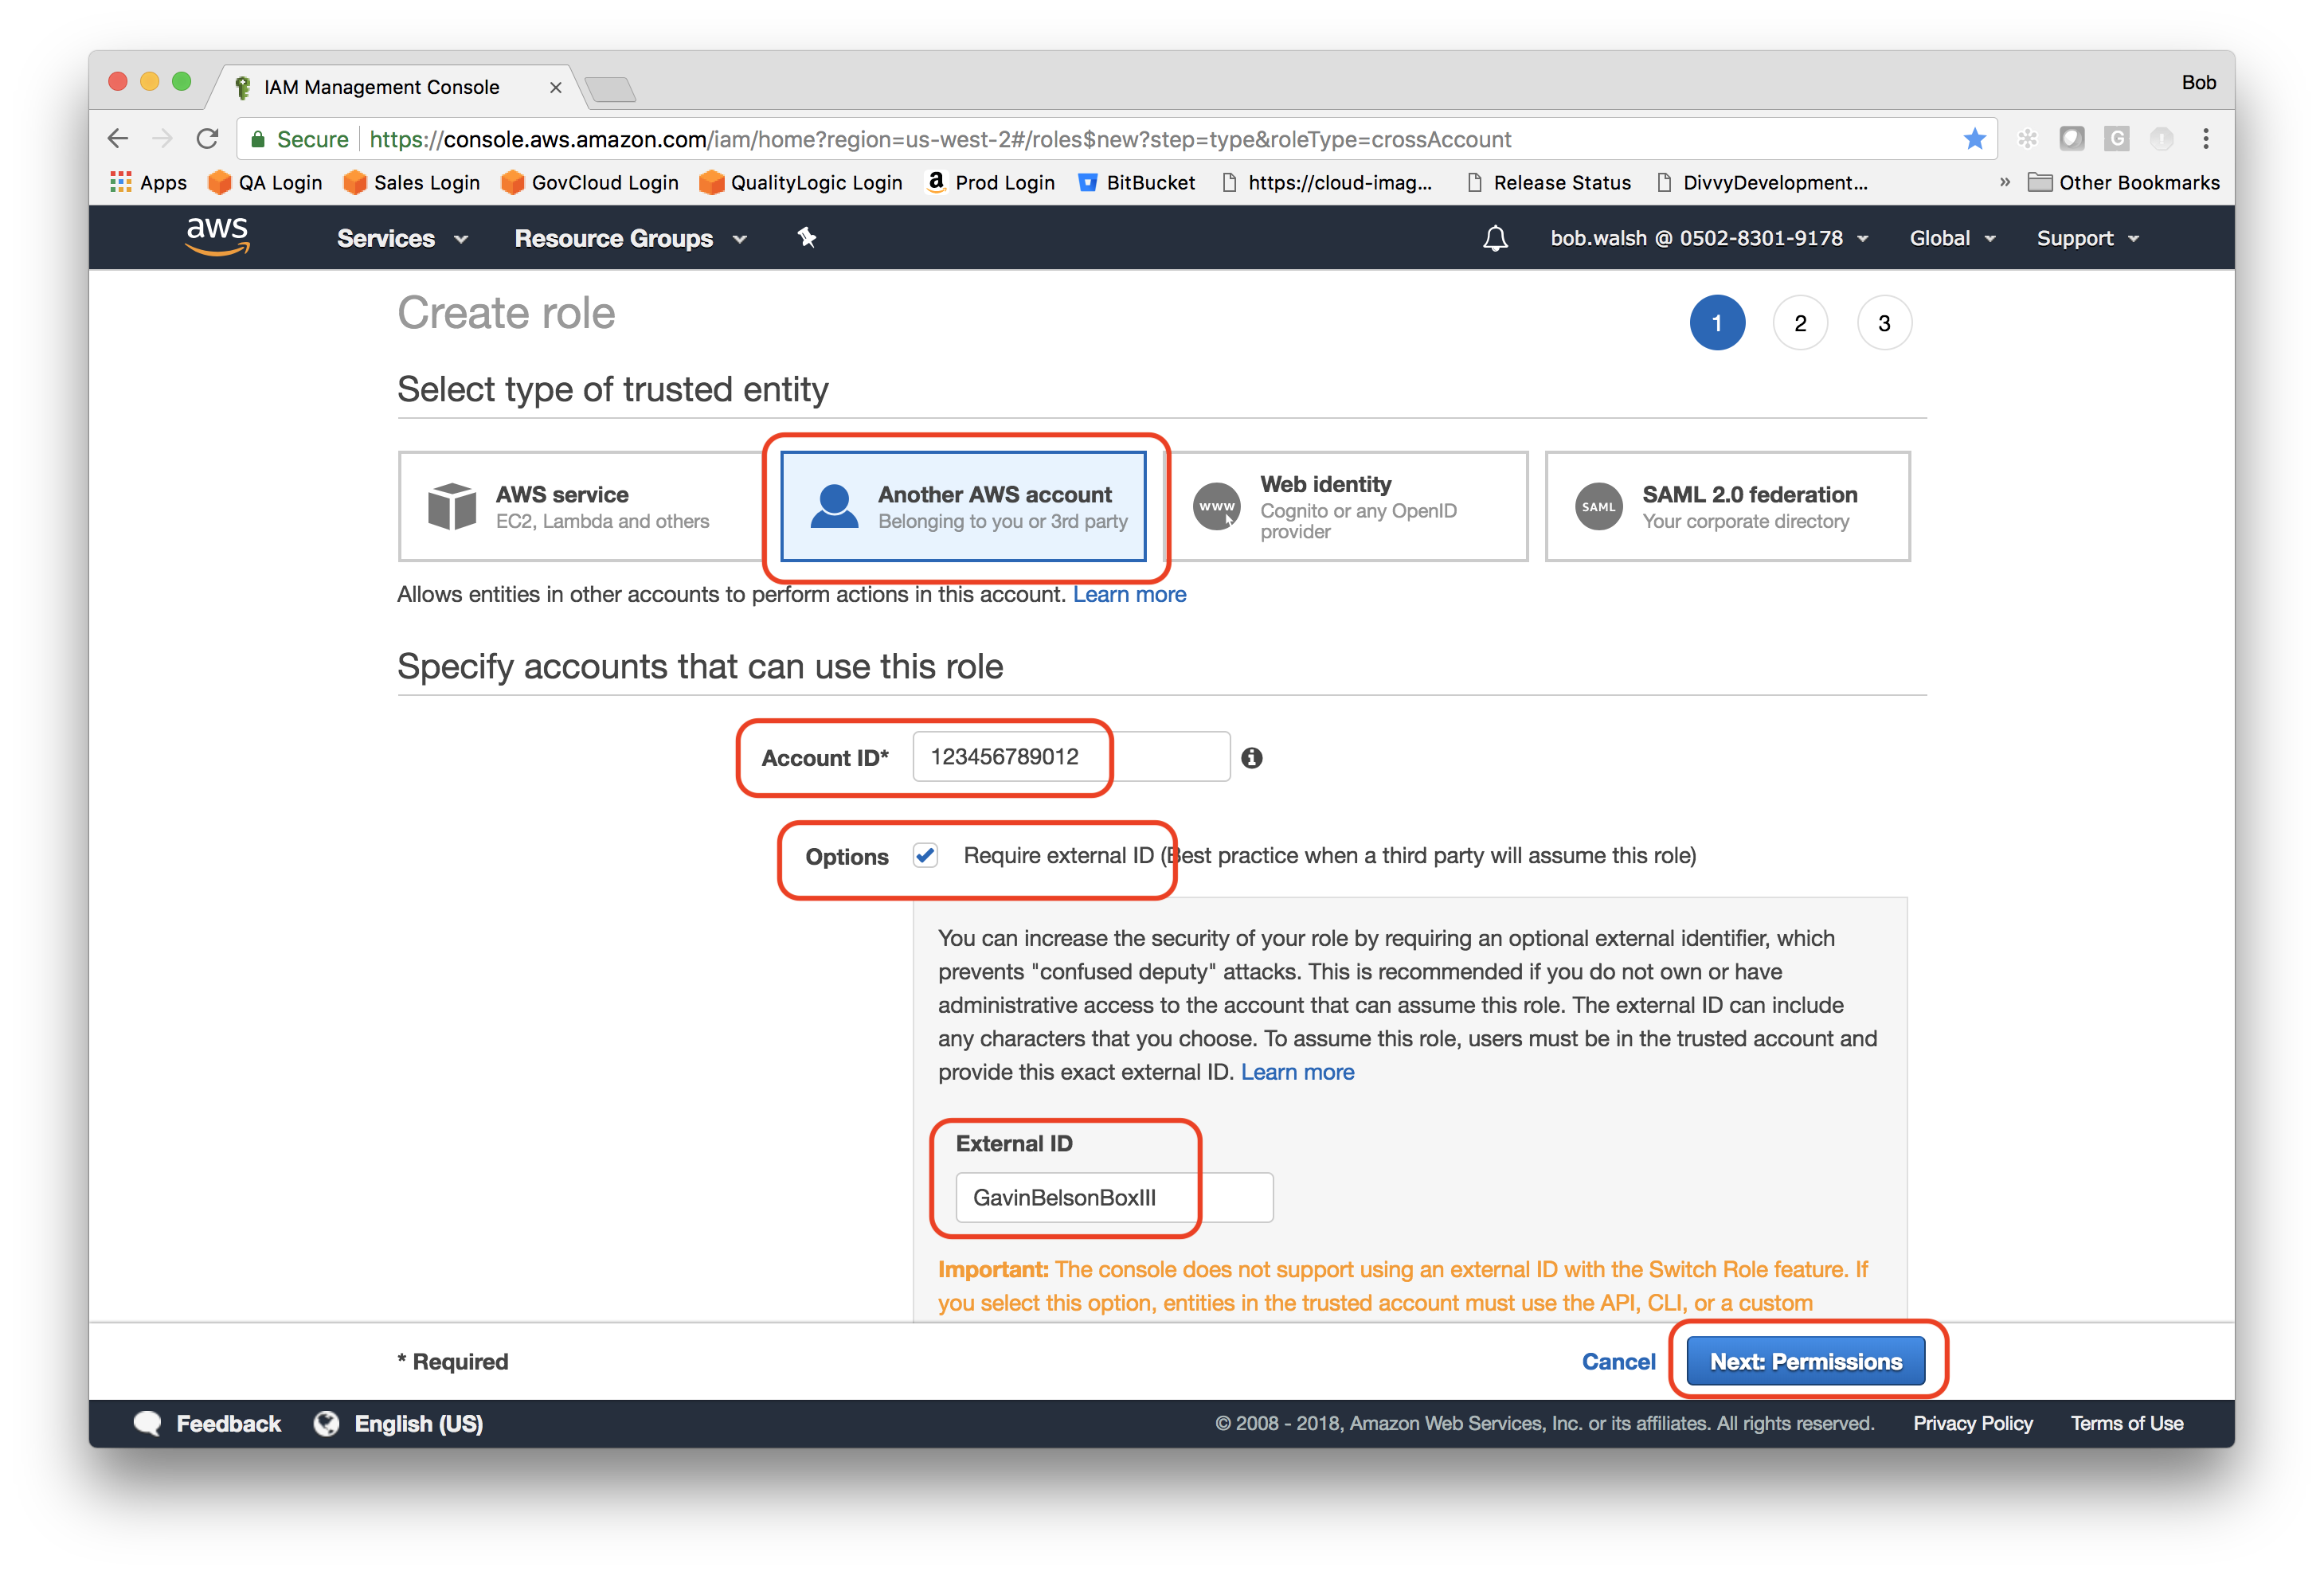
Another AWS Account. Select Another AWS account.
b. Account ID. Enter the account ID of AWS account that is hosting TRiA
c. Options: Require External ID. Add an external ID that will function like a password and that you will use later when adding the account to TRiA.
Next: Permissions. Click on Next: Permissions
4.) Repeat
Repeat the steps above to 1) attach either the read-only or power-user policy (the STS policy is not necessary) to the role, 2) finish creating the role, 3) copying the account ID and Role ARN, and then using that information in TRiA to add the account.
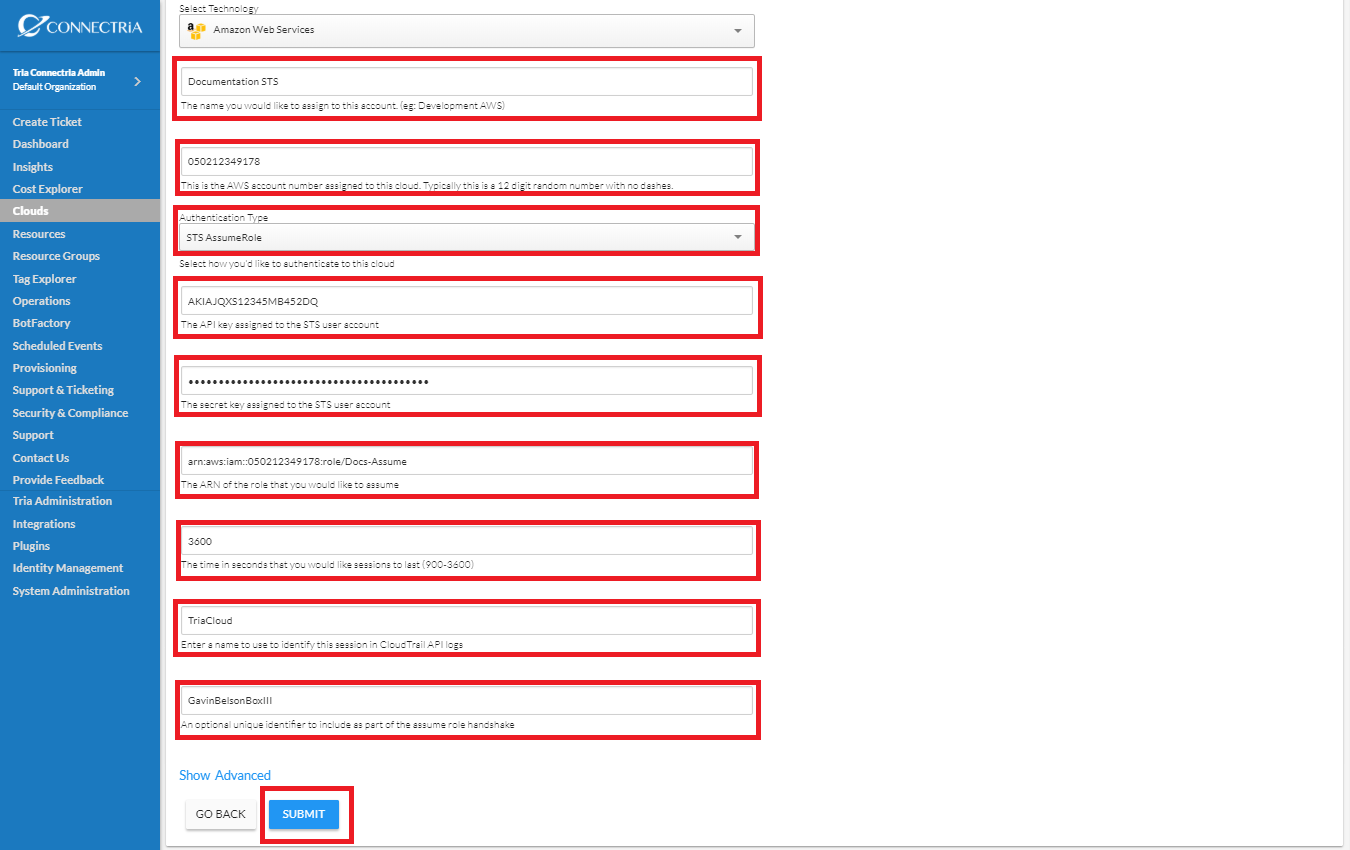
5.) Add Account to TRiA
Name. Provide a descriptive name.
b. Account ID. Enter the account ID of AWS account that is being harvested by TRiA.
Authentication Type. Choose STS Assume Role.
d. Amazon API and Secret Keys. Provide the API Key and Secret keys from Step 6 for the TRiA user, e.g., TRiA-STS-Access.
e. Role ARN. Provide the ARN of the trust role you created in account to be harvested.
f. Duration. Enter a value of 900 to 3600 seconds for the STS token to be valid before rotation.
g. Session Name. Provide an intuitive nickname for the session name. This session name is only used for CloudTrail API audit purposes. Recommended name is TRiA.
h. External ID (Optional). Enter the external ID, if used, when creating the trust role in the account to be harvested.