Getting started
Video Tutorials
Welcome to TRiA! To learn more about the TRiA Cloud Management Platform (CPM) and what benefits it can provide to you. Please watch the videos below.
TRiA Cost Optimization
TRiA Resource Management
TRiA Security and Compliance Insights
Adding a Cloud Account
Setting up an AWS account in TRiA is very simple and can be done in 5 minutes or less. Following these steps will have you up in no time. For setting up an Azure account, go here.
TRiA supports adding your AWS account to TRiA using three basic options:
API Access Key
Instance Assume Role
Secure Token Service
For the purpose of keeping this simple and for trial customers, we will focus on using the API Access Key method. Regardless of which option you chose, you start by creating a policy for the AWS account you will be adding. You may choose from either a Standard User Policy or a Power User Policy.
Here we will add an AWS account with a Power User Policy and an API Access Key.
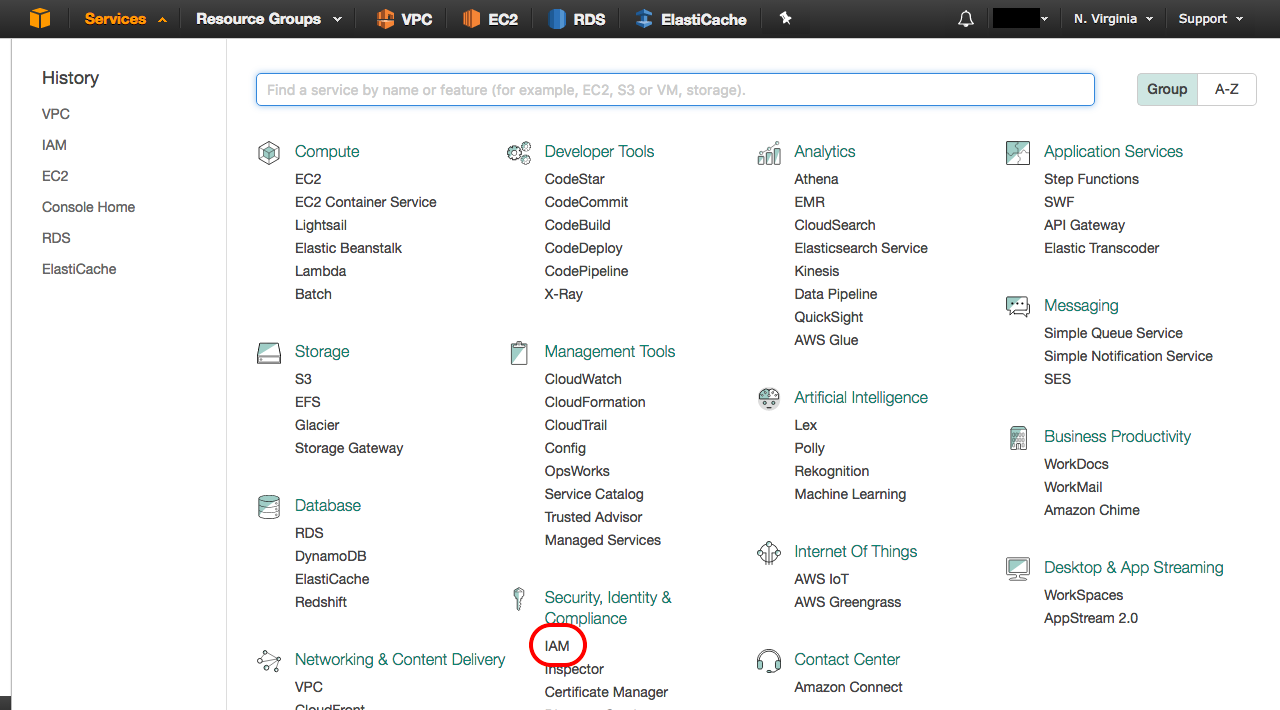
1.) To create a policy, open your AWS Console and select “Services” at the top left of the console and then click on “IAM” under “Security, Identity & Compliance”.
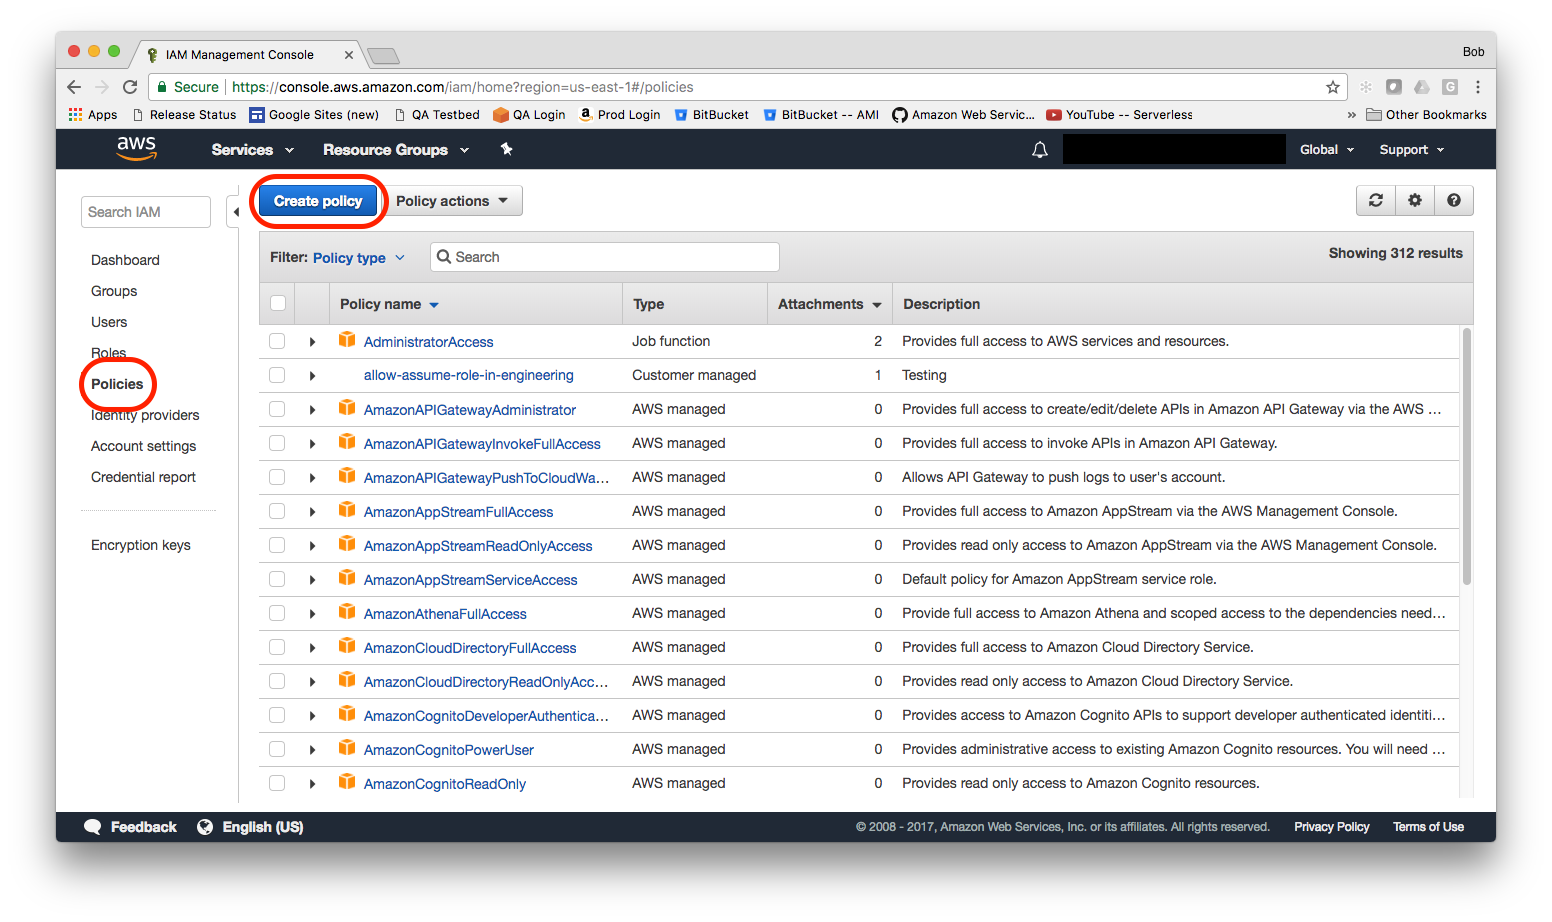
2.) Select “Policies” on the left menu of the console and then select “Create policy”.
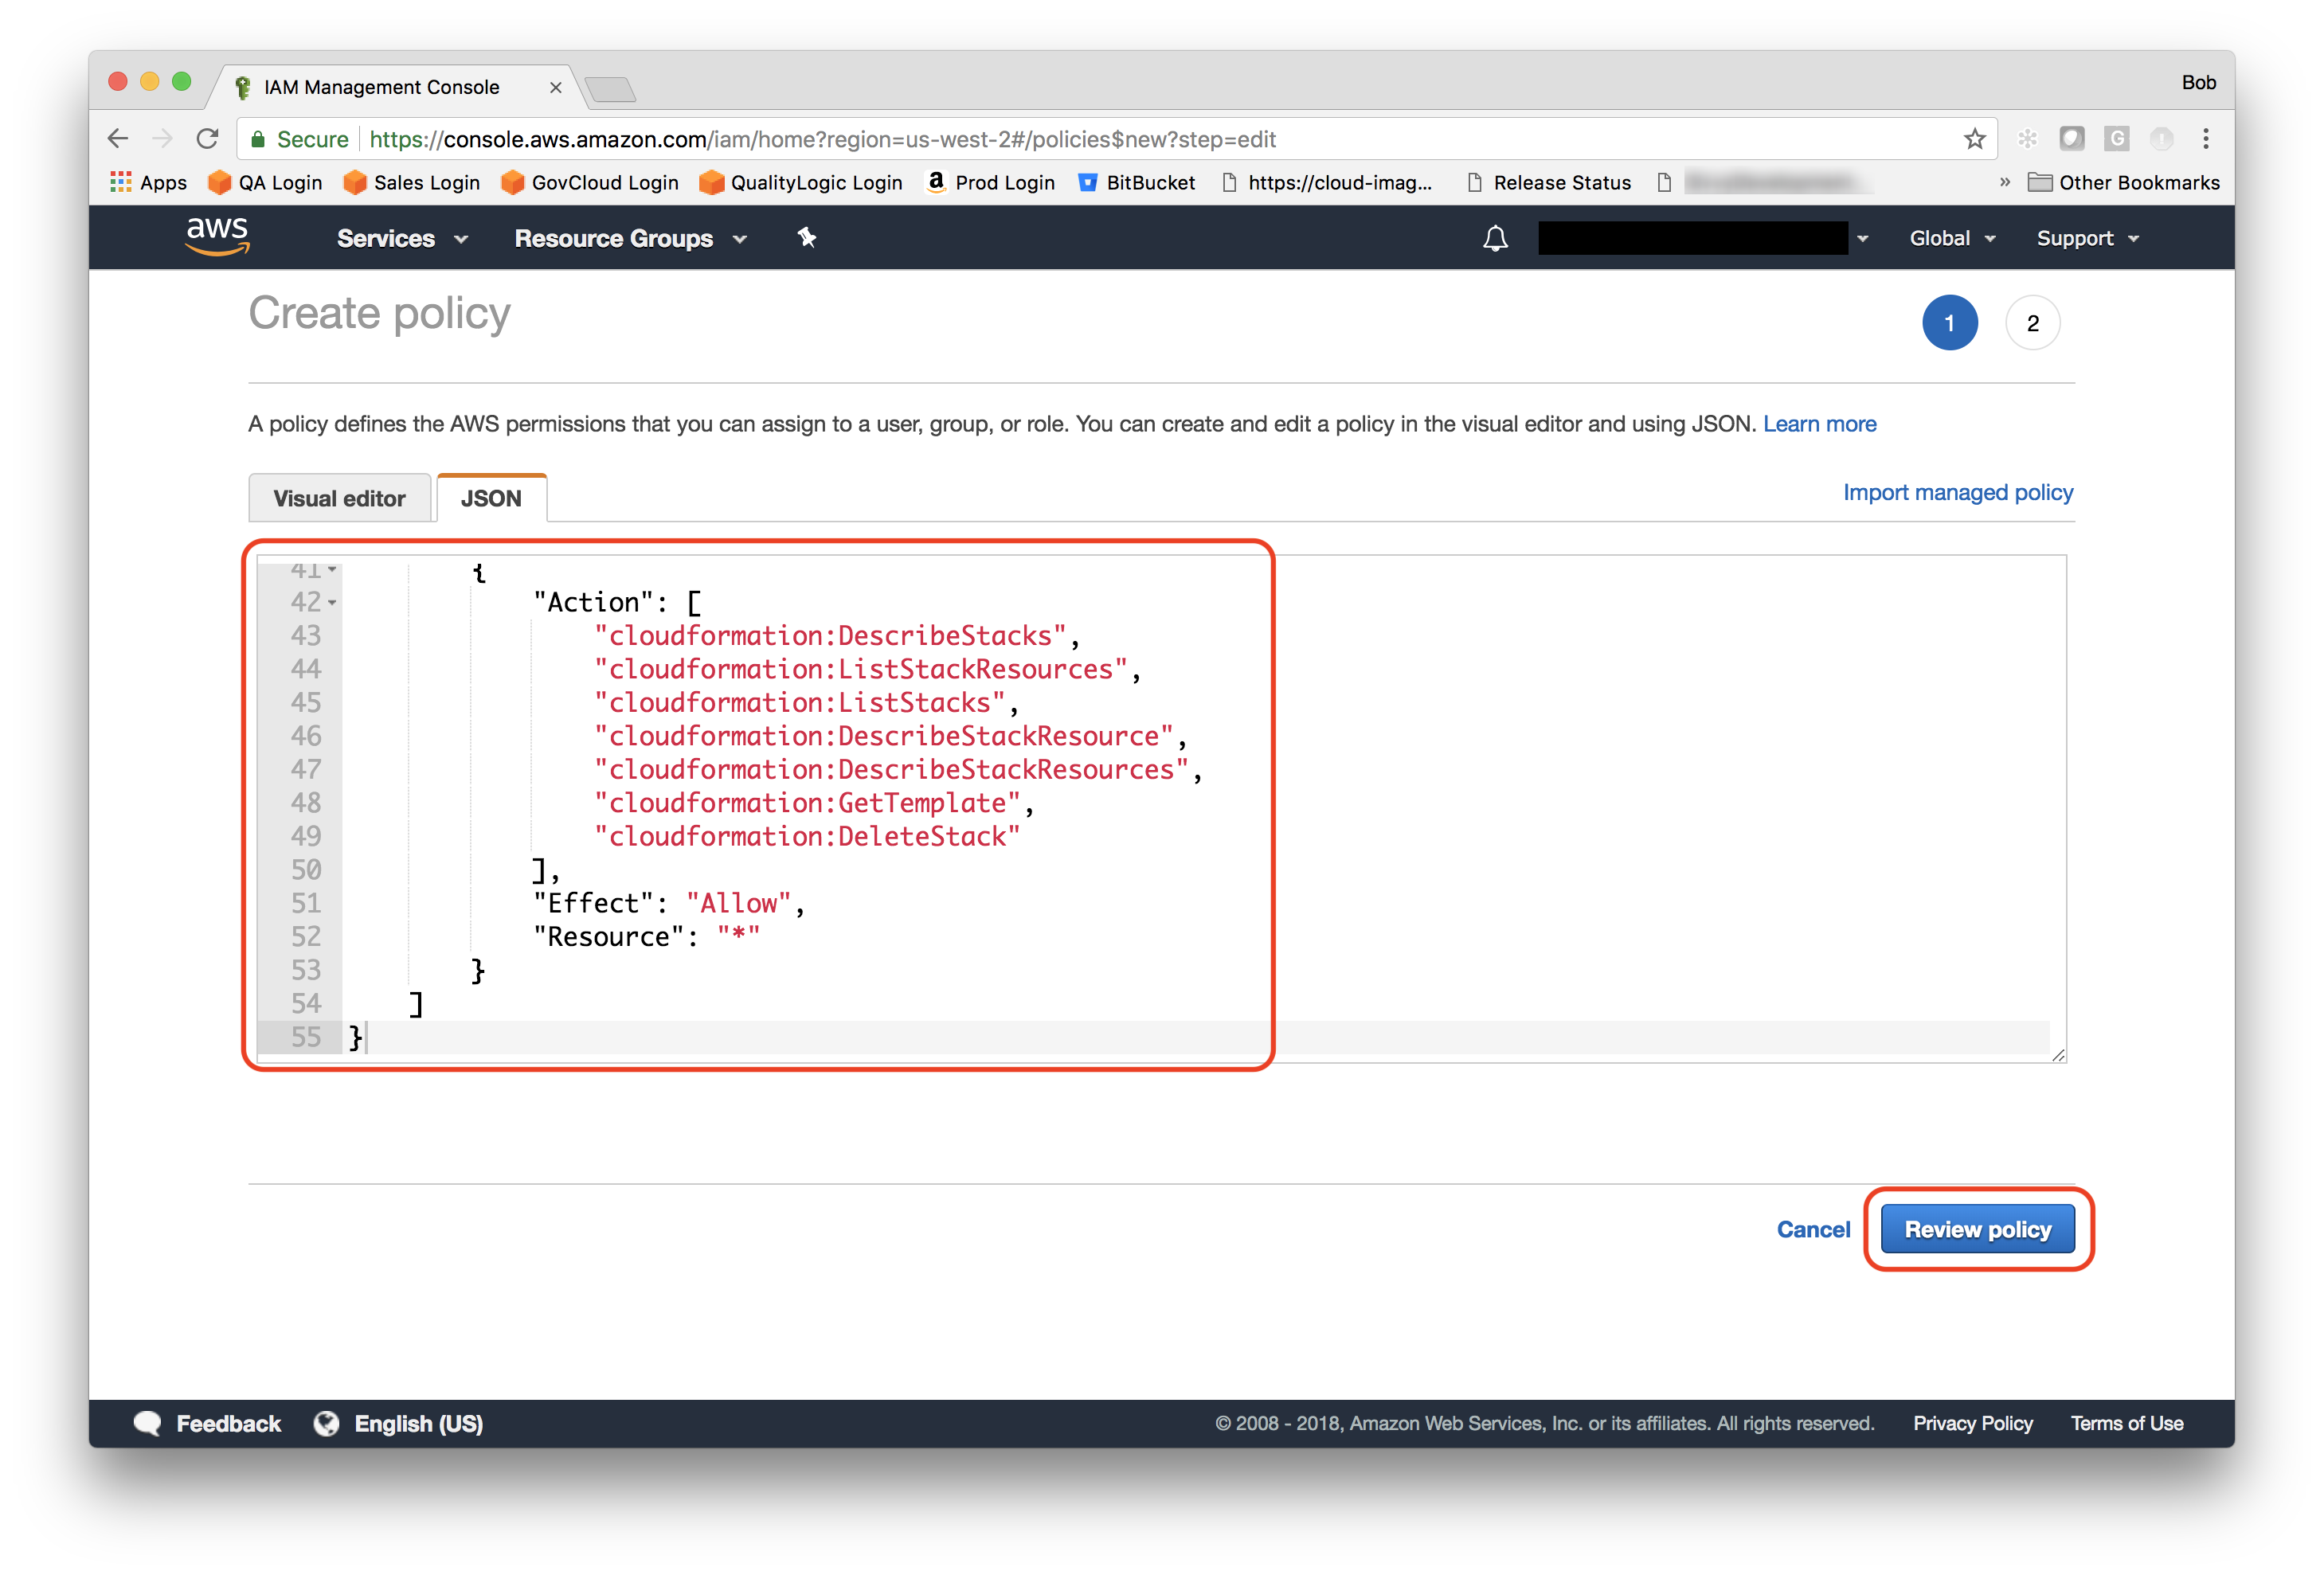
3.) Once on the “Create policy” page, select “JSON”, copy/paste your desired policy from the TRiA Policies page in the Policy Document window, and then select “Review policy”.
4.) Next you will name your policy (e.g., TRiA_Standard_Policy), and then click on “Create policy”.
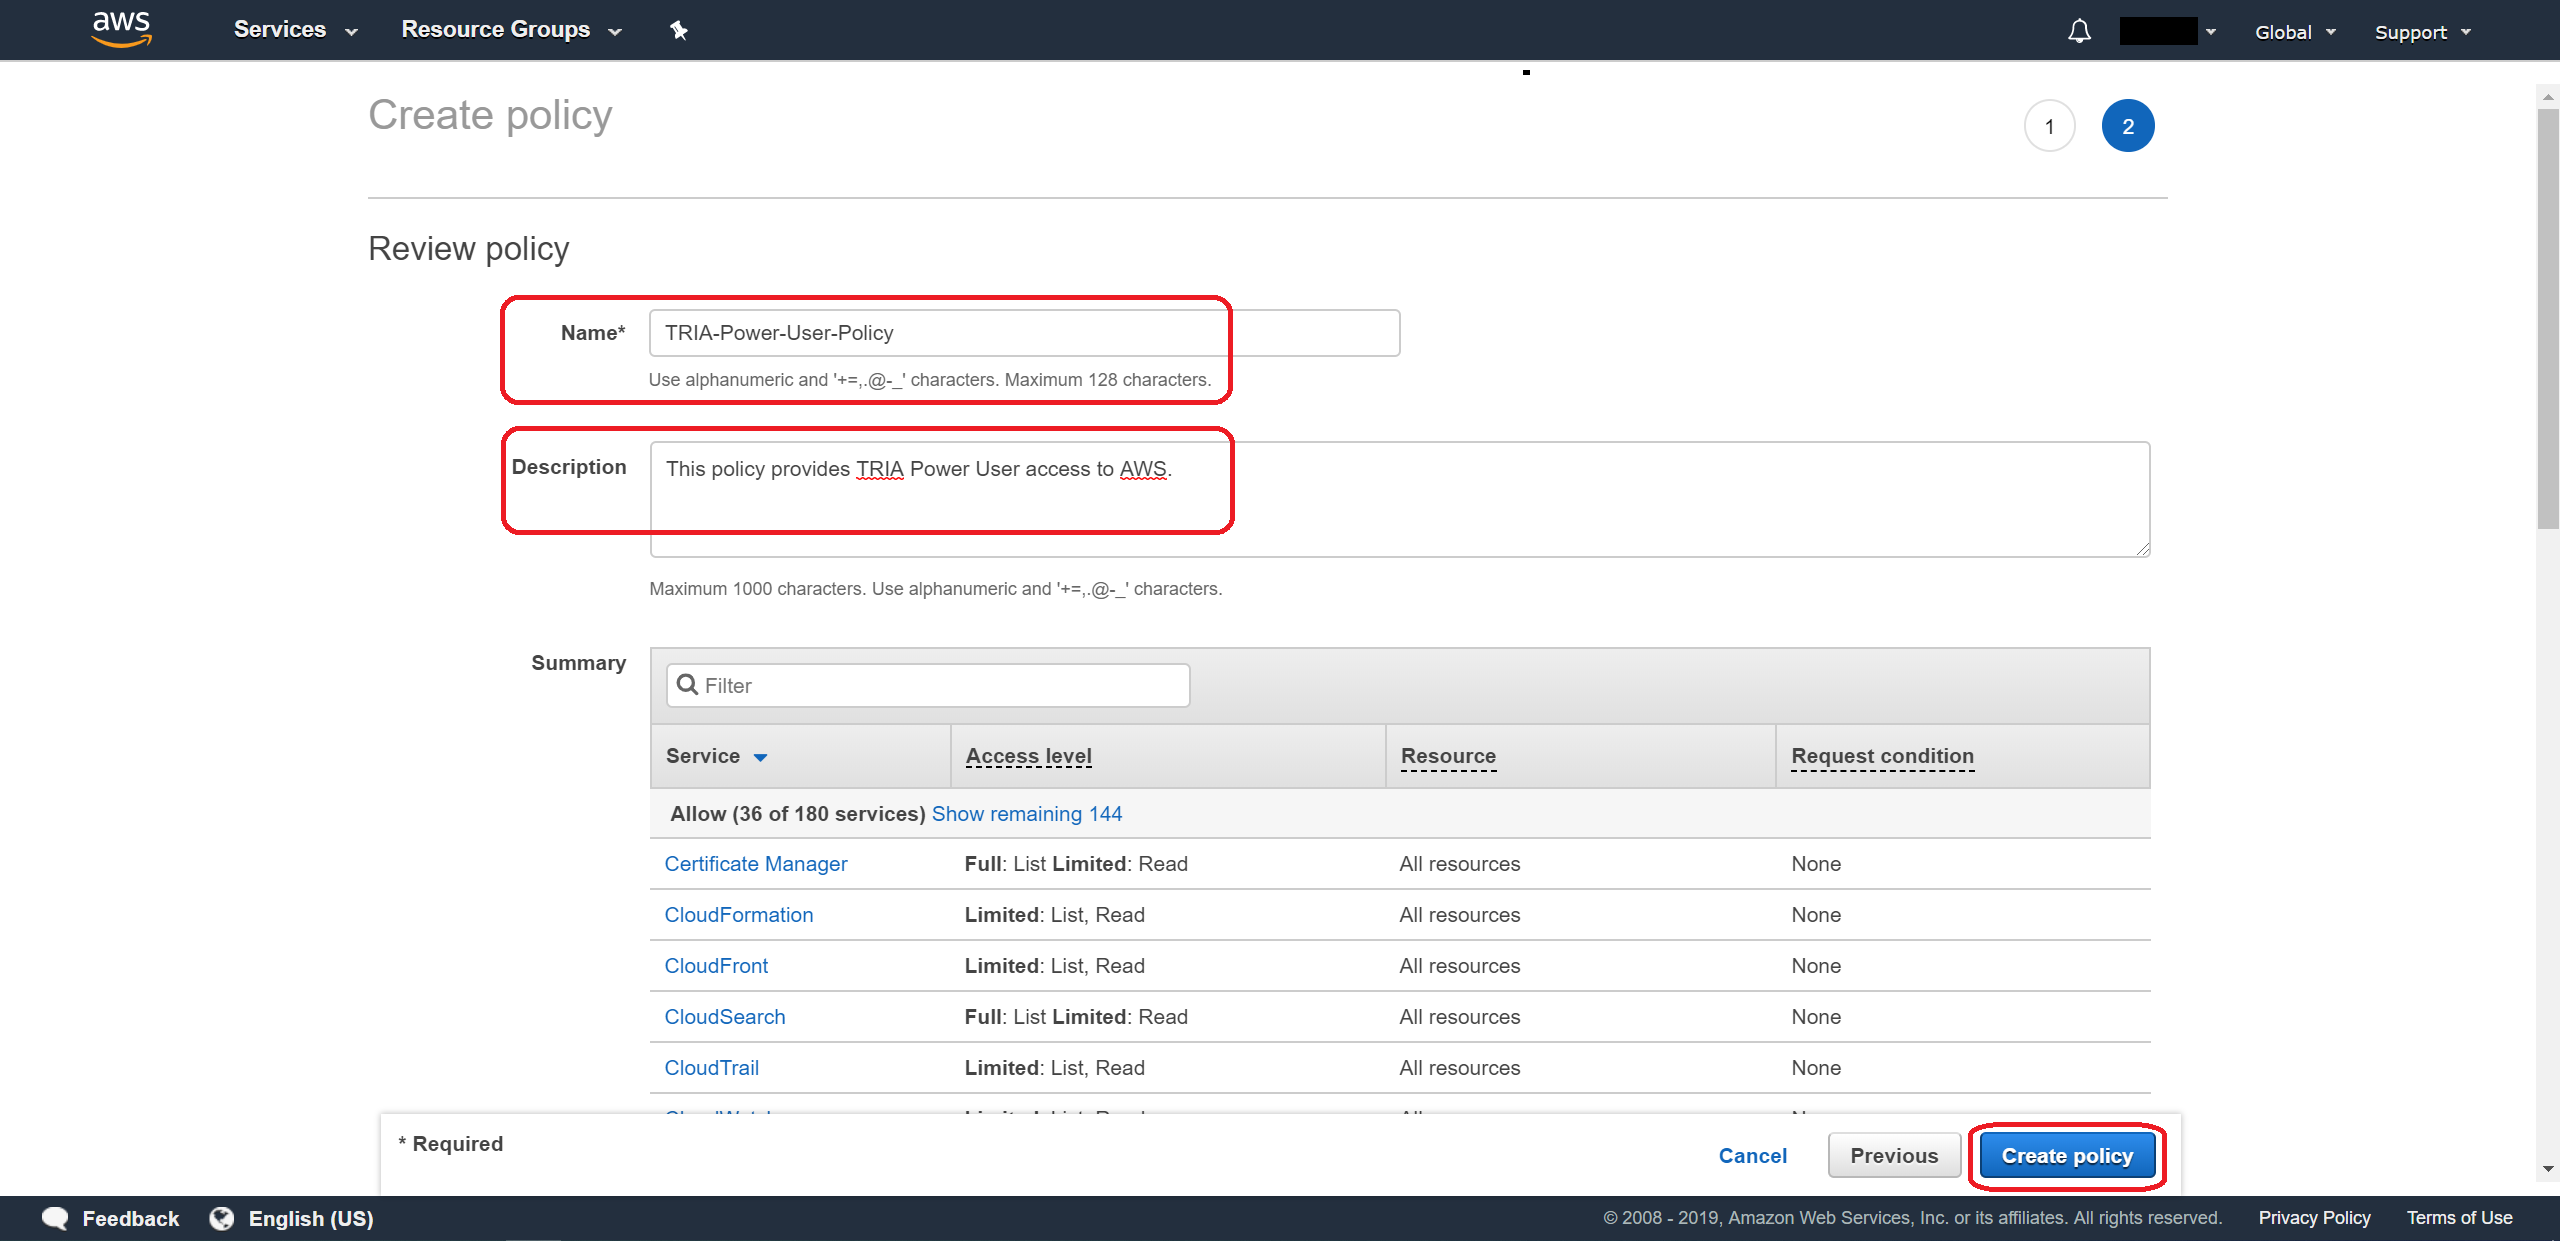
Now, that your policy has been created we will create an API user and assign the user the TRiA policy you just created.
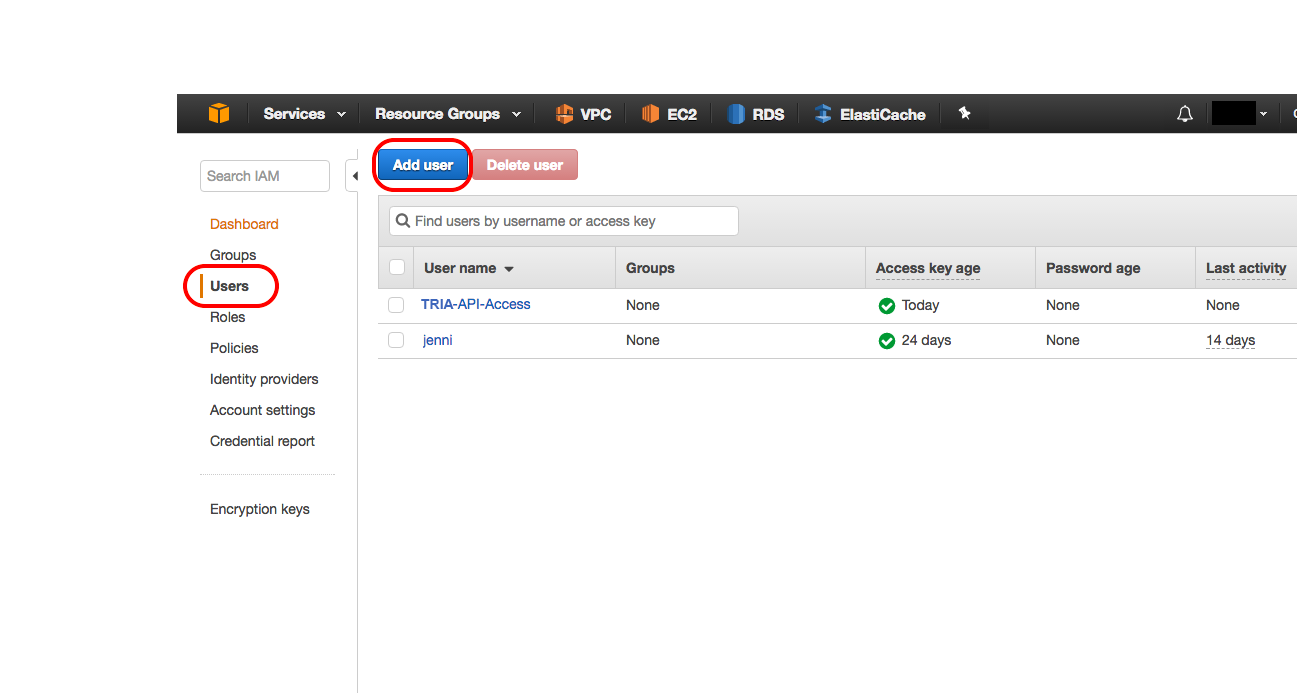
5.) To set up an API Access key user, in your AWS console under IAM, start by selecting “Users” and then “Add User” inside the “Identity & Access Management” service in the AWS Console.
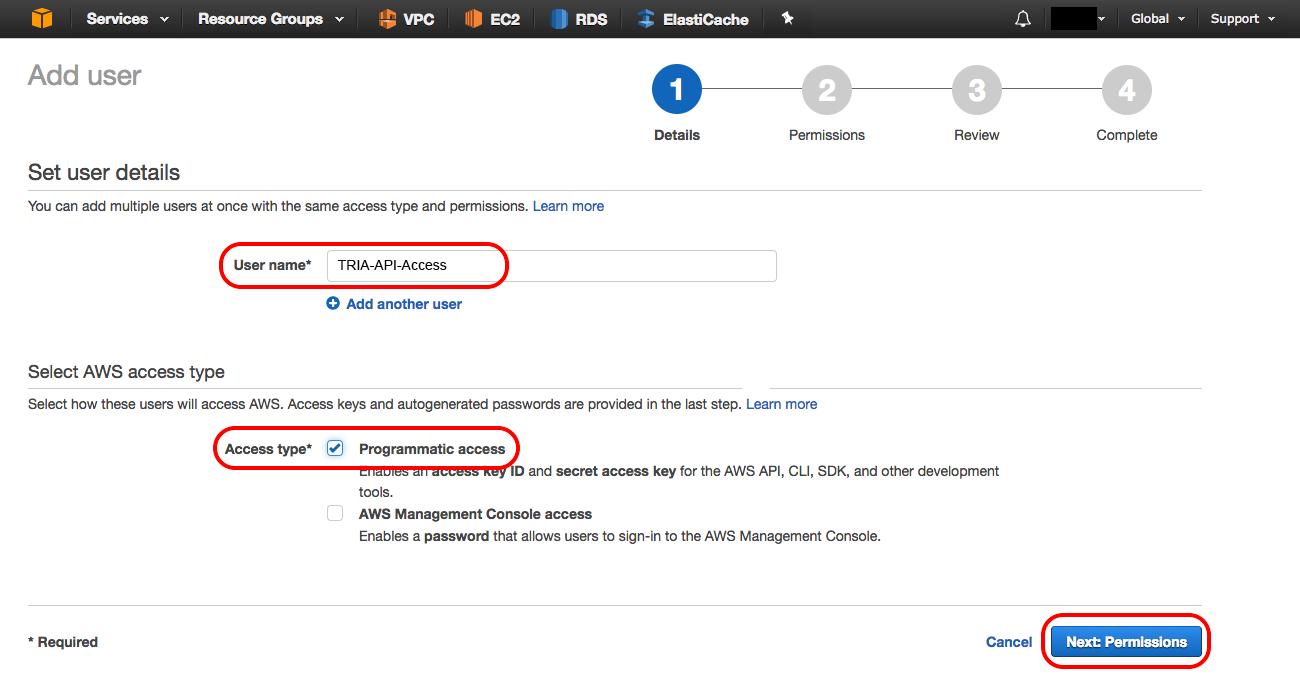
6.) Next, give the user a name, select “Programmatic access” for the AWS access type, and click “Next: Permissions”.
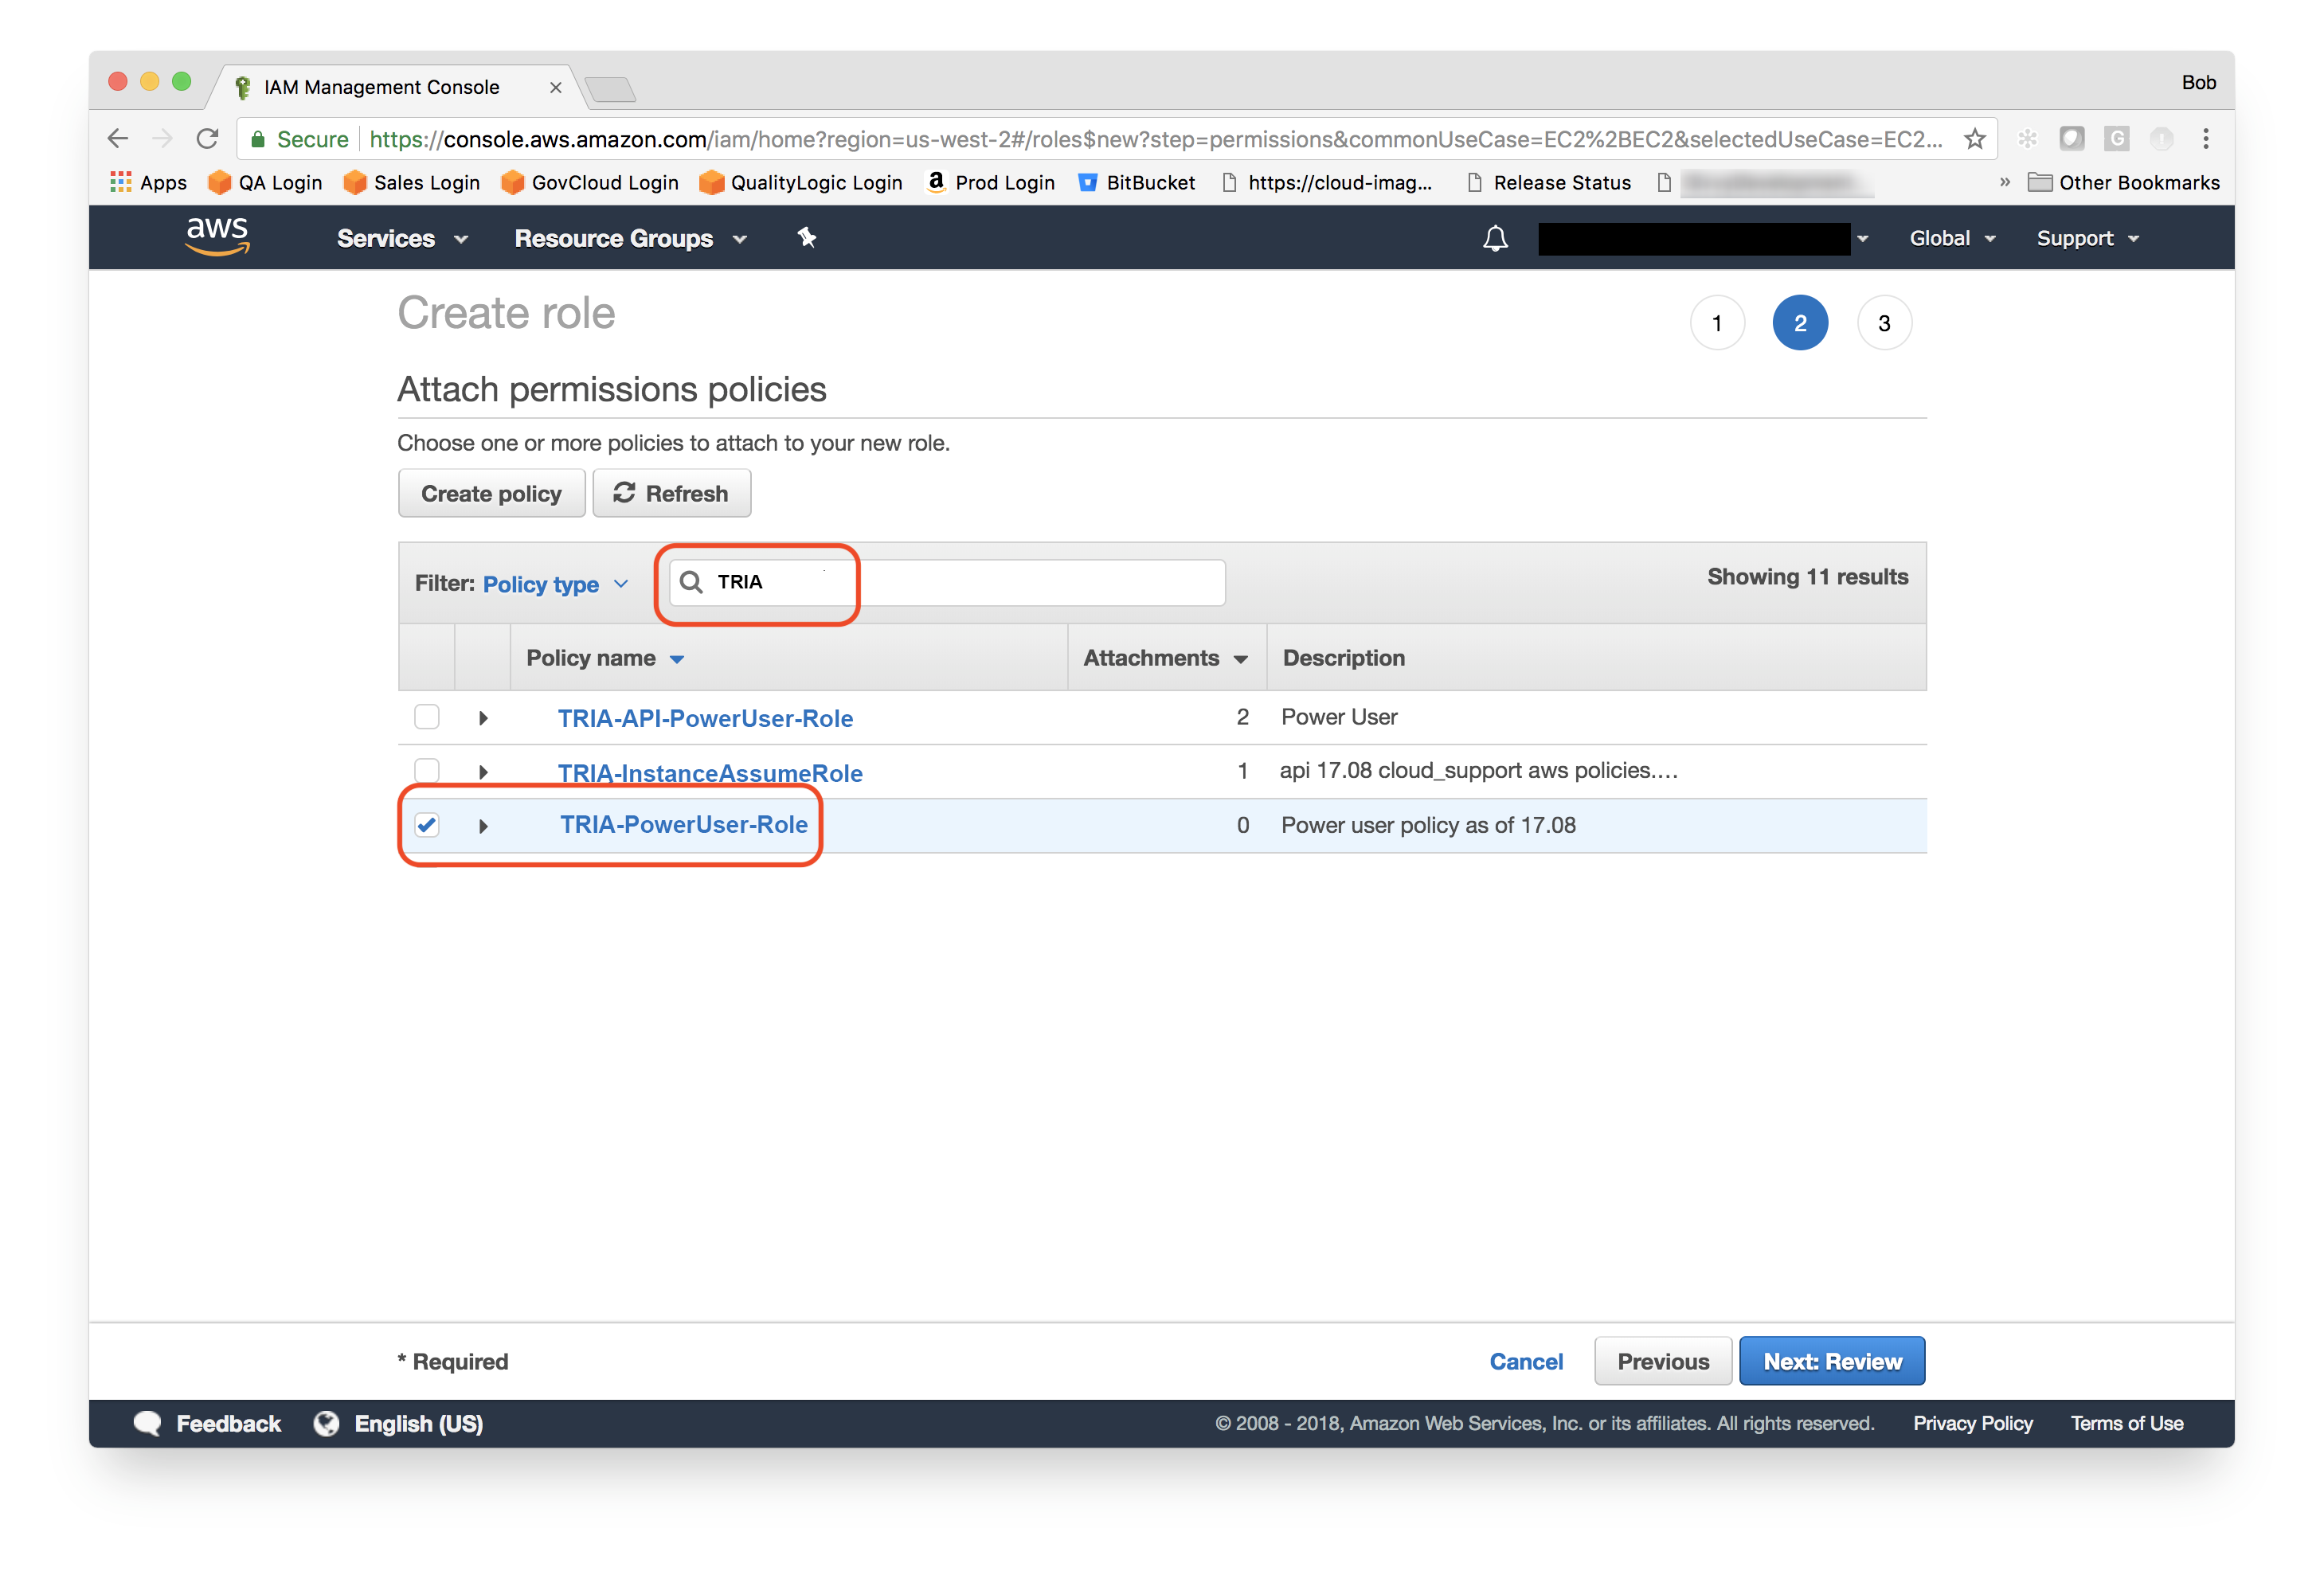
7.) To give permissions to your new user, select “Attach existing policies directly.” Next, select the policy you just created previously and choose “Next: Review”.
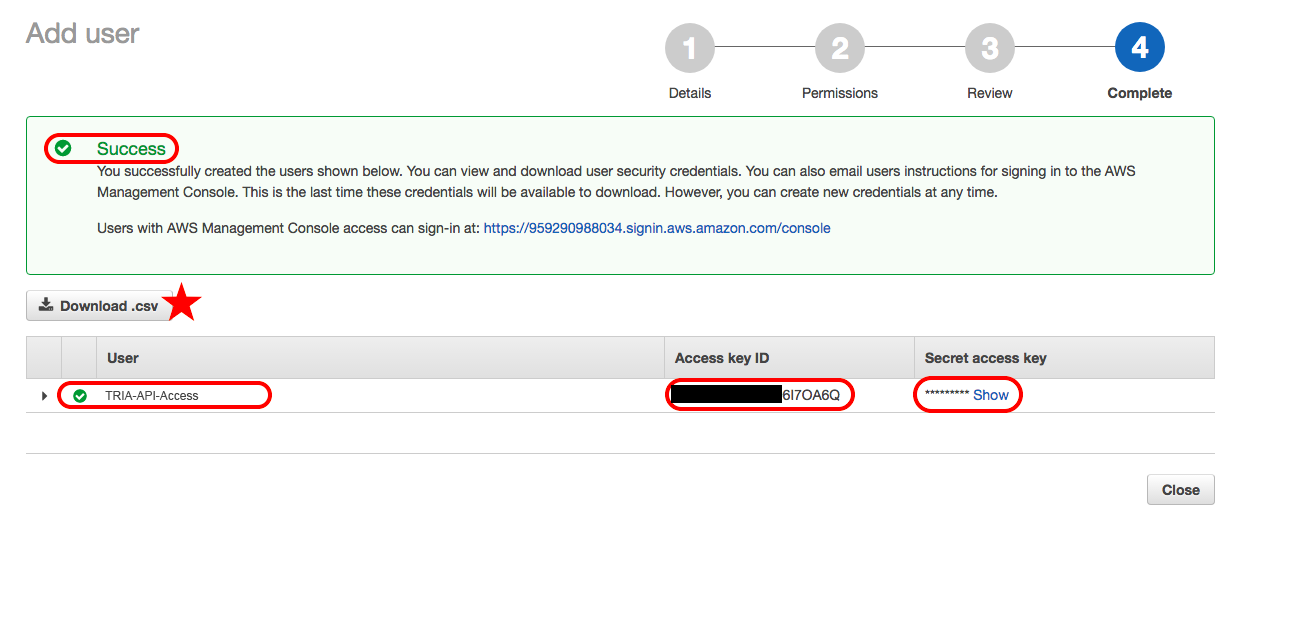
8.) Now confirm that your User name, AWS access type, and permissions are correct and select “Create user” to receive your Access ID key and Secret access key. (Note, don’t forget to save your credentials by downloading to *.csv, once you leave this page they cannot be viewed later.)
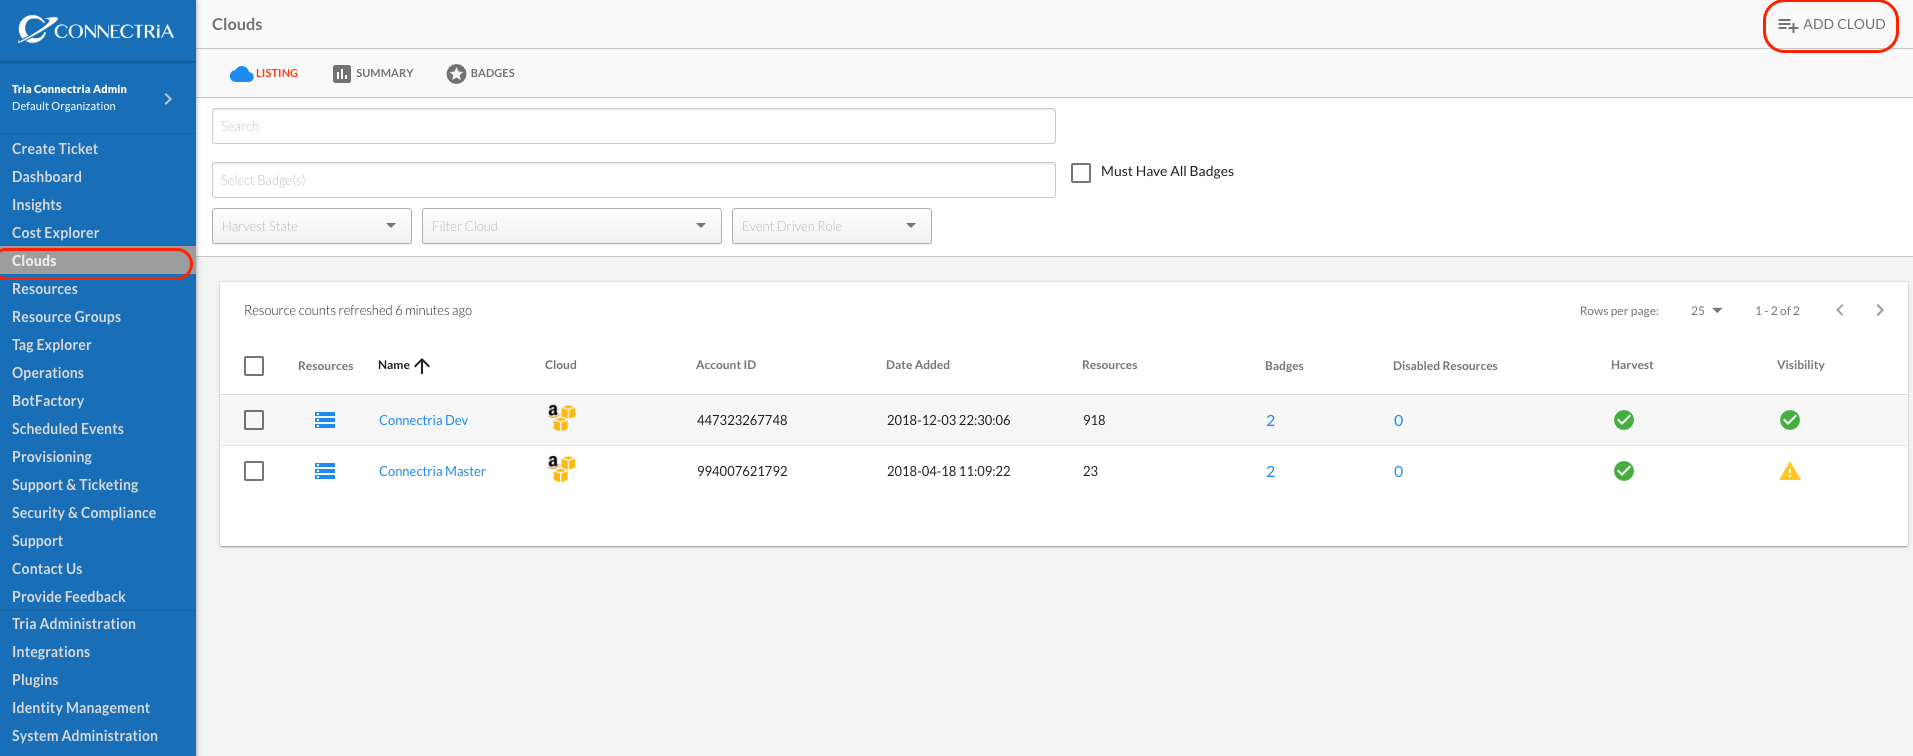
9.) The final step is to go to your TRiA account, navigate to “Clouds” in the left-hand menu, and select “Add Cloud” in the upper right.
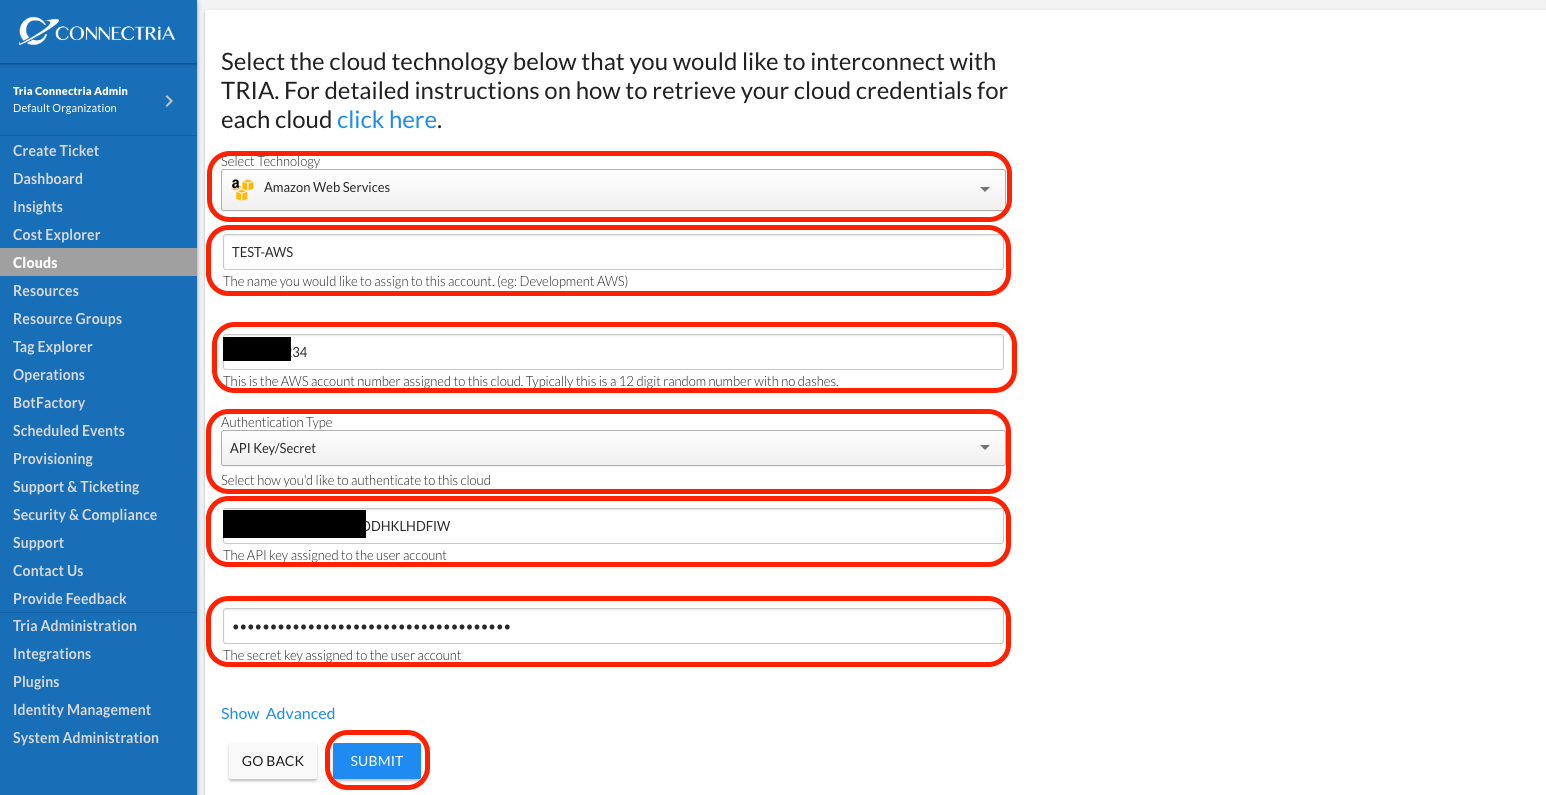
10.) Here we will need to supply some information for our cloud account in TRiA.
A name for the cloud account in TRiA.
Your AWS account number.
Choose “API Key/Secret” for Authentication Type.
Enter your Access Key ID received from AWS.
Enter your Secret Key received from AWS.
Click on “Submit”.
Now you have successfully connected your AWS account in TRiA.