Instance Assume Role
If you are deploying TRiA onto one or more virtual private servers within Amazon Web Services (AWS), then we strongly recommend leveraging Instance Assume Role. Authentication using this mechanism leverages temporary API credentials that are rotated every 60 minutes.
The steps below describe how to configure Instance Assume Role for your AWS-hosted TRiA instances. Once you have given your TRiA instances this role, you can add additional AWS clouds in a straightforward manner (see below).
Note well, these instructions assume you have added two IAM Policies., i.e., Read-Only + STS or Power User + STS, as described here.
Steps for TRiA Instance(s)
1.) Identity & Access Management Console
Login as an Admin to the AWS console in the account where TRiA is deployed. Access the Identity & Access Management service.
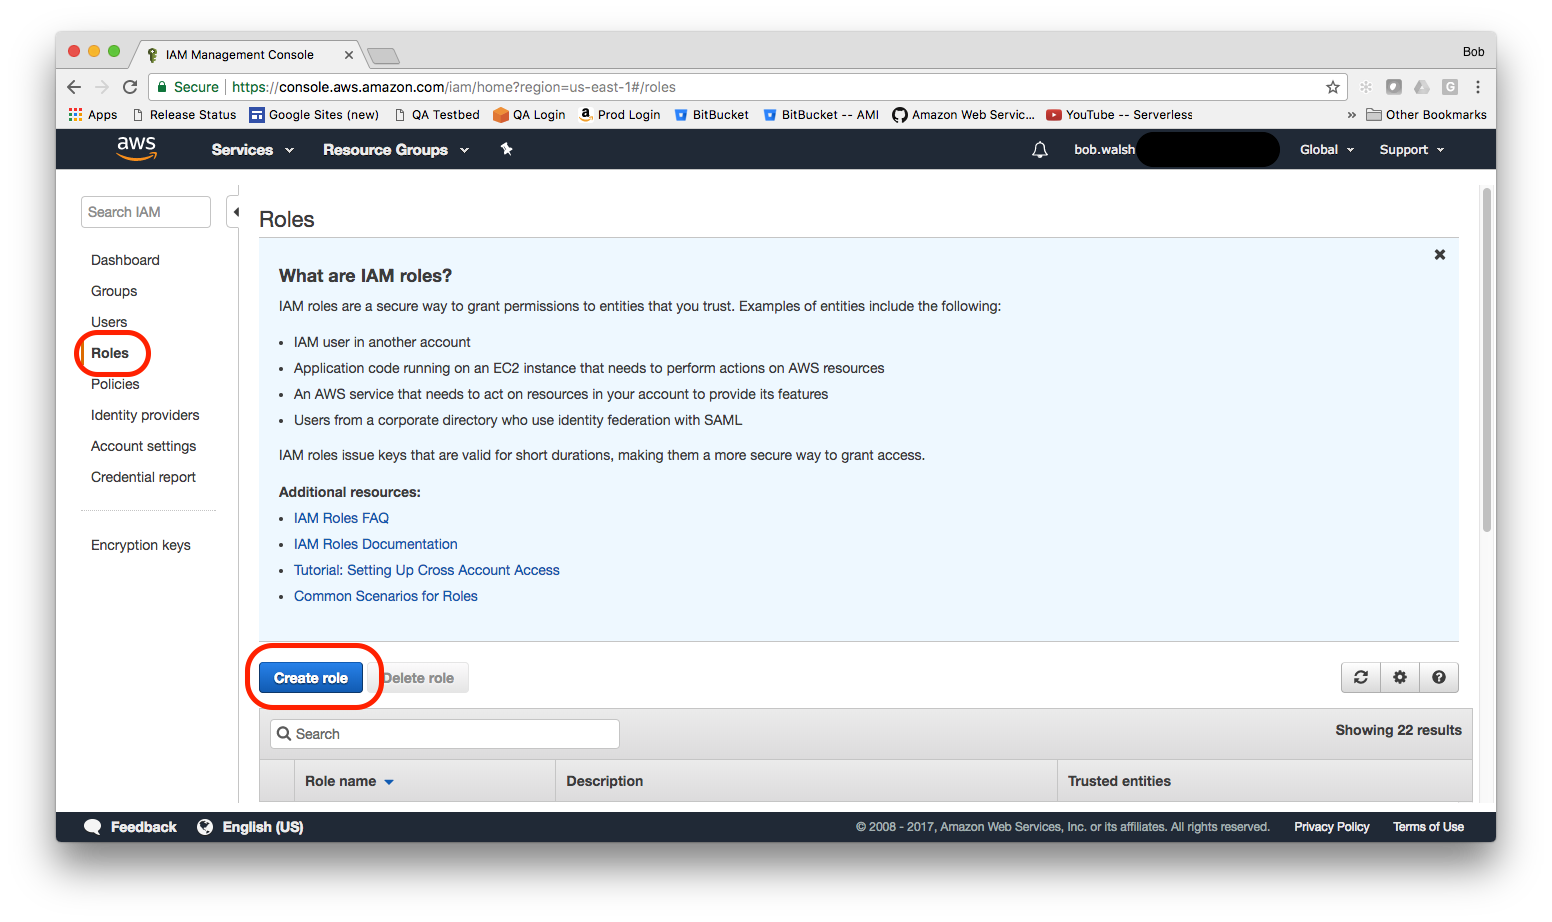
2.) Create Role. Select Roles and Create role.
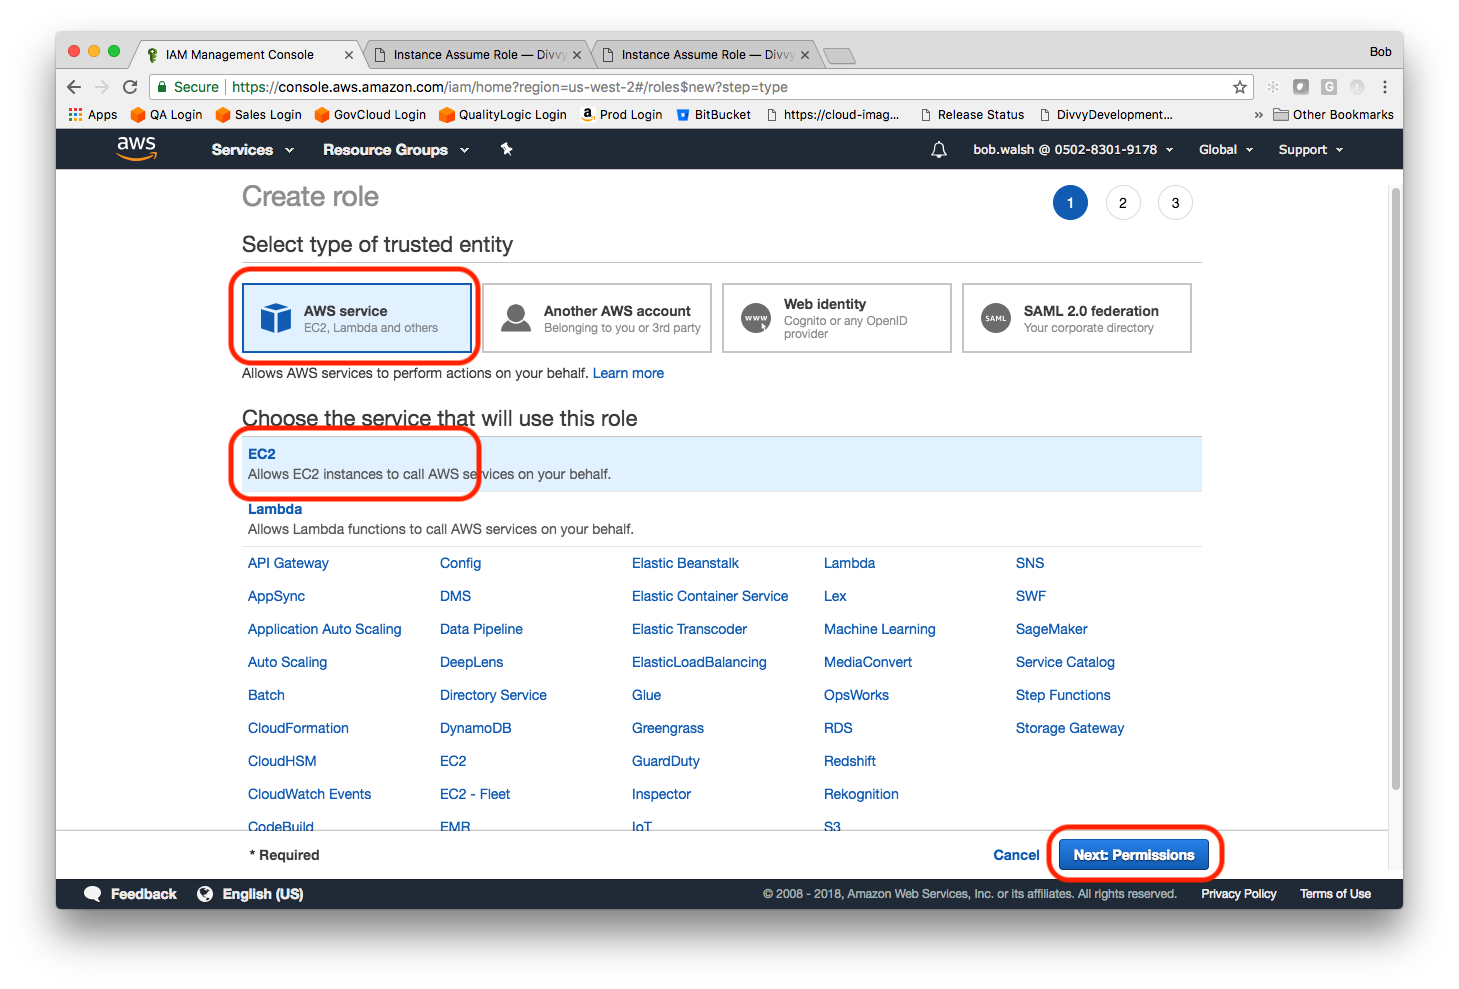
3.) AWS Service. Select AWS service, EC2, and then Next: Permissions
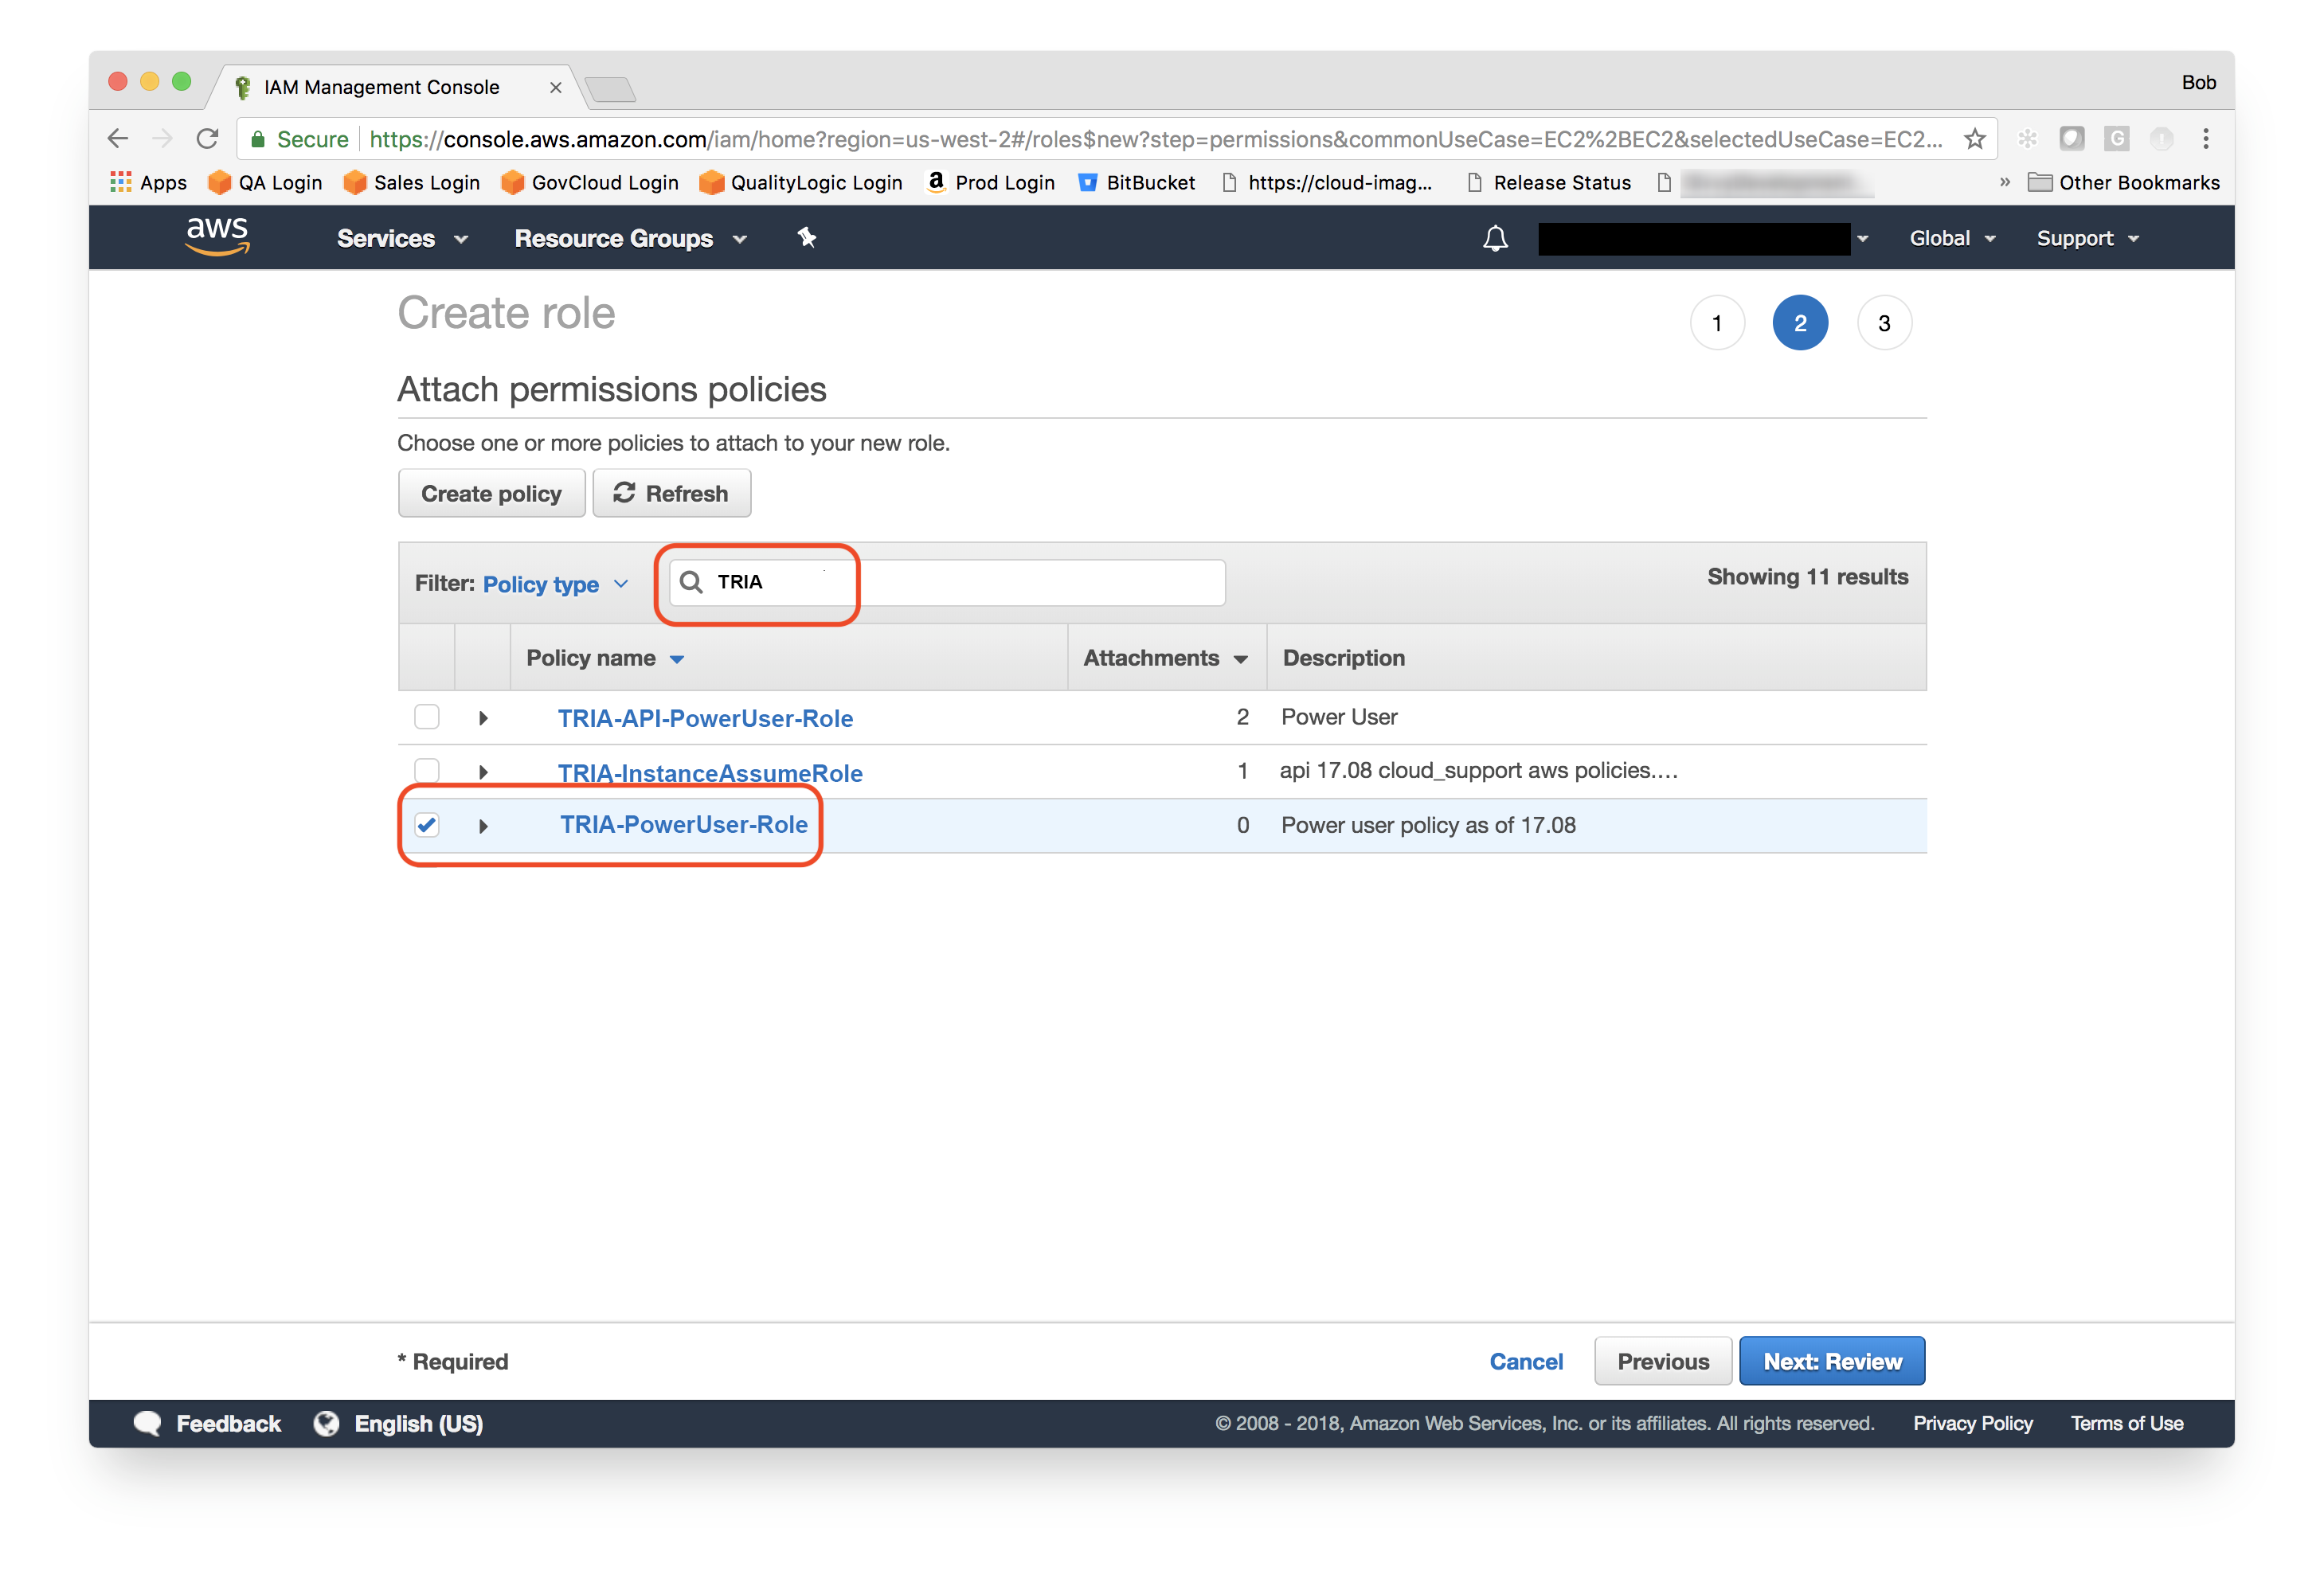
4.) Attach Policy
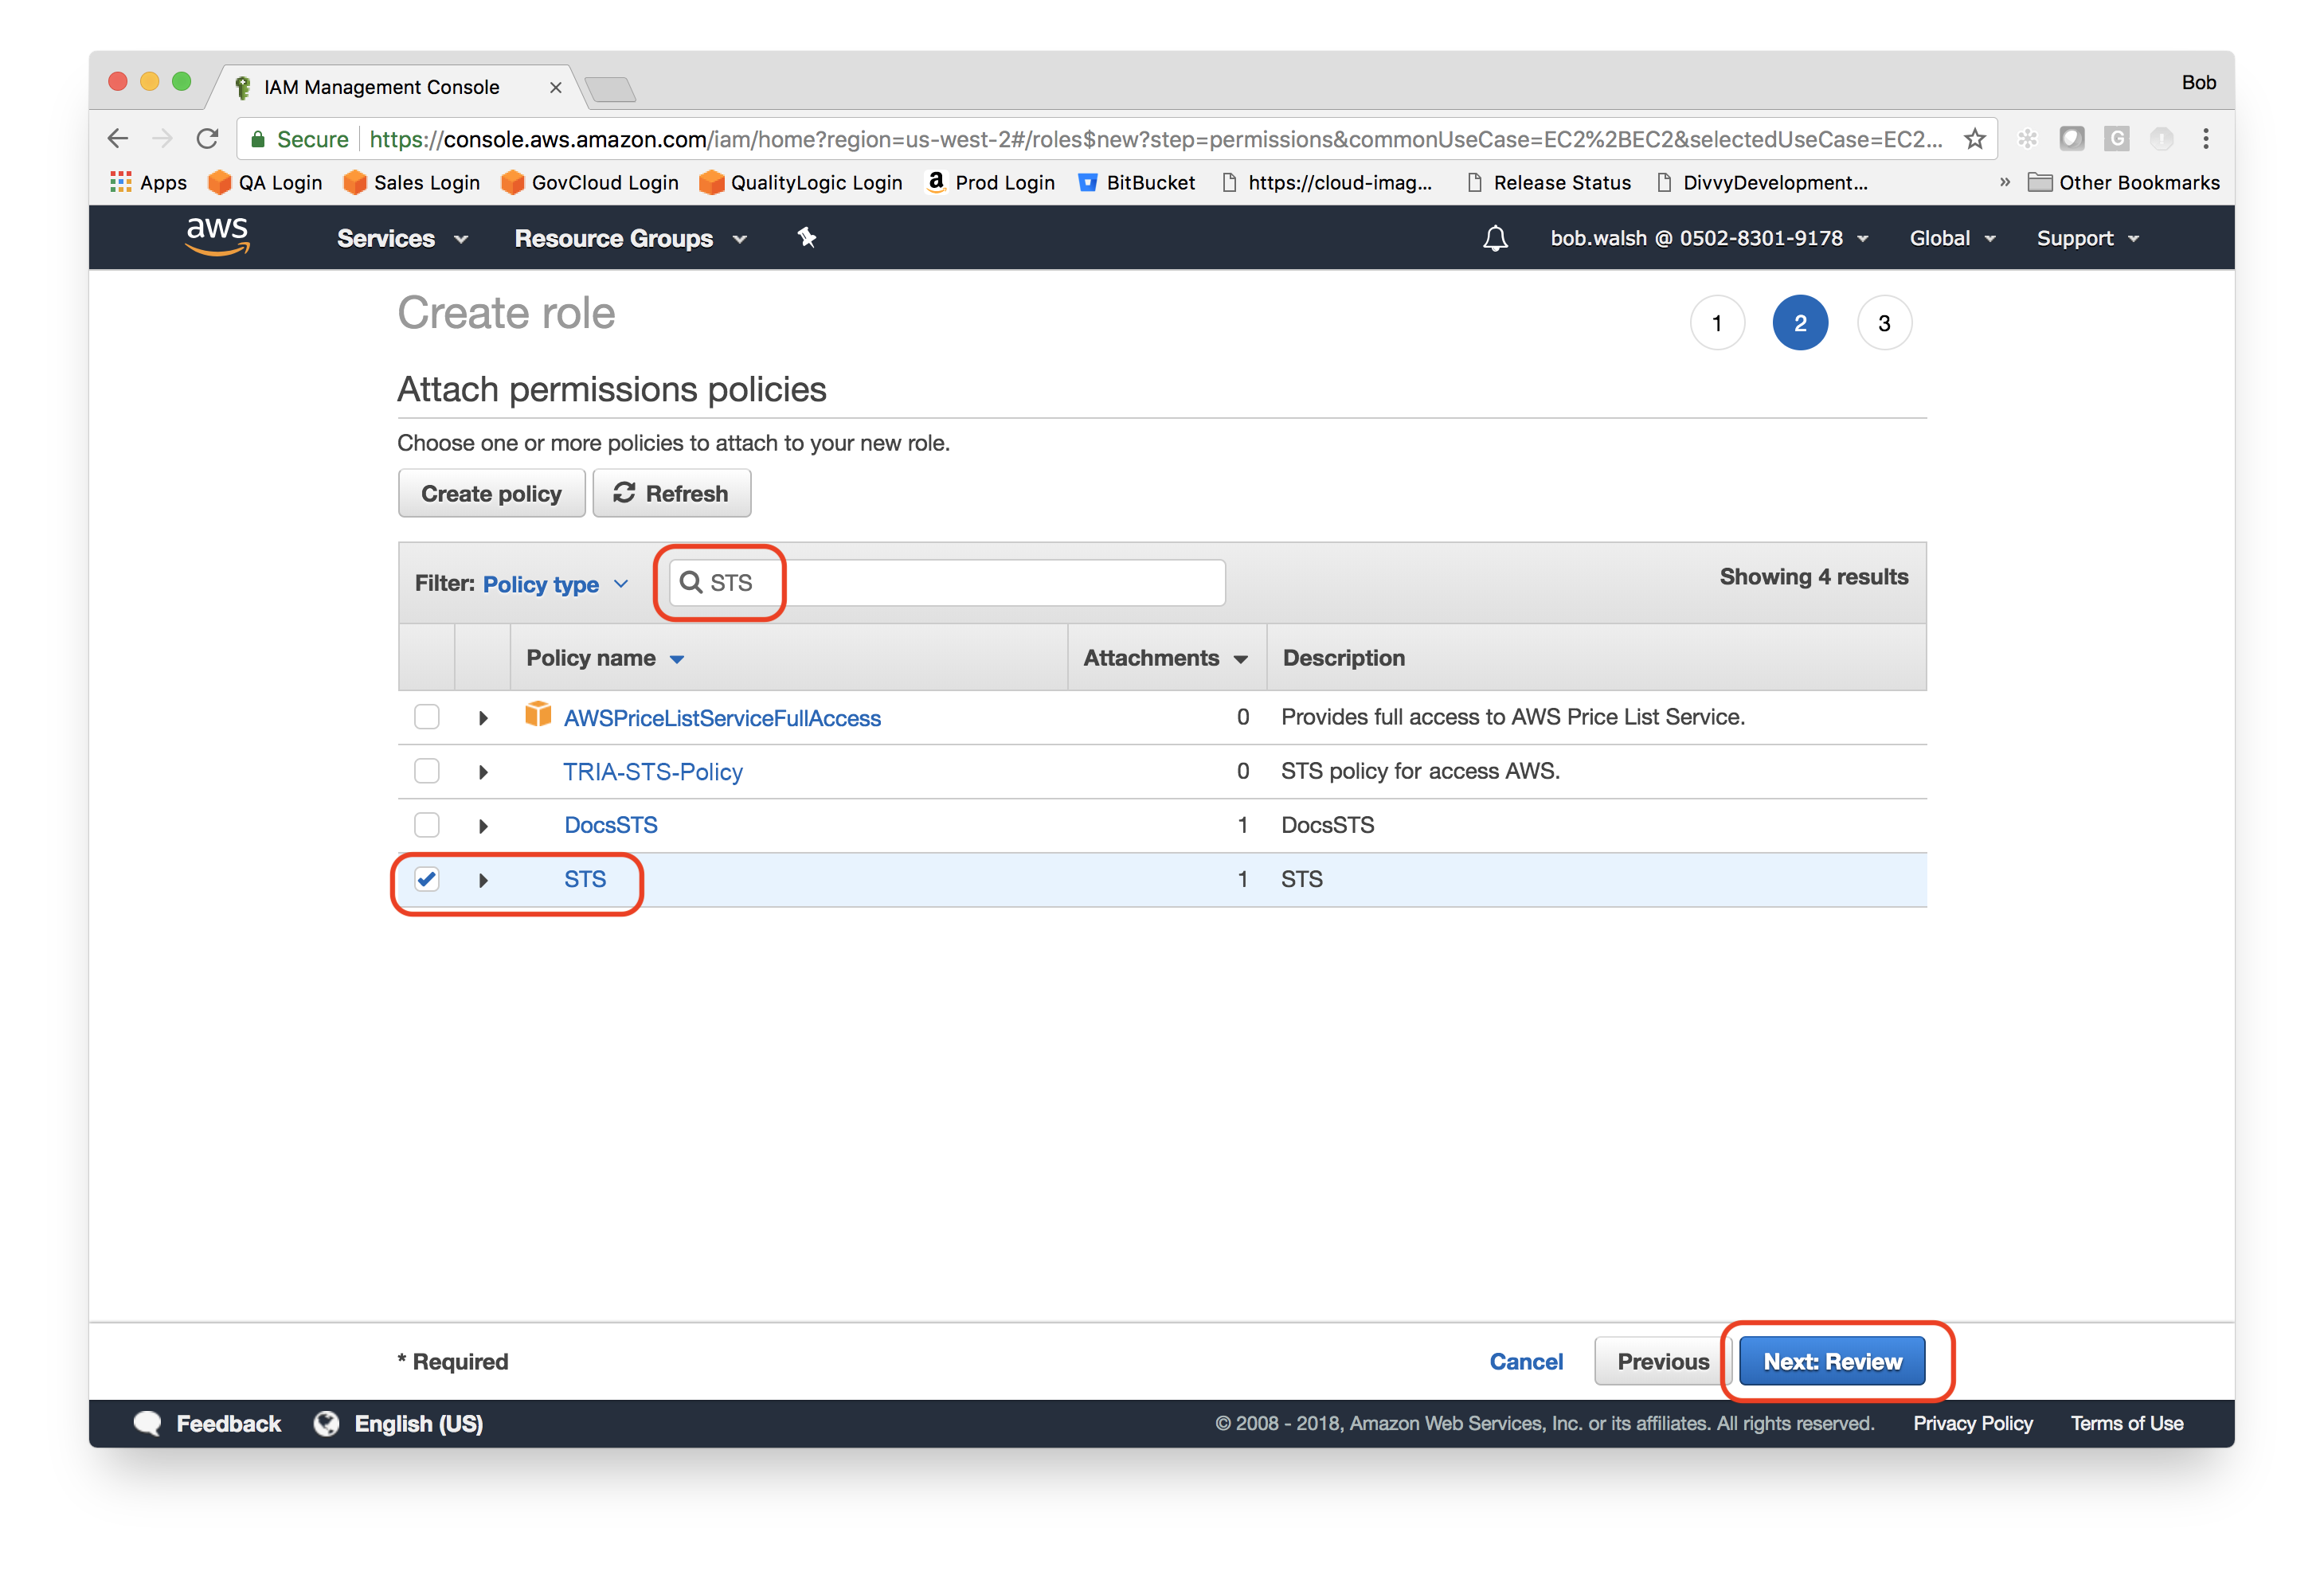
a. Searches Search for your newly created policies, e.g., TRiA-PowerUser-Policy and STS-Policy, one at a time. You can find them by filtering your results by name. Check the box next to the policy name. Repeat for the second policy.
Review Click on Next: Review.
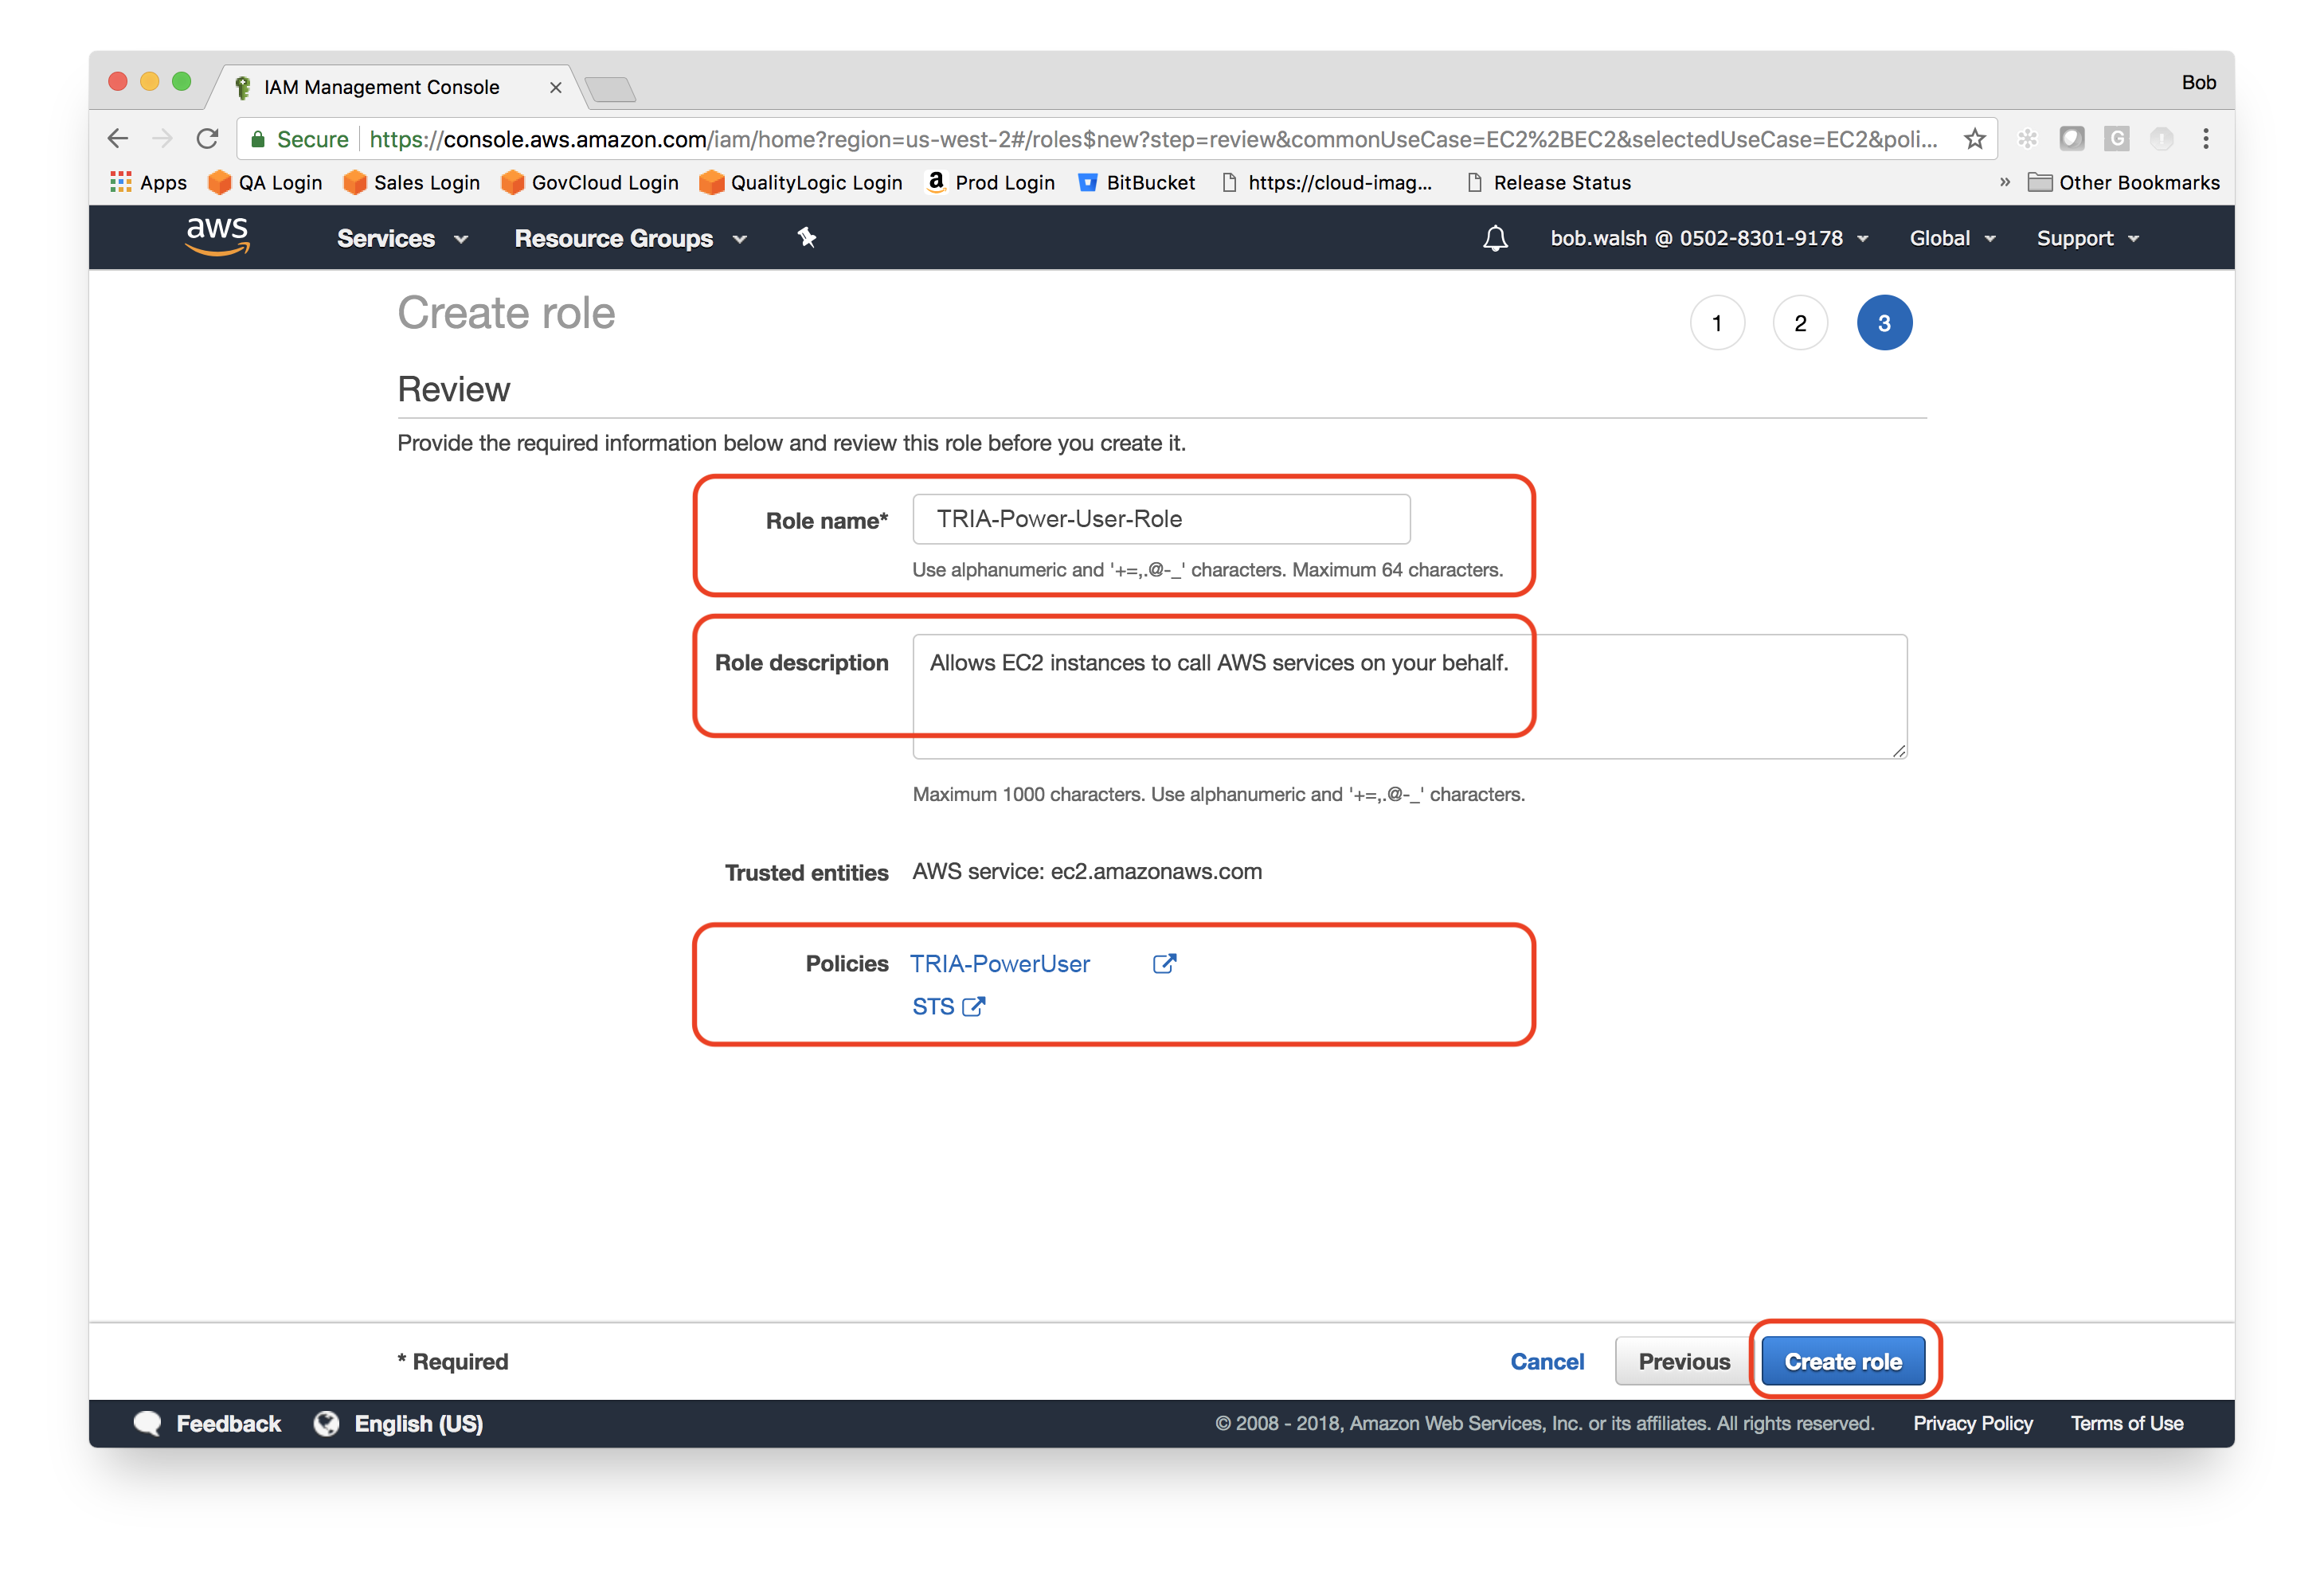
6.) Create Role
Name Use a descriptive name, e.g., TRiA-PowerUser-Role.
b. Description Add a description, e.g., ‘This role can be used by TRiA to access a PowerUser policy to manage AWS services in this account and any AWS accounts with one-to-one trusted relationships.’
c. Create role Confirm both policies are attached and click on Create role
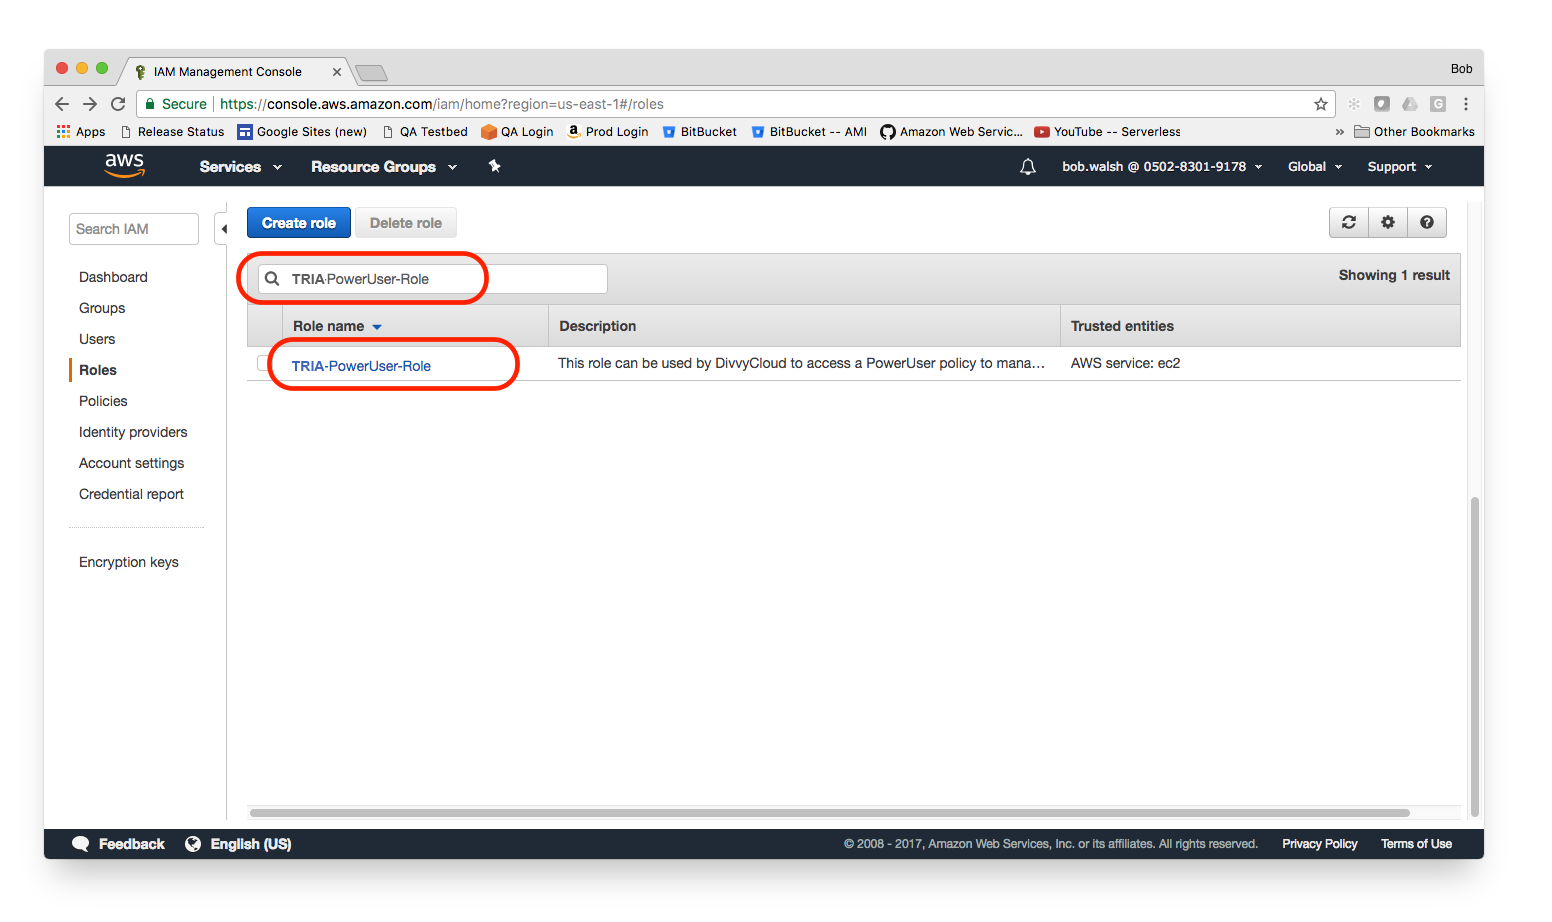
7.) Select Role. Search for your role and select.
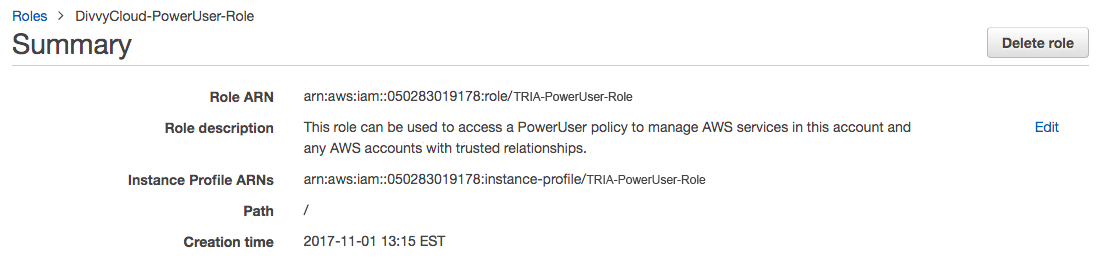
8.) Role ARN
Copy the Role ARN and save it for later use. You will use this Amazon Resource Name (ARN) to instruct TRiA how to connect to your AWS account.
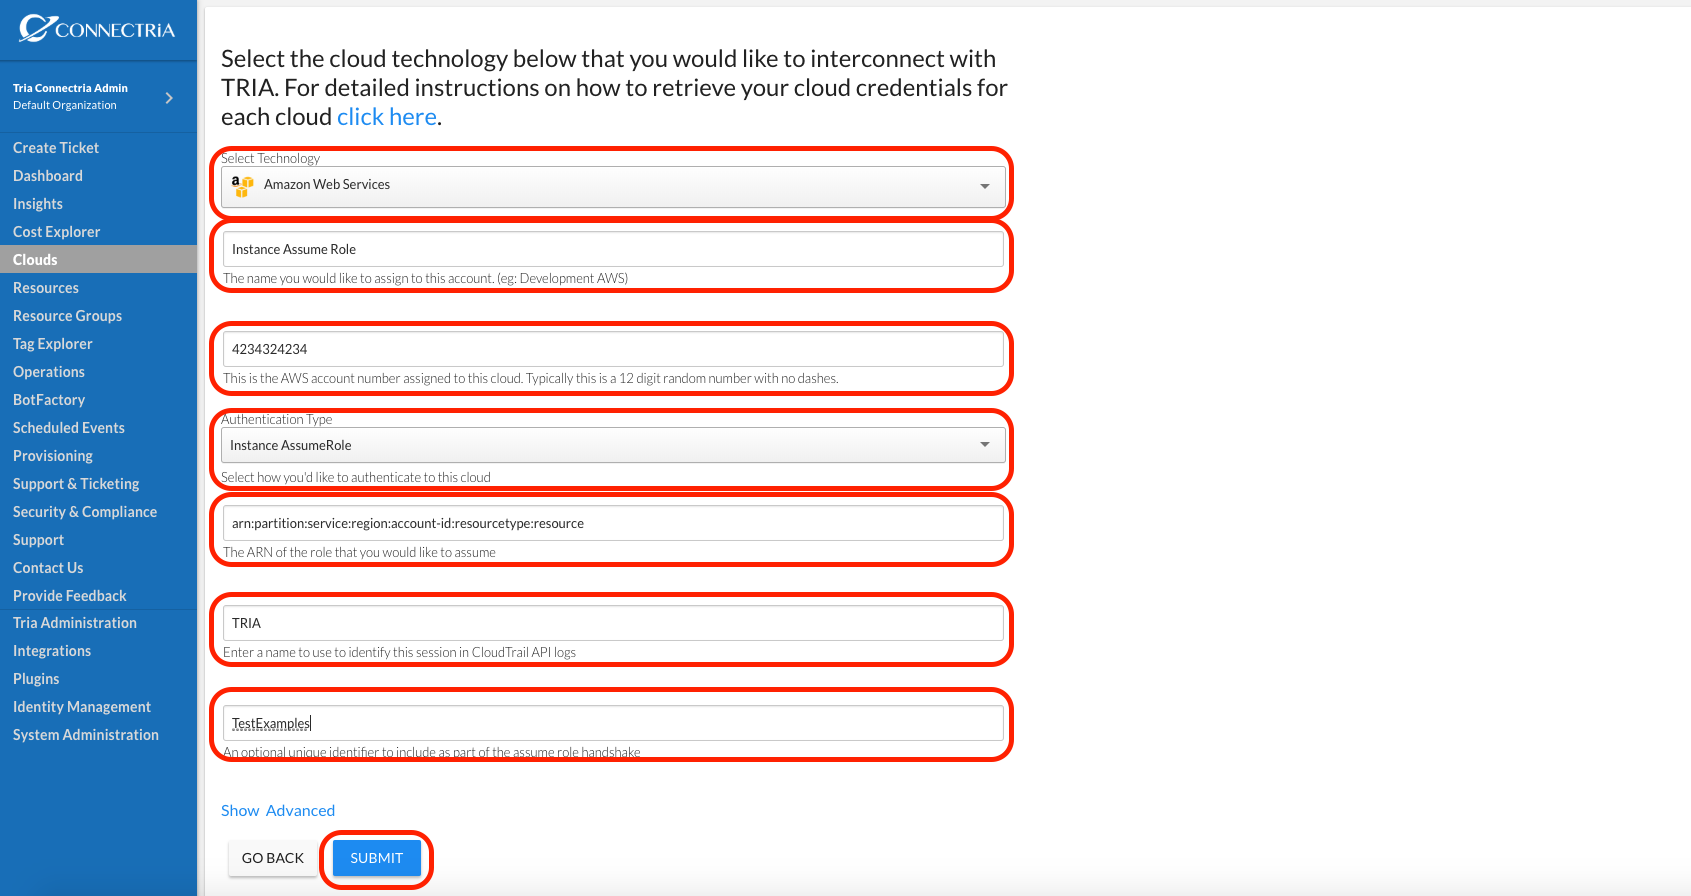
9.) Add Account to TRiA
In TRiA, click on “Add Cloud” and enter the required information for the account. Choose “Instance Assume Role” for the authentication type. Paste in the Role ARN from step 8 and enter an intuitive nickname for the session name. This session name is only used for CloudTrail API audit purposes. Recommended name is TRiA.
Of note, the optional External ID field is only relevant if you are adding a trusted AWS account rather than the AWS account hosting TRiA (See Steps for Additional AWS Accounts.)
Steps for Additional AWS Accounts
1.) Identity & Access Management Console
Login as an Admin to the AWS console in the account that you would like to add to TRiA. Access the Identity & Access Management service. Add the appropriate IAM policy as documented elsewhere.
2.) Create Role. Select Roles and Create role.
3.) AWS Service
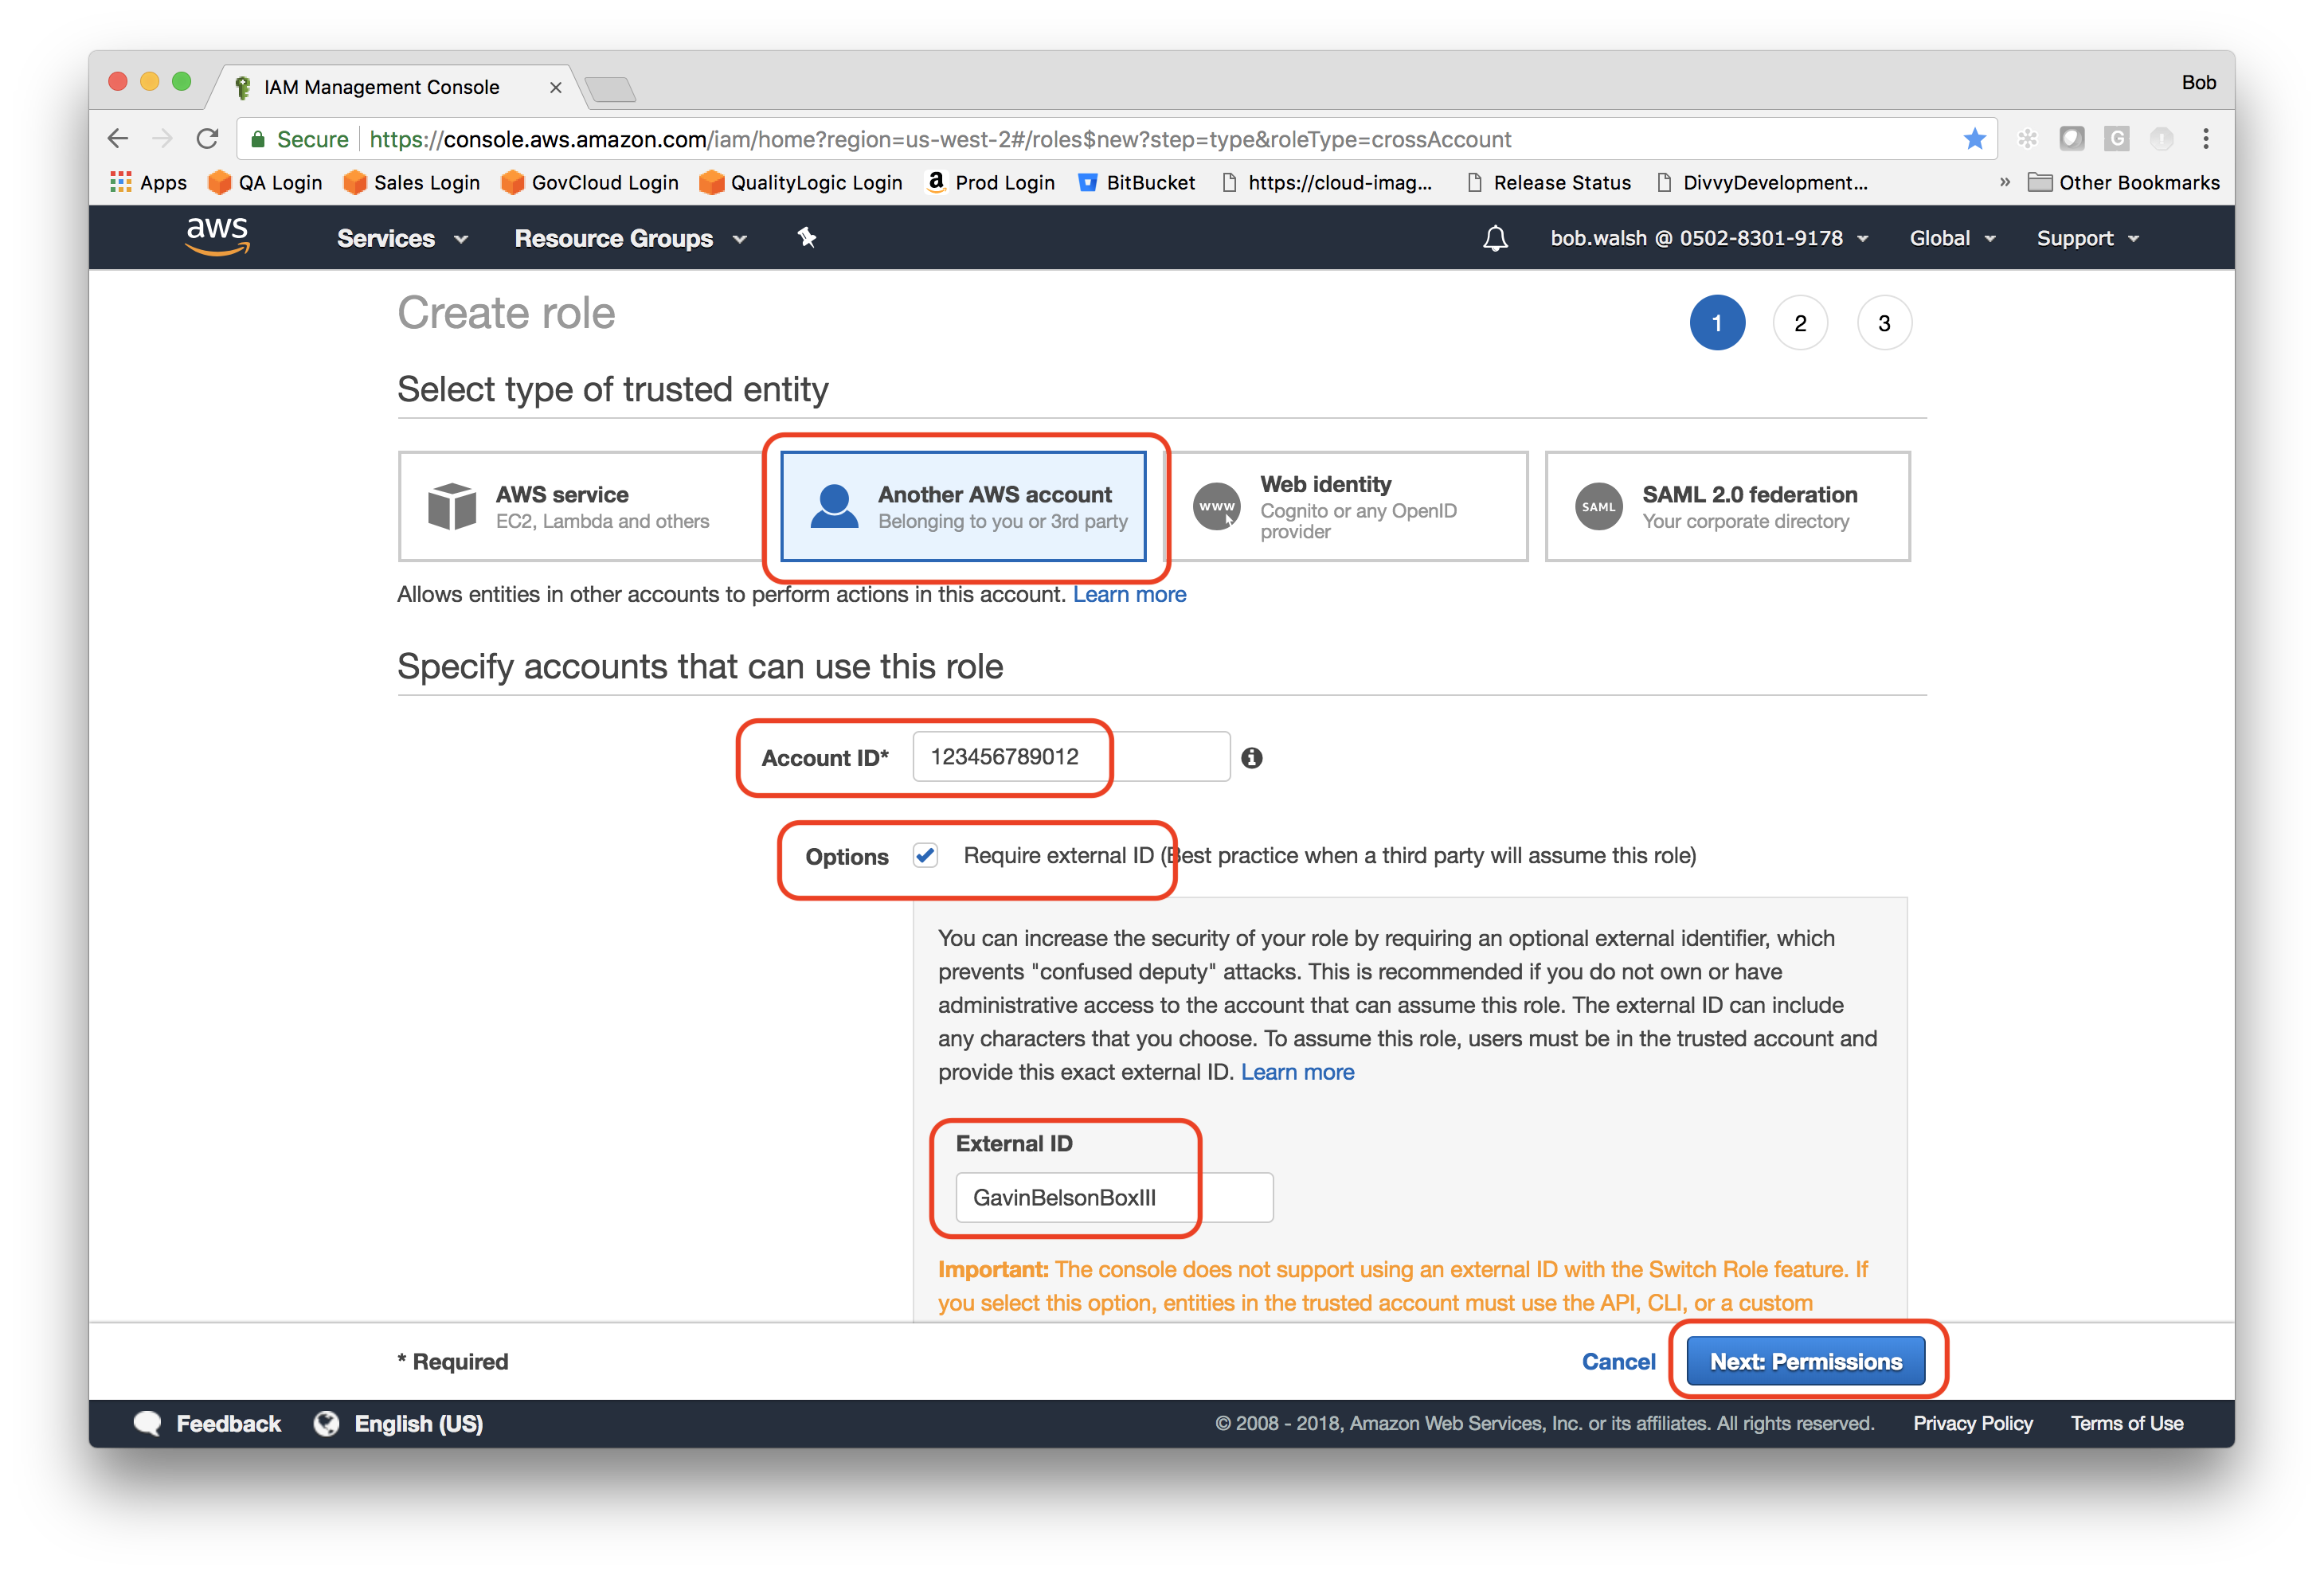
Another AWS Account. Select Another AWS account.
b. Account ID. Enter the account ID of AWS account that is hosting TRiA
c. Options: Require External ID. Add an external ID that will function like a password and that you will use later when adding the account to TRiA.
Next: Permissions. Click on Next: Permissions
4.) Repeat
Repeat the steps above to 1) attach the either the read-only policy or the power-user policy (the STS policy is not necessary) to the role, 2) finish creating the role, 3) copying the account ID and Role ARN, and then using that information in TRiA to add the account.