Adding GCP Cloud Account
Google Cloud Platform (GCP) is one of the world’s leading public cloud providers and they offer a variety of cloud services. You can add a GCP account into TRiA following these steps.
Steps
1.) GCP Console
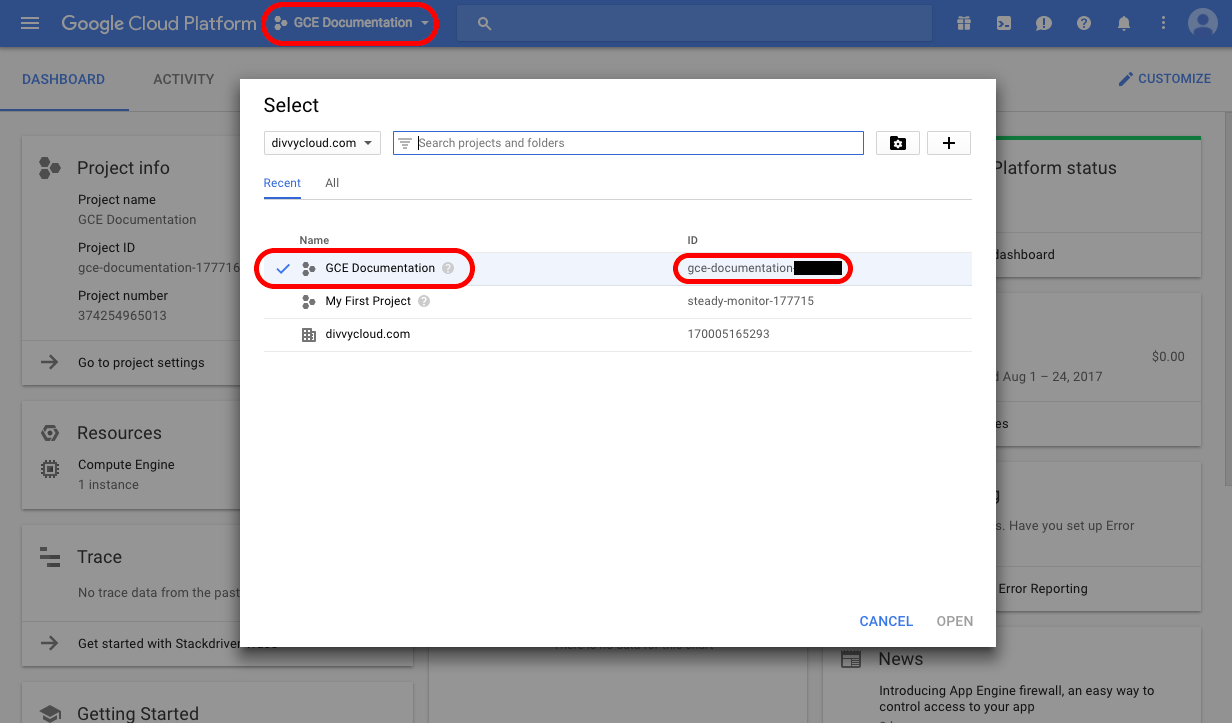
a. Settings. Login to the GCP console. Make sure you are in the organization and the project you wish to add to TRiA. Note the project ID, which you will use in TRiA.
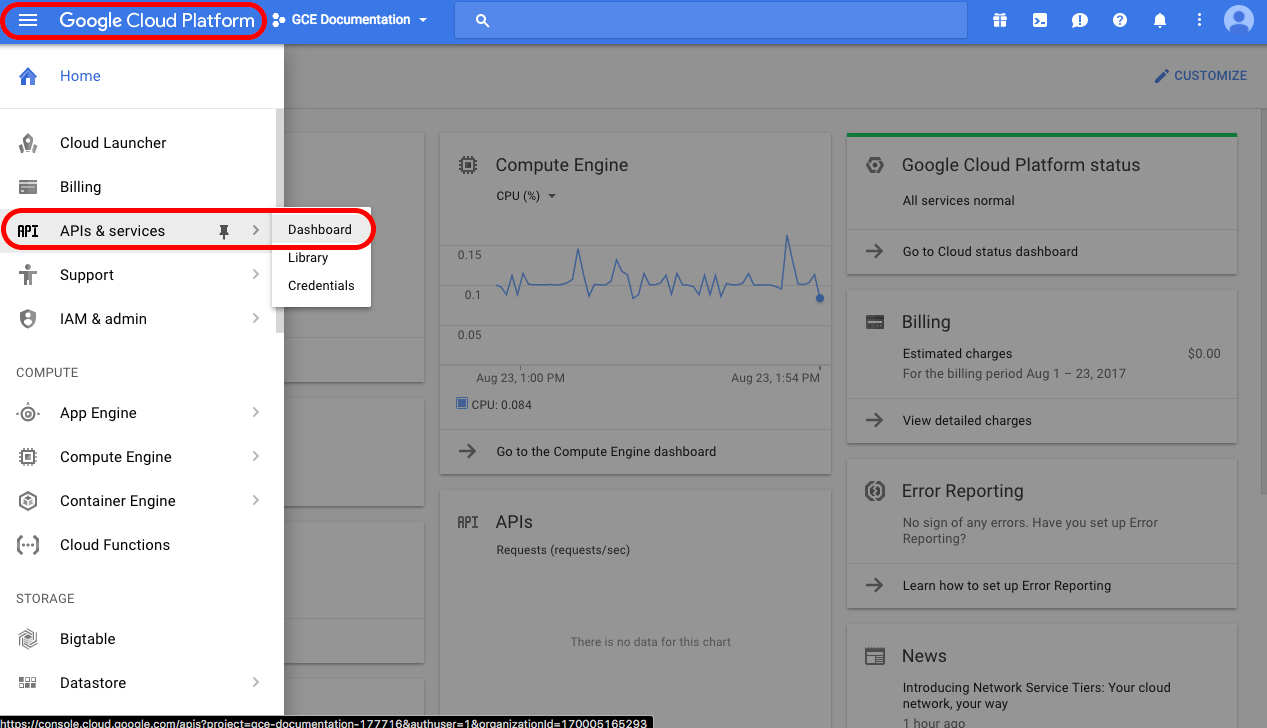
b. API Manager. Access the API Manager service from the top left navigation option.
2.) API Manager (part 1 of 2)
a. Dashboard. Once you access the API Manager, click on Dashboard on the left navigation window. It will show by default a listing of APIs that are enabled.
b. API. In order for TRiA to retrieve and act upon data in your cloud, you need to have the following APIs enabled:
Google Cloud Deployment Manager V2 API
Google Cloud SQL
Google Cloud SQL API
Google Cloud Storage
Google Compute Engine API
Google Compute Engine Instance Group Manager API
Google Compute Engine Instance Group Updater API
Google Compute Engine Instance Groups API
Google Kubernetes Engine API
Google Dataflow API
Google+ API
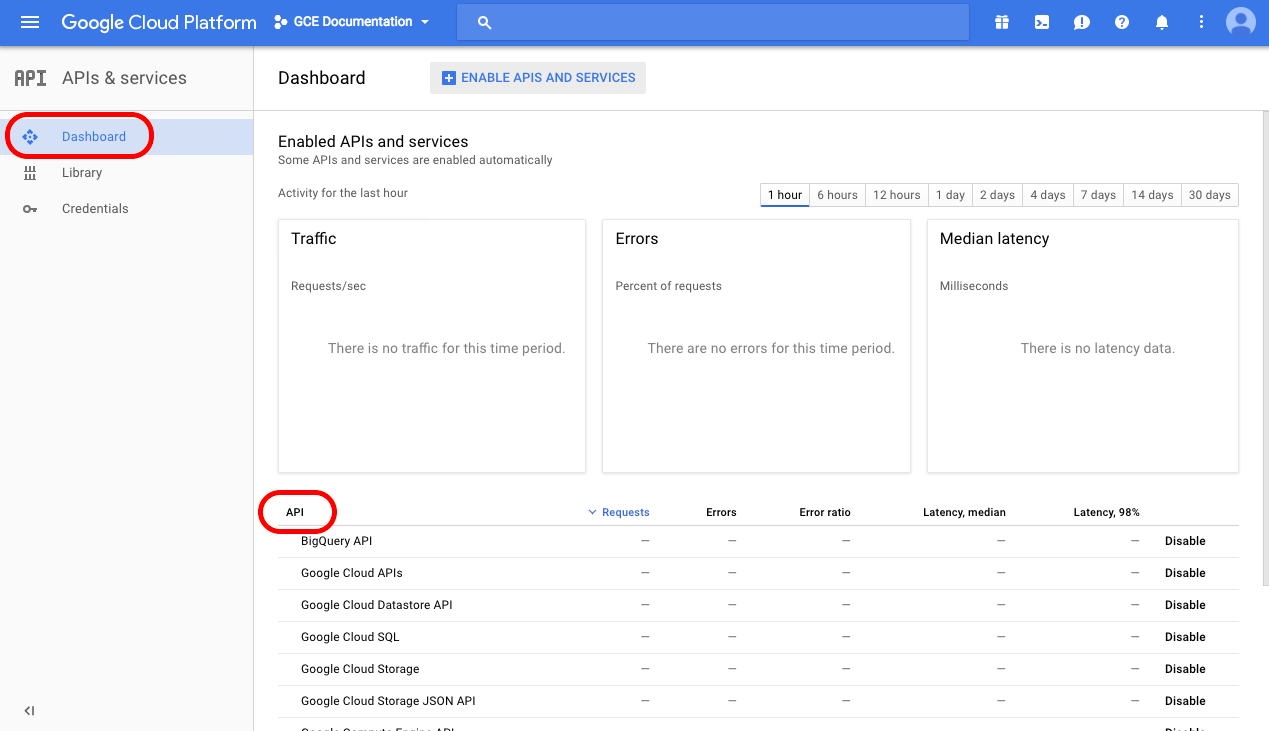
c. Enable API. If you do not have all of the required APIs enabled, select Enable APIs and services. Otherwise, skip to step #3.
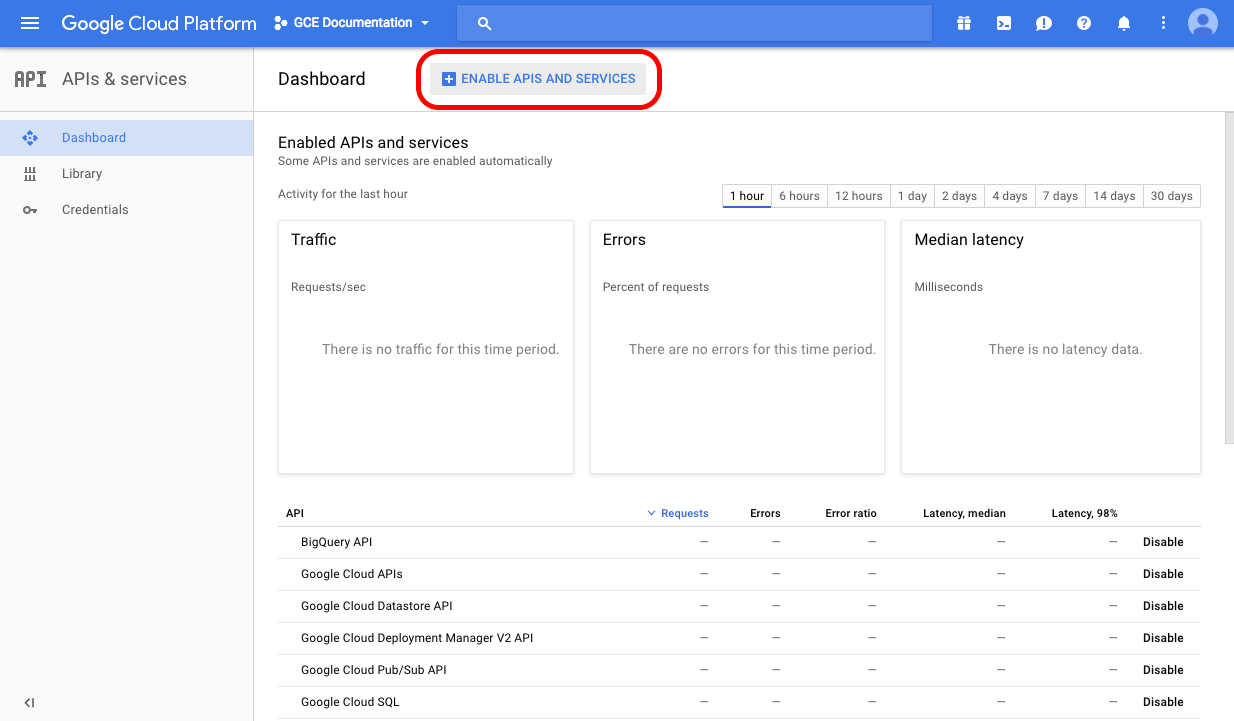
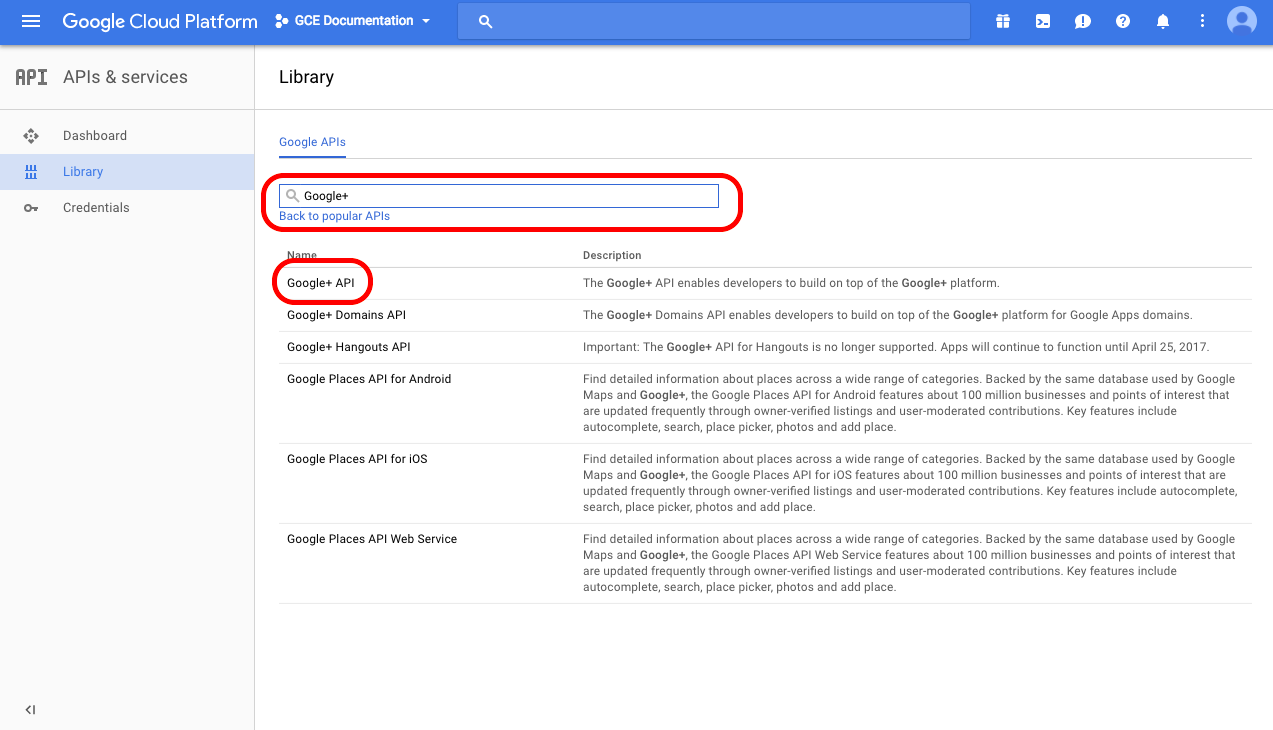
d. Library. Enter the name of the missing API in the search box. Select the searched for API.
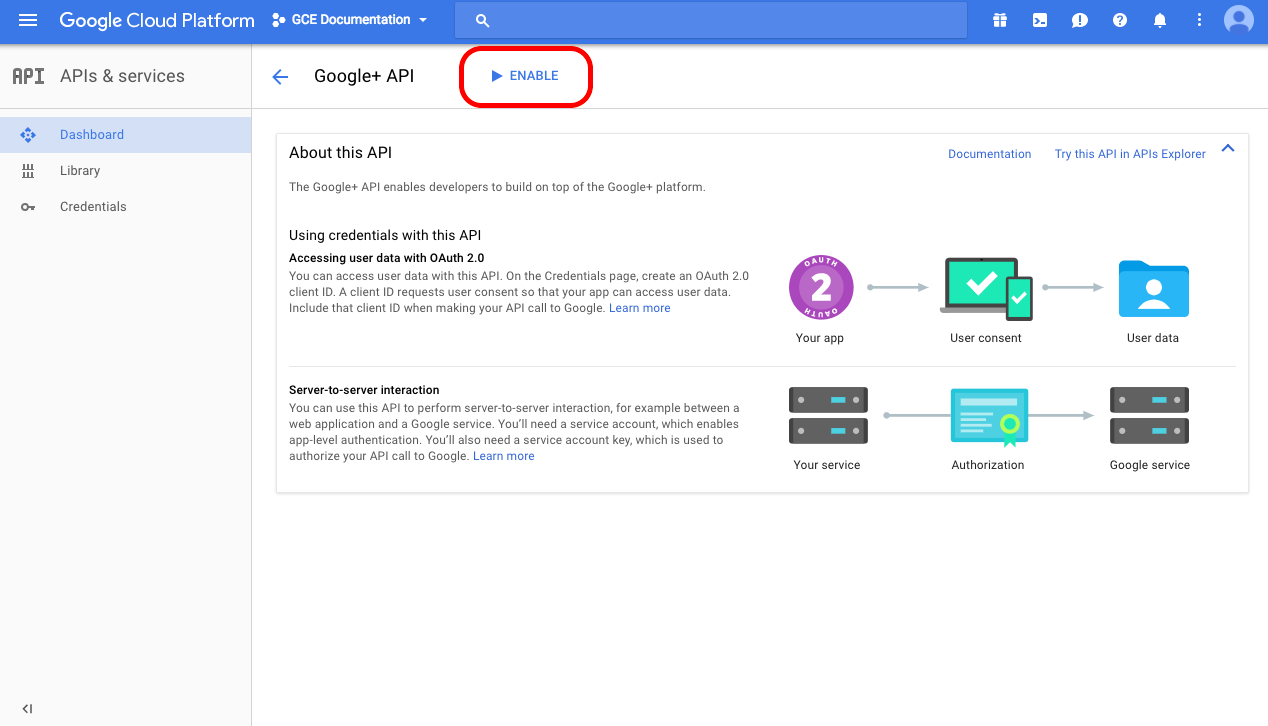
e. Enable API. You will see a description of the API. Once you have reviewed the information, select Enable. Repeat the process until you have added all of the missing APIs.
3.) API Manager (part 2 of 2)
a. Credentials. Once you have verified your enabled APIs, click on Credentials on the left navigation window.
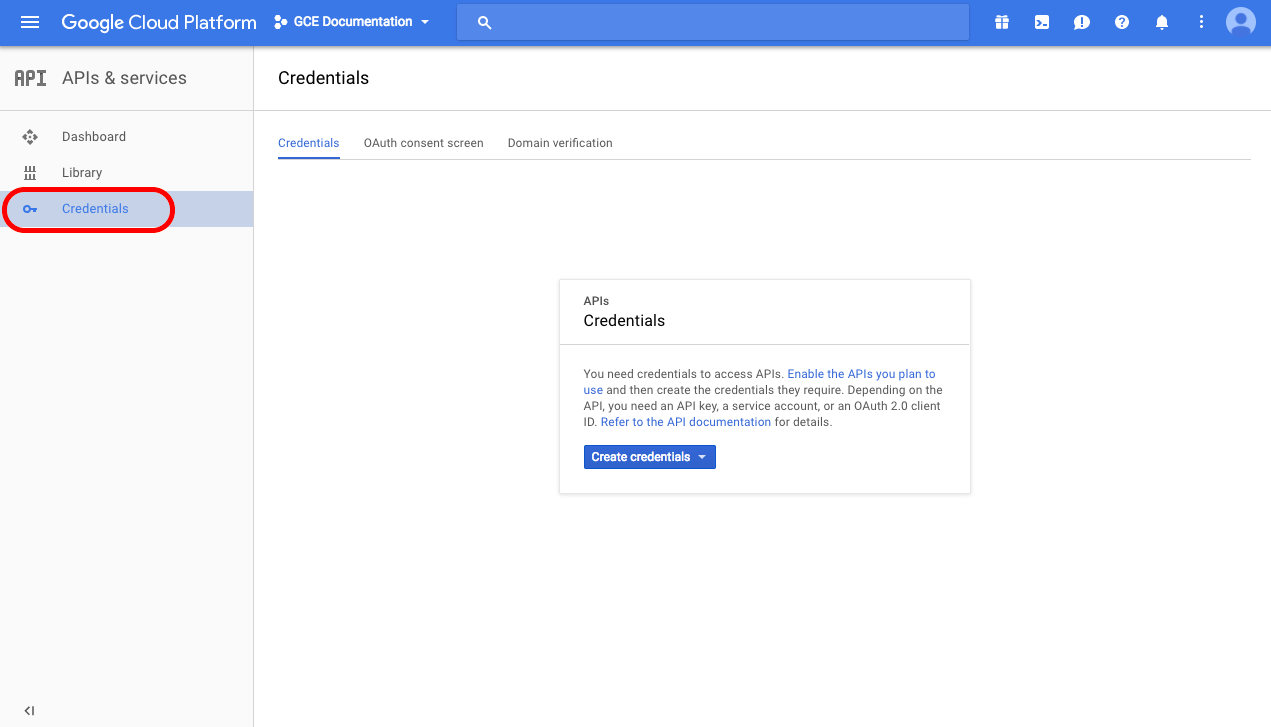
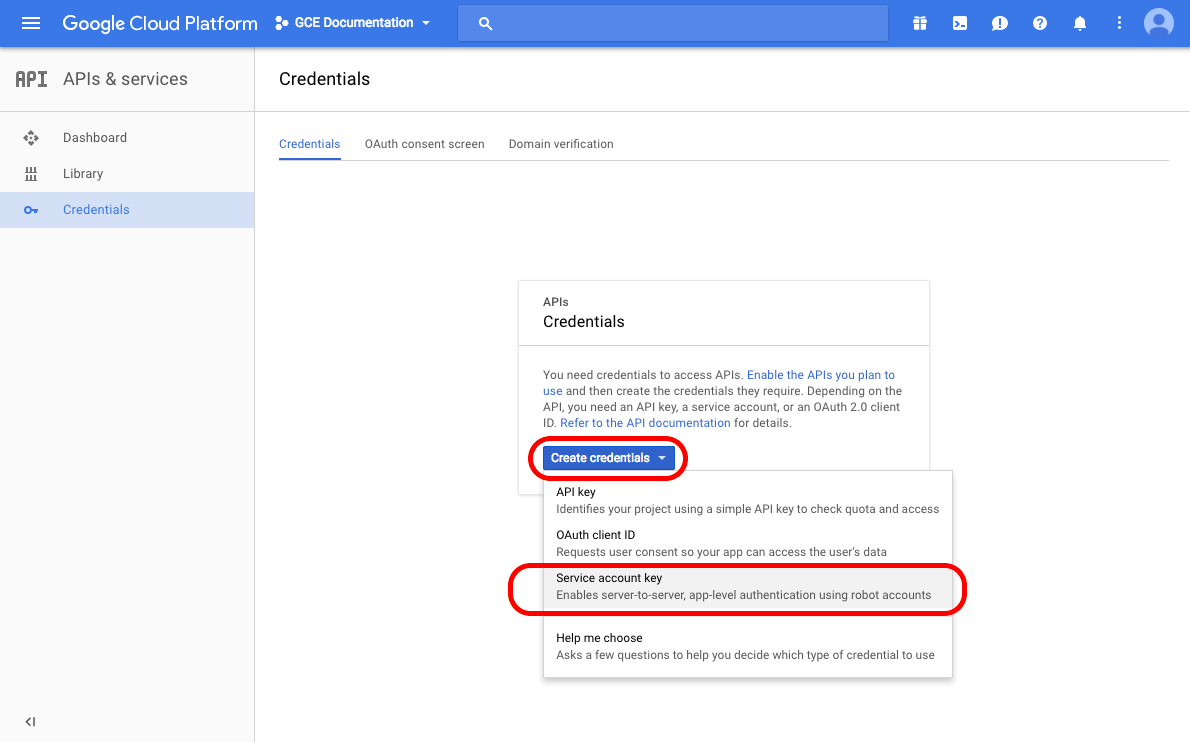
b. Create credentials. Click on the Create credentials dropdown and select Service account key.
4.) Credentials
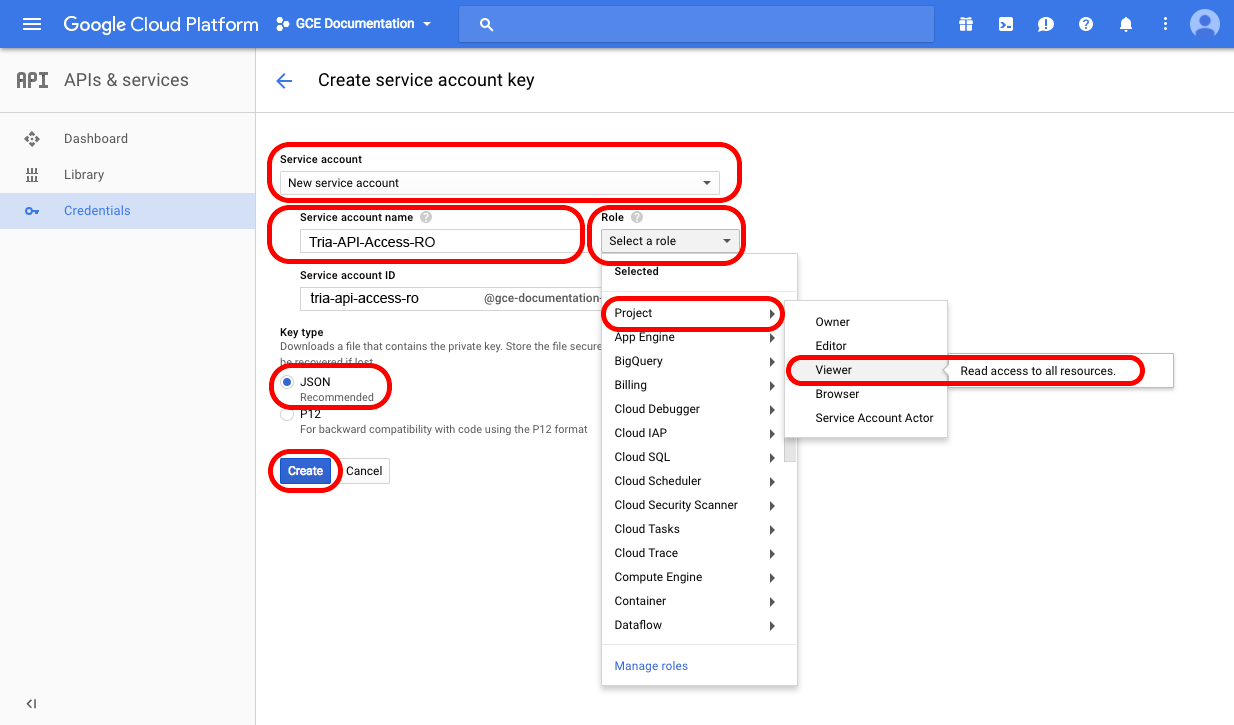
a. Service account. Click on the Service acount dropdown and select New service account.
b. Service account name. Enter a service account name to denote that this account is used for TRiA. As an example, you could name the service account TRiA-API-Access. By creating a specific TRiA service account, you are then able to monitor in Logging all actions taken by TRiA, which helps you understand what TRiA is doing versus what others are doing and facilitates troubleshooting.
Role. Click on the Role dropdown and select
Project->Viewer. This selection gives TRiA the scope to view all cloud resources. If you would like to view and act upon all cloud resources, choose Editor or Owner.
d. Key type. Select JSON as Key type. That allows TRiA to call APIs programmatically.
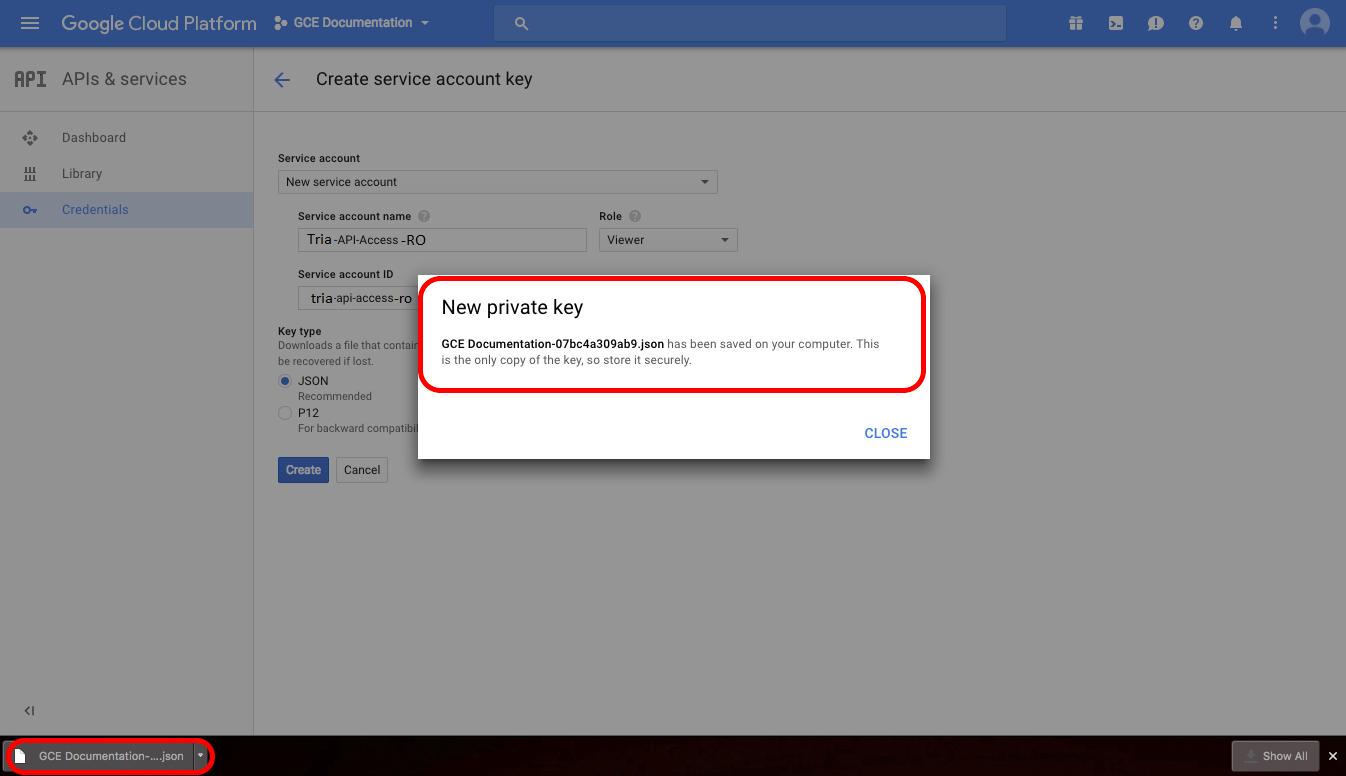
e. Create. Click on Create and you should see a confirmation message with the name of your JSON. Importantly, store this JSON in a secure place as the JSON is the only copy of the keys.
5.) TRiA
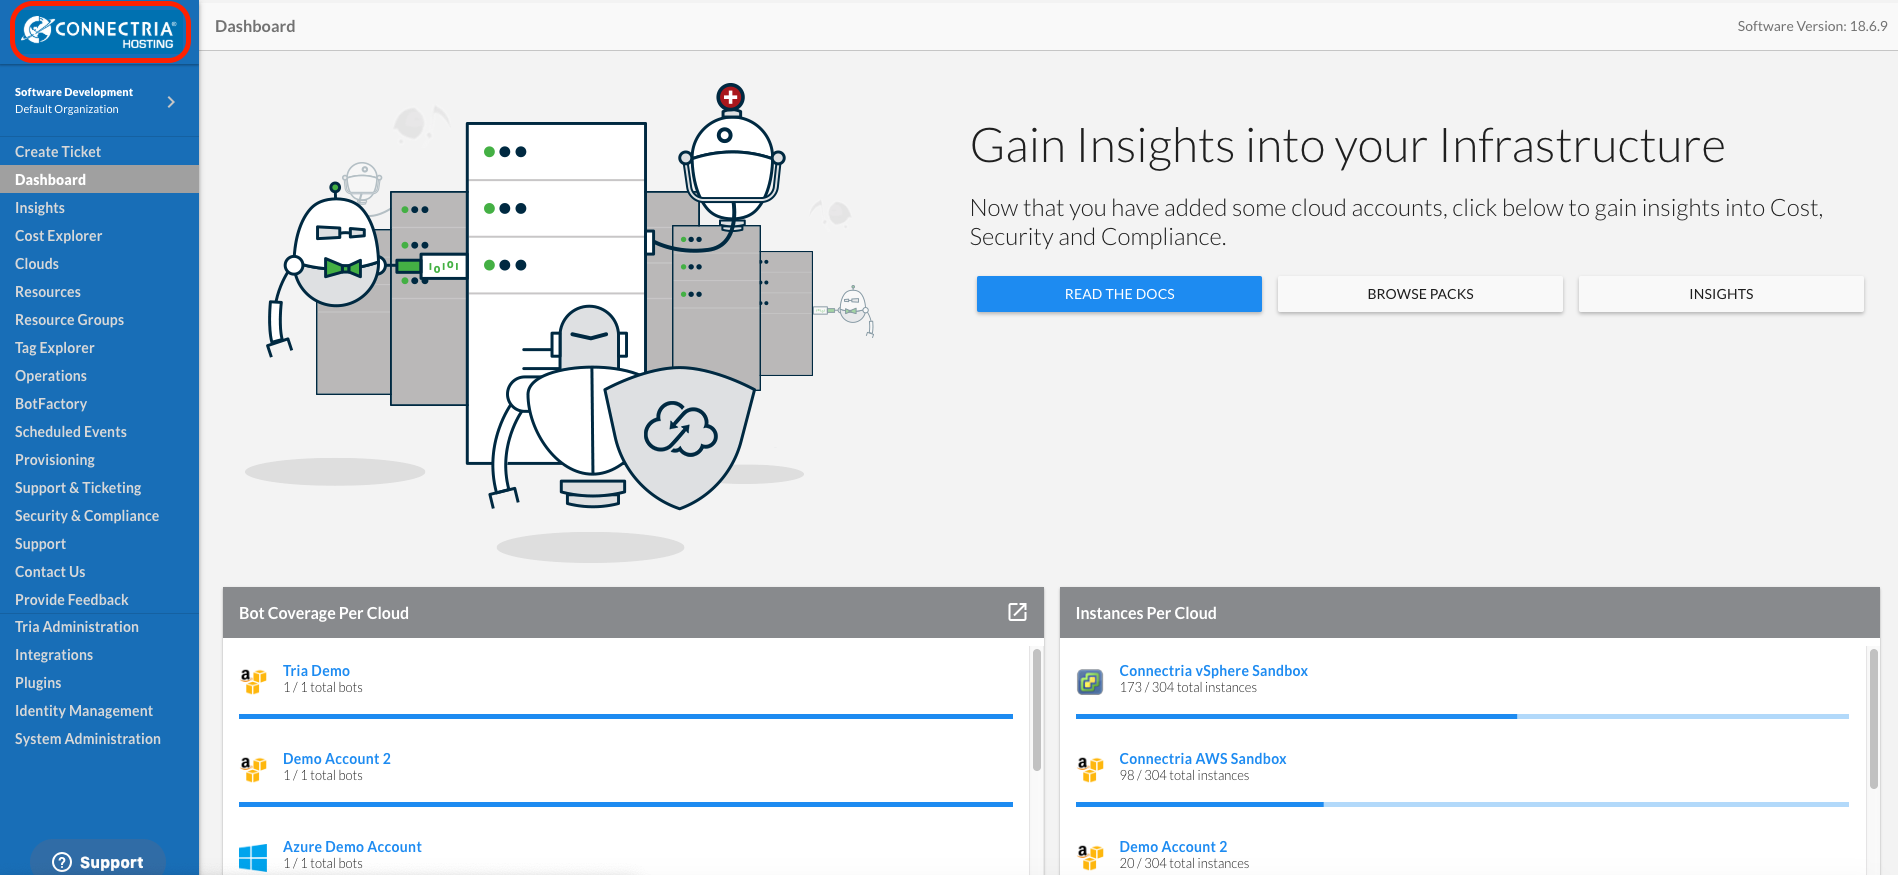
Go to your TRiA account.
6.) Add Cloud
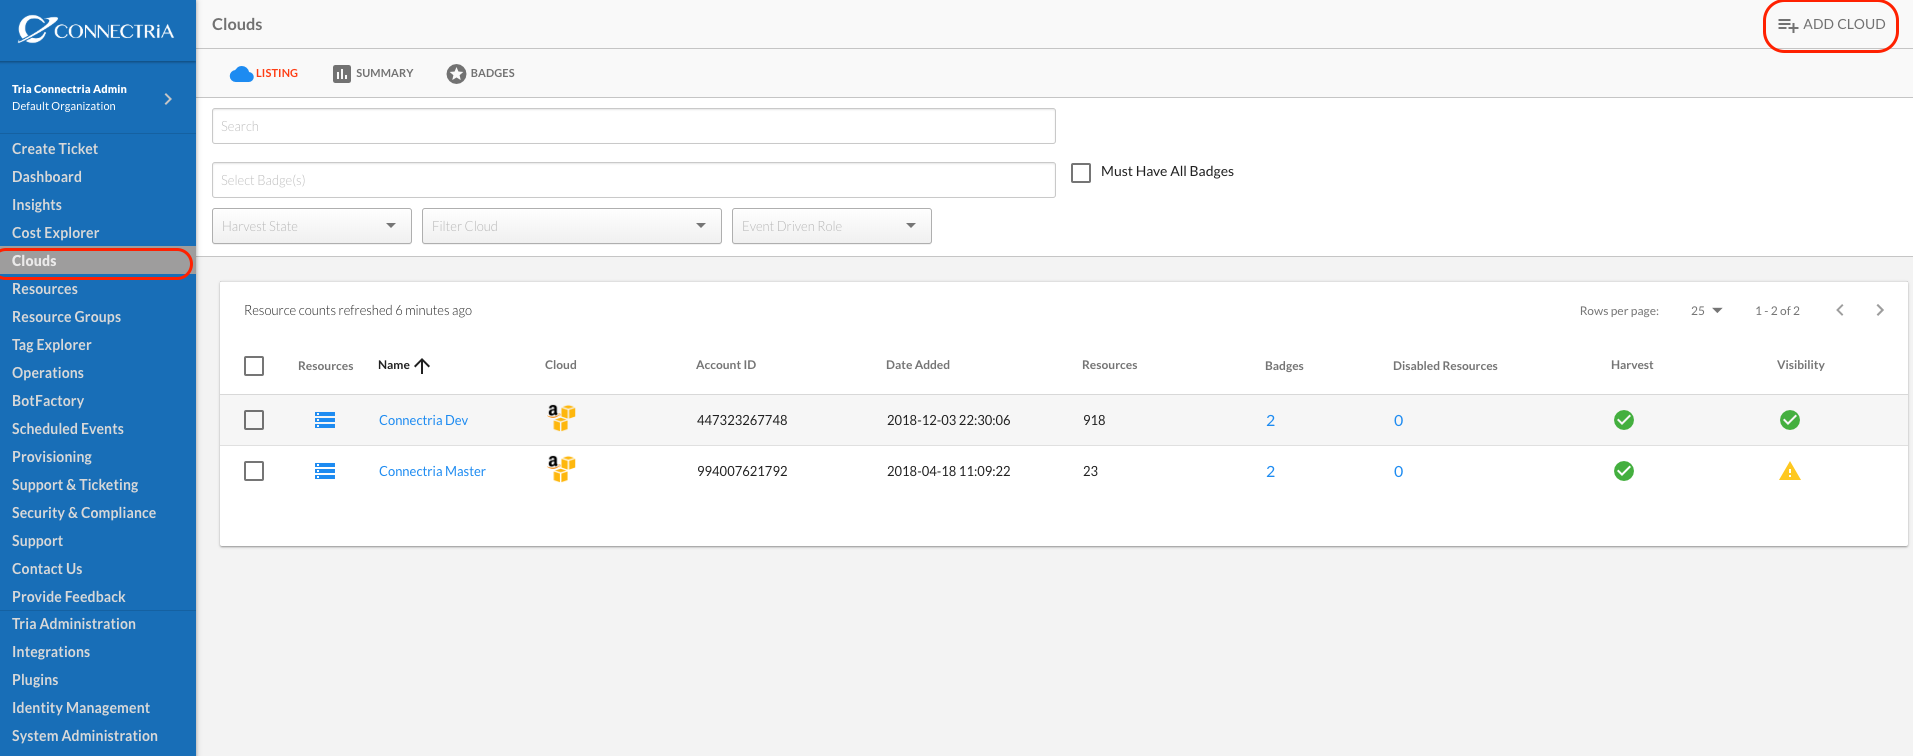
Navigate to Clouds on the left-hand side navigation menu. Click on Add Cloud in the upper right.
7.) Enter Cloud Information
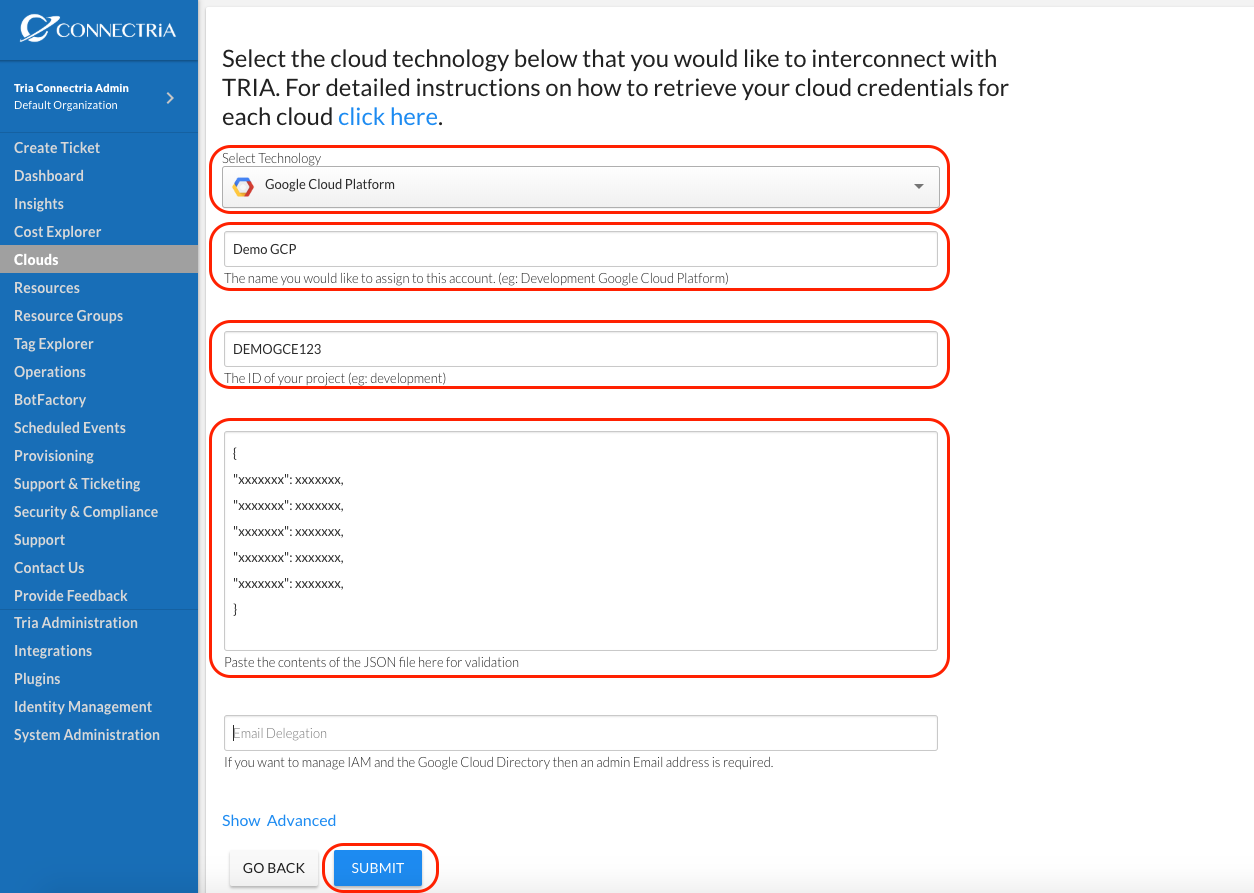
Select Google Compute Engine in the Select Technology dropbox.
Name your cloud account.
Provide your project ID from Step 1.
Enter in the contents of your JSON.
Click on Submit.
8.) Confirm
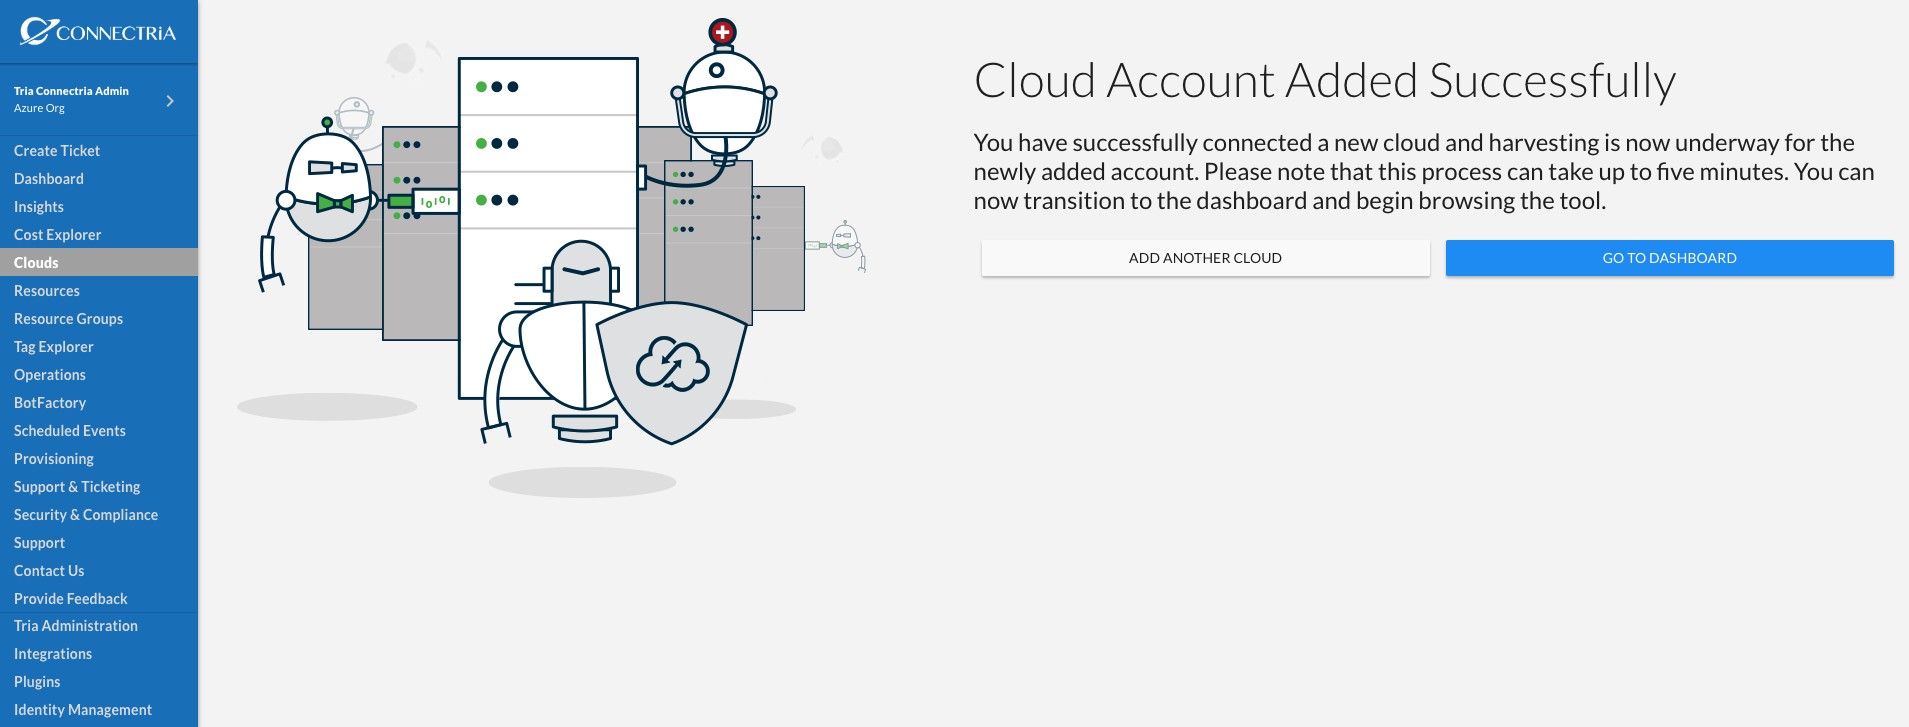
You should see a screen that indicates you have successfully added a cloud account. TRiA will begin harvesting immediately and the data should start to surface afer five minutes or so depending upon the size of your cloud account.
You can see your cloud account is added by selecting Clouds in the left-hand side navigation menu and confirming that your newly added cloud account is listed.