Resource Group Curation
You can assign bot actions to resource groups in one of two ways: to curate a resource group and to add resources to a resource group.
Curate Resource Group
TRiA ships with a bot action named Curate Resource Group, which, when added
to a bot’s instruction set, assumes responsibility for maintaining the state of
the resource group. This action can be used only as a one-to-one relationship
between a single bot and single group. The bot will autonomously move resources
in and out of the group as needed, based on the configured policy. (See example below.)
Add to Resource Group
On occasion, you may want to use multiple bots to add resources to a group. You can do this using the bot action Add To Resource Group. As the name implies, this action will only add resources to a group and will not automatically remove resources that no longer apply.
Curate Resource Group Example
In the following Curate Resource Group example, a resource group named Production
Resources is created. This group includes resources with the tag key “environment”
and a tag value of “production”. The scope of the bot will be set to look for
appropriately-tagged resources across Microsoft Azure, Amazon Web Services, and Google
Compute Engine.
AwsConfig,
AppServer,
ContainerRegistry,
ContainerImage,
Instance,
ResourceAccessList,
ResourceAccessListRule,
Volume,
Snapshot,
DatabaseSnapshot,
MemcacheSnapshot,
BigDataSnapshot,
EmailServiceDomain,
PublicIp,
PrivateNetwork,
PrivateSubnet,
NetworkFlowLog,
NetworkInterface,
NetworkPeer,
InternetGateway,
NatGateway,
RouteTable,
DnsZone,
SshKeyPair,
PrivateImage,
DatabaseInstance,
DatabaseCluster,
MemcacheInstance,
ElasticsearchInstance,
BigDataInstance,
InstanceReservation,
LoadBalancer,
BackendService,
ForwardingRule,
TargetProxy,
Hypervisor,
RestApi,
RestApiKey,
RestApiStage,
Secret,
ServerlessFunction,
ServiceAlarm,
ServiceApp,
ServiceAccessKey,
ServiceDataset,
ServiceDomain,
ServiceEncryptionKey,
ServiceEncryptionKeyVault,
ServiceLogGroup,
ServicePolicy,
ServiceRegion,
ServiceRole,
ServiceGroup,
ServiceUser,
ServiceCertificate,
SharedFileSystem,
StorageAccount,
StorageContainer,
StackTemplate,
ApiAccountingConfig,
AutoscalingGroup,
Datastore,
DistributedTable,
MessageQueue,
DistributedTableCluster,
Workspace,
MapReduceCluster,
DataStream,
DeliveryStream,
SearchCluster,
Spanner,
IdentityProvider,
Container,
ContainerInstance,
ContainerDeployment,
KubernetesIngress,
Pod,
PodSecurityPolicy,
KubernetesService,
ContainerCluster,
ContentDeliveryNetwork,
NotificationTopic,
NotificationSubscription,
MLInstance,
Database,
ContainerRegistry,
ContainerImage,
DirectConnect,
DDoSProtection,
WebApp,
ThreatFinding
Create a new resource group. Navigate to the Resource Groups section of the tool and create a new resources group called “Production Resources”.
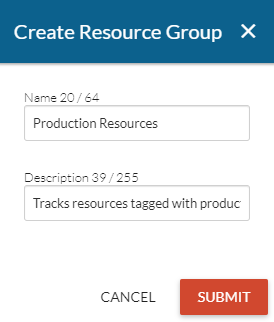
Creating a “Production Resources” Resources Group
Create a new bot. Click on the Create Bot button and enter the name, description, and category (in this example “Best Practices”).
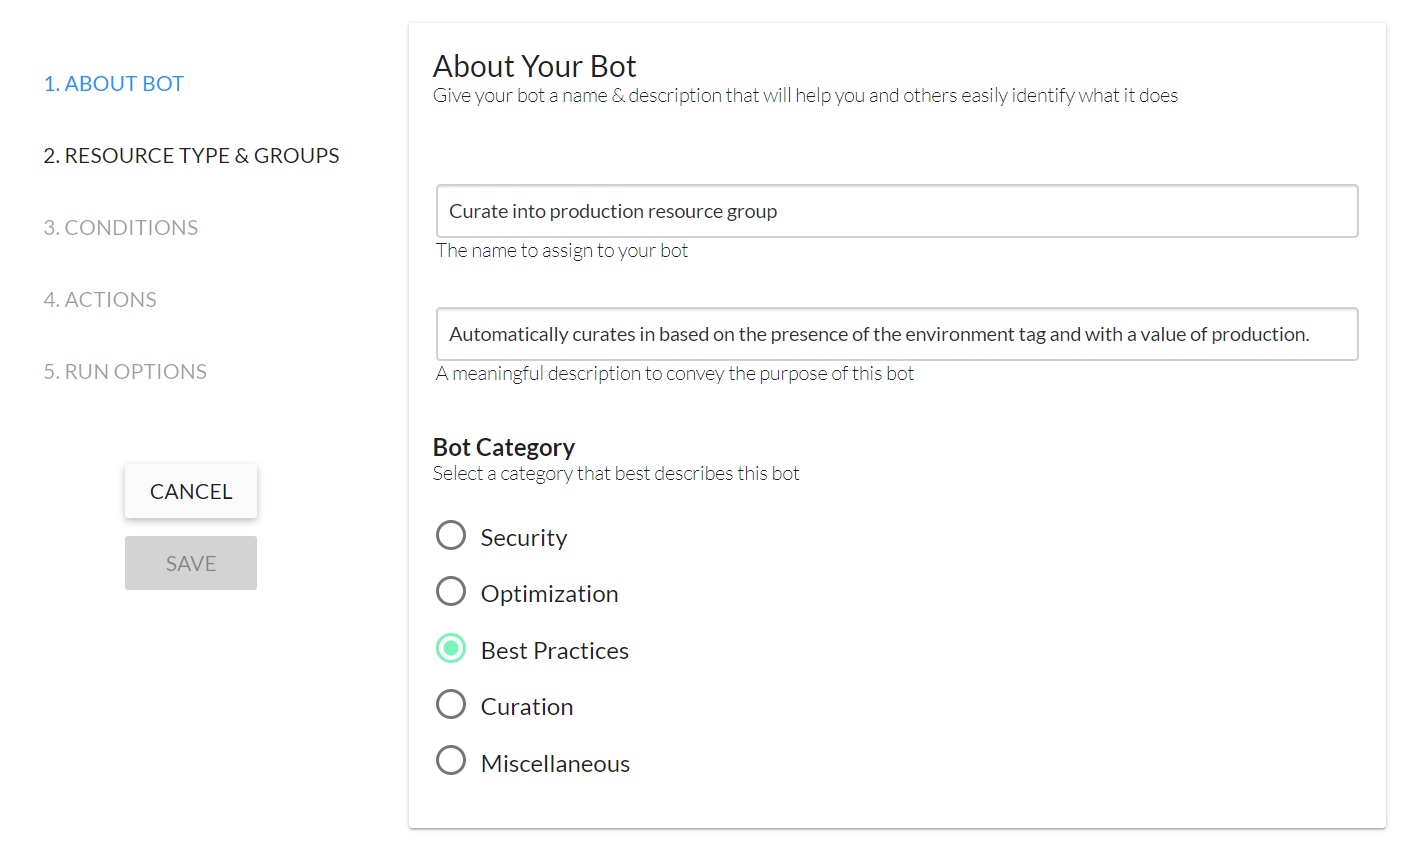
Creating a Bot—Initial Bot Setup
Configure the bot’s scope. The scope defines the resource type(s) and cloud account(s) to be inspected. For this example, scope includes billable resource types—such as instances, database instances (e.g., AWS RDS), volumes, and snapshots—across three cloud accounts. Note: If “Select All Clouds” had been selected, the bot would scan every configured cloud account.
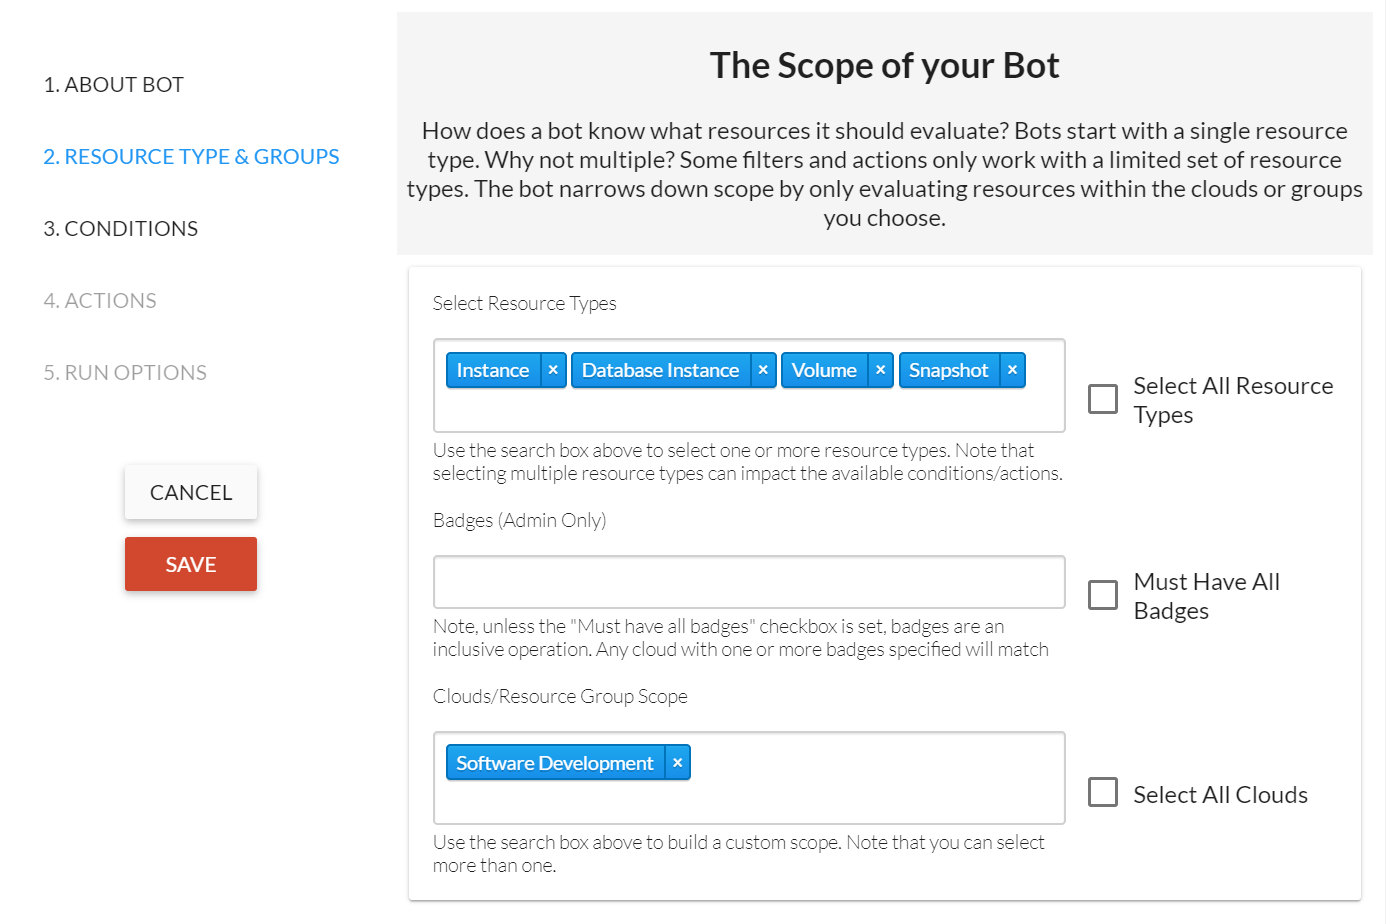
Scoping the Bot
Configure the bot’s conditions. For this example, the bot uses a single condition that inspects resource tags and looks for a single key Environment with a single value Production.
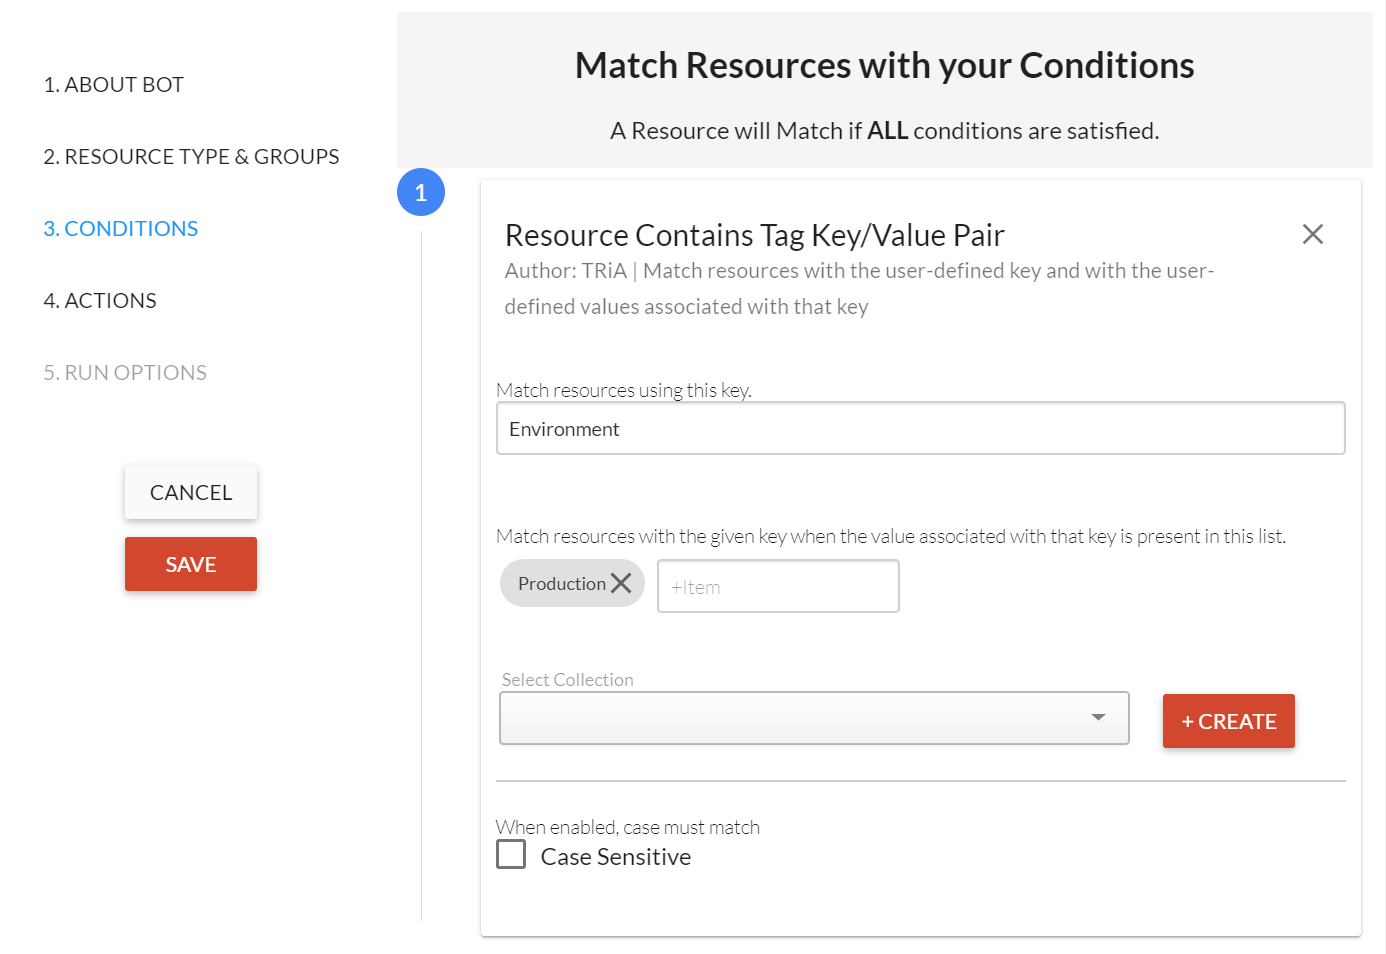
Configuring the Bot’s Conditions
Configure the bot’s actions. The action used for this example is Curate Resource. Select that action from the listing and then use the drop-down to select the desired group
Production Resources.
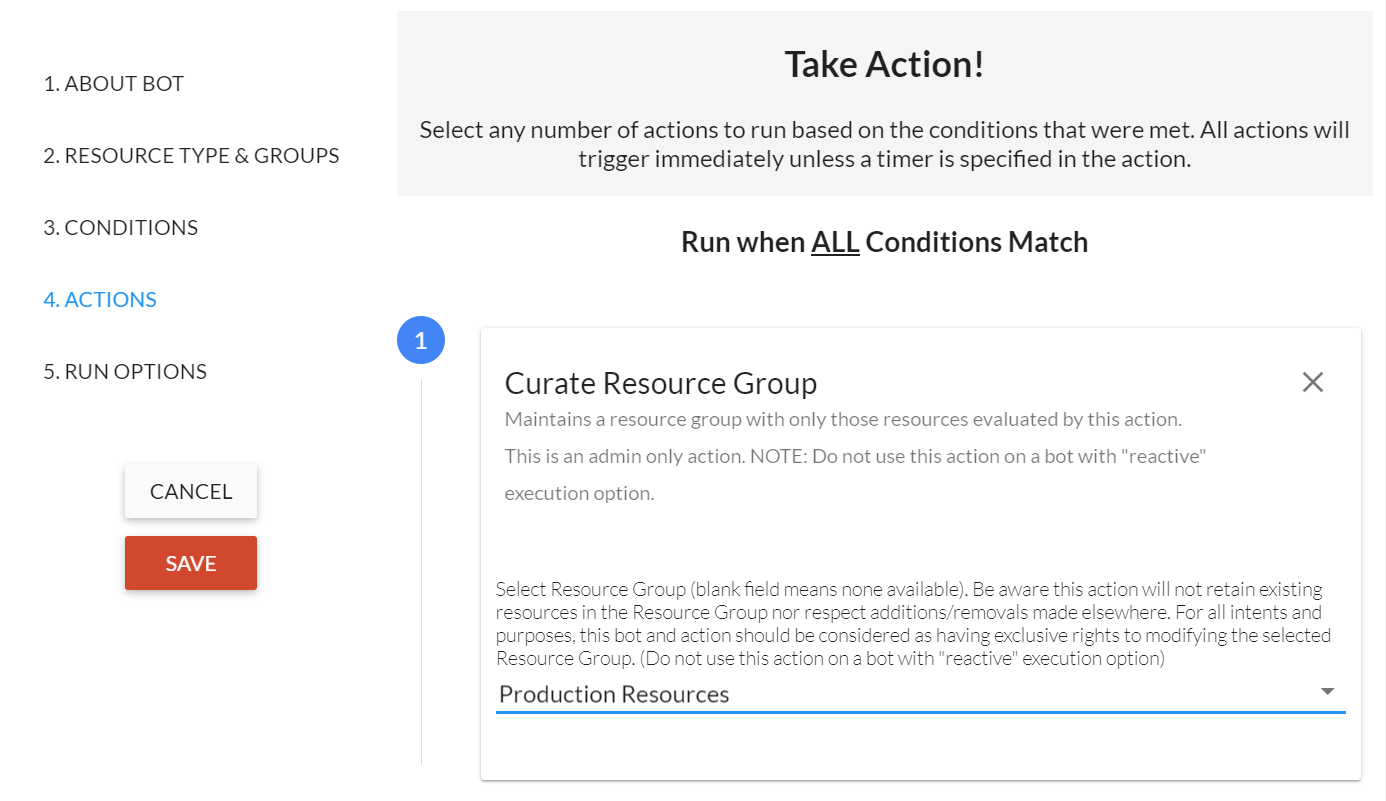
Configuring the Bot’s Actions
Choose when the bot will run. For this type of bot, we recommend using resource created and resource modified. The bot will now act any time a new resource is spun up in the cloud, or when its tags are modified. If you select an on-demand scan (enable batch execution), this bot will execute immediately and will look at all selected resources, including those previously discovered.
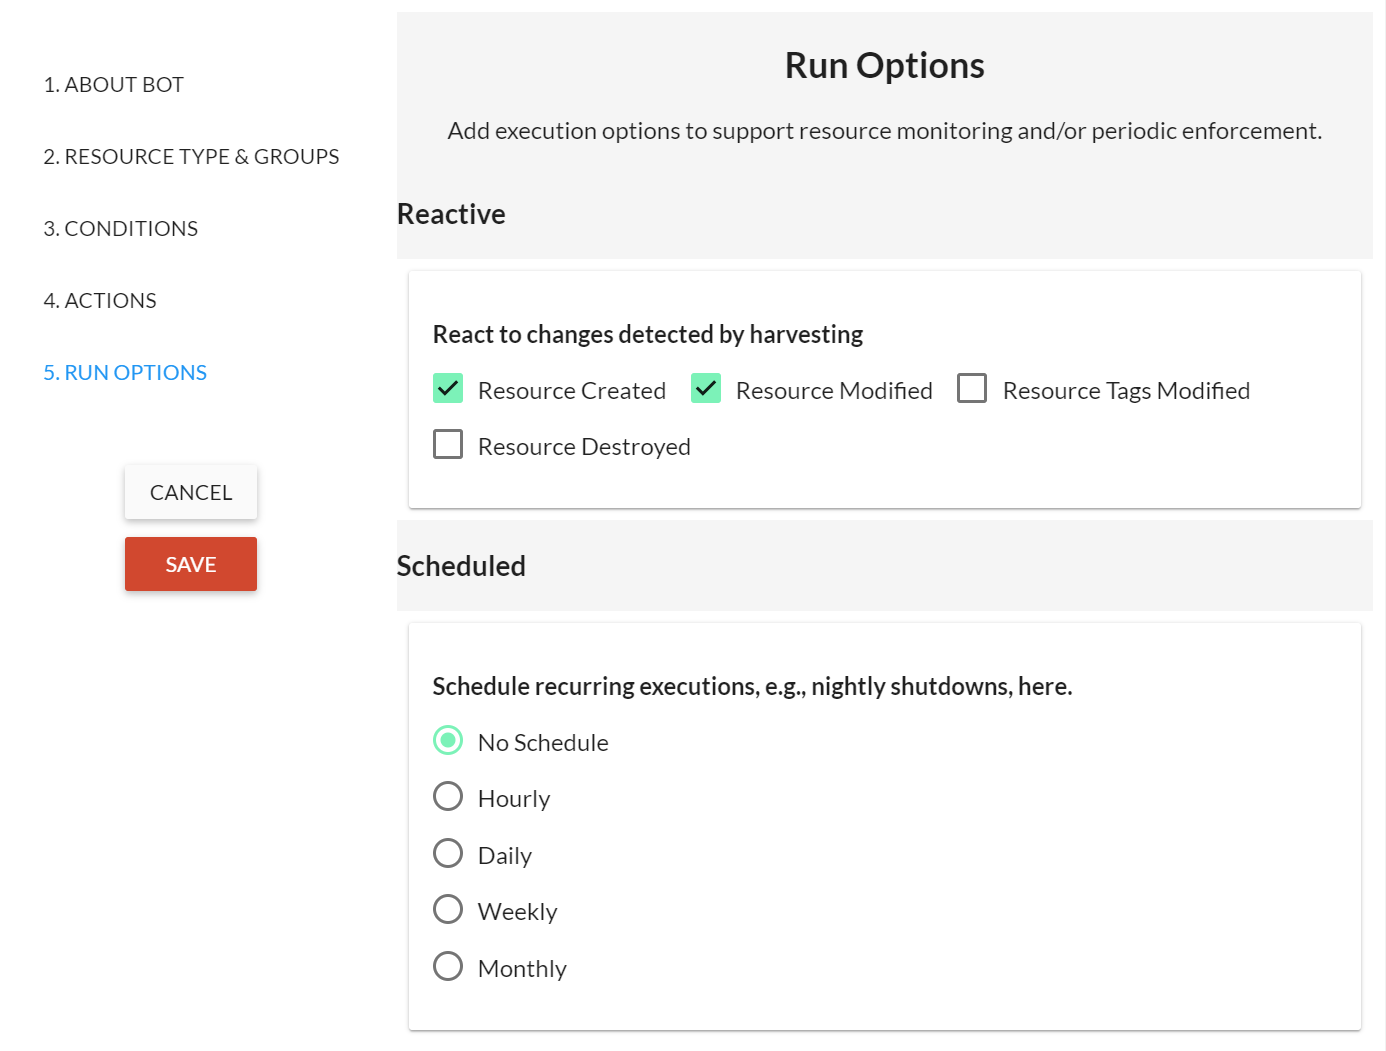
Choosing When the Bot Will Run
Save the bot. Once done, you can perform a retroactive scan and, if you have resources that meet the configured conditions, they should show up in the Production Resources group.